HDMI
Display
ENGLISH
Standard 1
![]() Picture Adjust
Picture Adjust
![]() Fine Menu 1
Fine Menu 1
![]() Fine Menu 2
Fine Menu 2
Input Signal |
RGB/HD Adjust |
HDMI |
![]() Display
Display
OSD/Blanking |
Config. |
CSC HDMI 1 | Auto |
CSC HDMI 2 | Auto |
Deep Color HDMI 1 | Auto |
Deep Color HDMI 2 | Auto |
Standard 1
![]() Picture Adjust
Picture Adjust
![]() Fine Menu 1
Fine Menu 1
![]() Fine Menu 2
Fine Menu 2
![]()
![]()
![]() Input Signal
Input Signal
![]() RGB/HD Adjust
RGB/HD Adjust
 HDMI
HDMI
Display |
OSD/Blanking |
Config. |
Keystone | 0 |
Scale | 0 |
Width | 0 |
Position H | 0 |
Position V | 0 |
Color Wheel | x5 |
Installation | Front |
Item |
|
| Adjustments | |||
Keystone |
|
| 0 | 25 | ||
(Electronic vertical |
|
| ||||
( | ) | ( | ) | ( ) | ||
keystone correction) | ||||||
|
|
|
|
| ||
|
|
|
|
|
| |
Scale |
|
|
| 0 | ||
| (Min) |
|
| (Max) | ||
Width |
|
|
| 0 | ||
| (Min) |
|
| (Max) | ||
|
|
|
|
|
| |
Position H |
|
| 0 | 50 | ||
| (Left) | (Default) | (Right) | |||
Position V |
|
| 0 | 50 | ||
Item | Adjustments |
CSC HDMI 1, | Auto, RGB, YPBPR 4:4:4, YPBPR 4:2:2, |
CSC HDMI 2 | YCBCR 4:4:4, YCBCR 4:2:2 |
| Select the color space conversion for |
| HDMI input. |
Deep Color HDMI 1, | Auto, 8Bit, 10Bit, 12Bit |
Deep Color HDMI 2 | Select the color depth for HDMI input. |
|
|
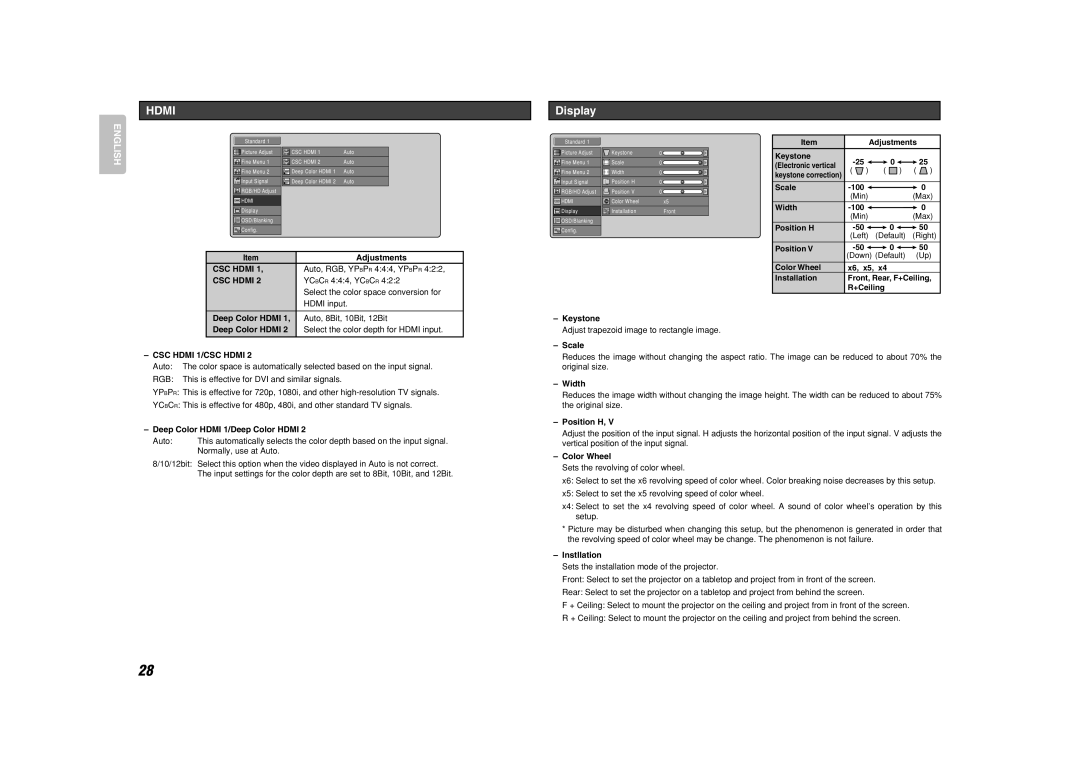
–CSC HDMI 1/CSC HDMI 2
Auto: The color space is automatically selected based on the input signal.
RGB: This is effective for DVI and similar signals.
YPBPR: This is effective for 720p, 1080i, and other
YCBCR: This is effective for 480p, 480i, and other standard TV signals.
–Deep Color HDMI 1/Deep Color HDMI 2
Auto: | This automatically selects the color depth based on the input signal. |
| Normally, use at Auto. |
8/10/12bit: Select this option when the video displayed in Auto is not correct. The input settings for the color depth are set to 8Bit, 10Bit, and 12Bit.
28
| (Down) (Default) (Up) |
Color Wheel | x6, x5, x4 |
Installation | Front, Rear, F+Ceiling, |
| R+Ceiling |
–Keystone
Adjust trapezoid image to rectangle image.
–Scale
Reduces the image without changing the aspect ratio. The image can be reduced to about 70% the original size.
–Width
Reduces the image width without changing the image height. The width can be reduced to about 75% the original size.
–Position H, V
Adjust the position of the input signal. H adjusts the horizontal position of the input signal. V adjusts the vertical position of the input signal.
–Color Wheel
Sets the revolving of color wheel.
x6: Select to set the x6 revolving speed of color wheel. Color breaking noise decreases by this setup.
x5: Select to set the x5 revolving speed of color wheel.
x4: Select to set the x4 revolving speed of color wheel. A sound of color wheel’s operation by this setup.
*Picture may be disturbed when changing this setup, but the phenomenon is generated in order that the revolving speed of color wheel may be change. The phenomenon is not failure.
–Instllation
Sets the installation mode of the projector.
Front: Select to set the projector on a tabletop and project from in front of the screen.
Rear: Select to set the projector on a tabletop and project from behind the screen.
F + Ceiling: Select to mount the projector on the ceiling and project from in front of the screen.
R + Ceiling: Select to mount the projector on the ceiling and project from behind the screen.
