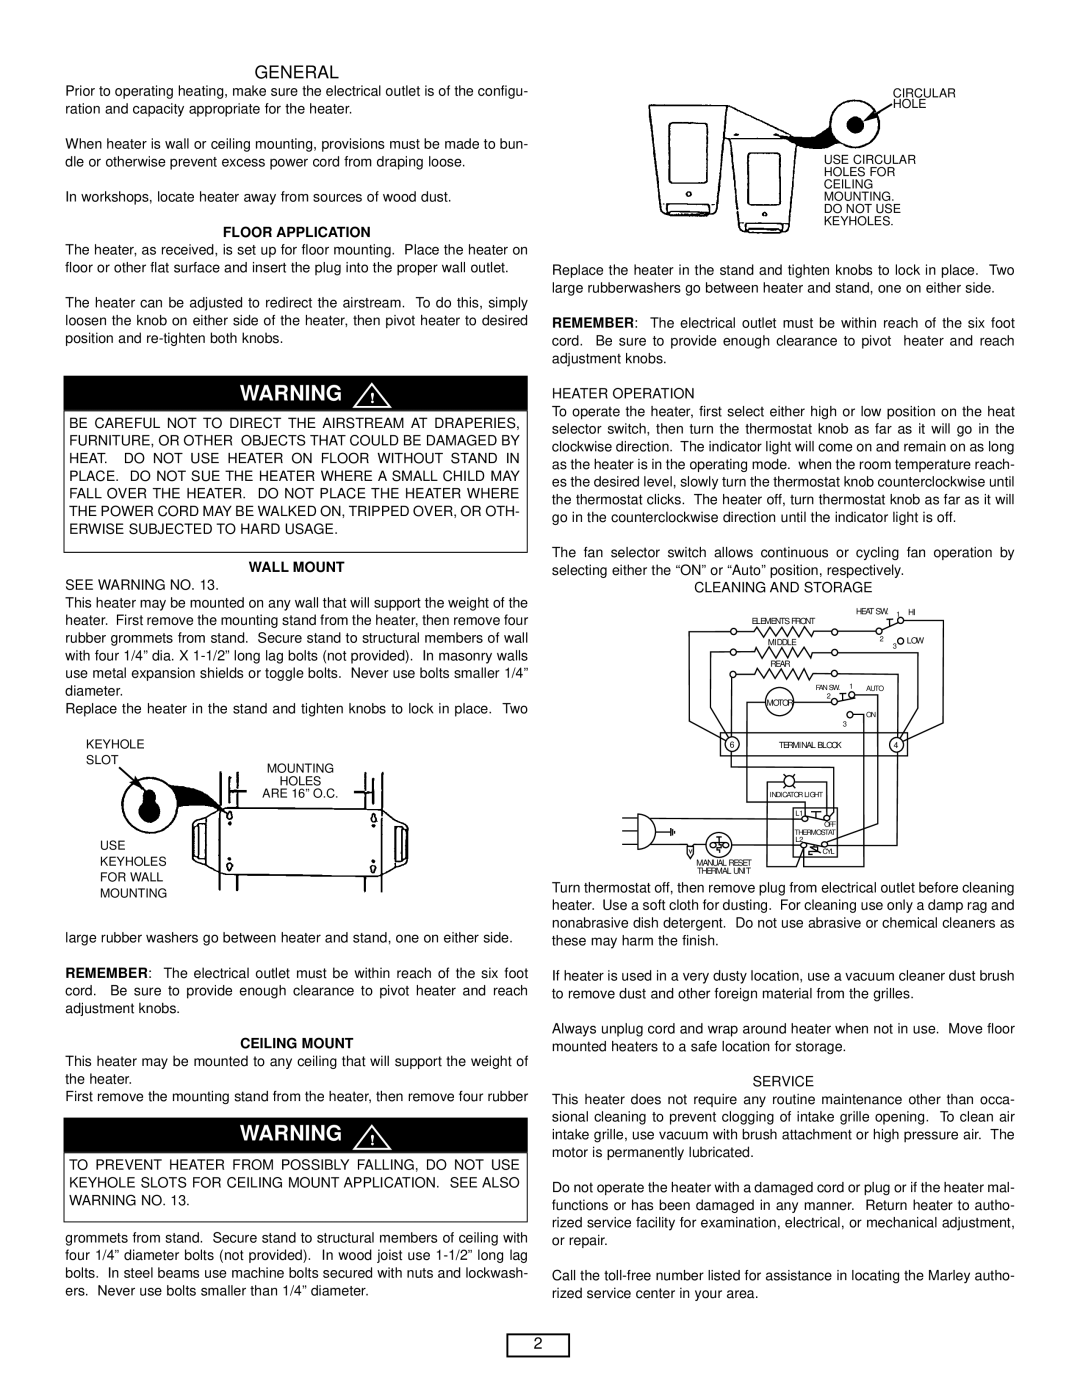
Marley Engineered Products PH4AB manual Ge Ne Ra L, N In G

Models: PH4AB

1 12
Download 12 pages 46.23 Kb
Page 2
Image 2
GE NE RA L

GE NE RA L

Priortooperatingheating,make suretheelectricaloutletisoftheconfigu- rationand capacityappropriafortheheatere.

When heateriswallorceilingmounting,provisionmustbe made tobun- dleorotherwisepreventexcesspowercordfromdrapingloose.

In workshops,locateheateraway fromsourcesofwood dust.

FLOOR APPLICATION

The heater,asreceived,issetupforfloormounting.Placetheheateron floororotherflatsurfaceand inserttheplugintotheproperwalloutlet.


C IR C U L AR


HO L E


US

E

CI

R C

UL A R

HO LE

S

F OR


CE

IL IN G


MO UNT IN G.


DO

N OT US E


KE

Y HO LE

S.


Replacetheheaterinthestandand tighteknobs tolock inplace.Two largerubberwashersgo betweenheaterand stand,one on eitherside.

The heatercan be adjustedtoredirecttheairstreamTo. do this,simply


loosentheknob on eithersideoftheheater,thenpivotheatertodesired

REMEMBER

: The electricaloutletmustbe withinreachof thesixfoot

positionand re-tightenbothknobs.

cord. Be

suretoprovideenough clearancetopivotheaterand reach


adjustmentknobs.


WAR

N IN

G

!


BE

CAREFUL

NOT TO

DIRECT


THE

AIRSTREAM


AT

DRAPERIES,


FURNITURE,

OR

OTHER

OBJECTS

THAT COULD

BE DAMAGED

BY


HEAT.


DO

NOT

USE

HEATER


ON

FLOOR

WITHOUT

STAND

IN


PLACE.

DO

NOT

SUE

THE

HEATER

WHERE

A

SMALL

CHILD

MAY


FALL


OVER

THE

HEATER.


DO

NOT

PLACE

THE

HEATER

WHERE


THE


POWER

CORD

MAY

BE

WALKED


ON, TRIPPED

OVER, OR

OTH -


ERWISE

SUBJECTED

TO HARD


USAGE.


WALL

MOUNT


SEE

WARNING

NO. 13.


Thisheatermay be mountedon any wallthatwillsupporttheweightofthe heaterFirstremovethemountingstandfromtheheater,thenremovefour. rubbergrommetsfromstand.Secure standtostructuralmembers ofwall withfour1/4” dia.X 1-1/2” longlagbolts(notprovided)In. masonry walls usemetalexpansionshieldsortoggleboltsNeverusebolt.smaller1/4” diameter.

Replacetheheaterinthestandand tighteknobs tolock inplace.Two

HEATER OPERATION

To operatetheheater,firselecteitherhighorlowpositionont theheat selectorswitch,thenturnthethermostatknob as faras itwillgo inthe clockwisedirectionThe. indicatorlightwillcome on and remainon aslong astheheaterisintheoperatingmode. when theroom temperaturereach- esthedesiredlevel,slowlyturnthethermostatknob counterclockwiseuntil thethermostatclicks.The heateroff,turnthermostatknob asfarasitwill go inthecounterclockwisedirectiountiltheindicatorlightisoff.

The fan selectorswitchallowscontinuousor cyclingfan operationby selectingeitherthe“ON”or“Auto”position,respectively.

CLEANING

AND

STORAGE


ELEMENTS FRONT

HEAT SW. 1

HI


MIDDLE


2

LOW


3


REAR


FAN SW. 1

AUTO


MOTOR

2


N IN ON 3

KEY HO LE

SLOT


MOU NT IN G


HOL

ES


AR E 16

” O.C .


6

TERMINAL BLOCK

4

INDICATOR LIGHT


L1


OFF


THERMOSTAT

U S E


L2


CYL

K EY

H OLES


MANUAL RESET

FO R

WA

LL


THERMAL UNIT

Turnthermostatoff,thenremoveplugfromelectricaloutletbeforecleaning

M OUN TI NG

heaterUse. a softclothfordustingFor. cleaninguseonlya dampragand


largerubberwashersgo betweenheaterand stand,one on eitherside.

nonabrasivedishdetergentDo. notuseabrasiveorchemicalcleanersas

thesemay

harm thefinish.

REMEMBER

: The

electricaloutletmustbe withinreachof thesixfoot

Ifheaterisusedina verydustylocation,usea vacuum cleanerdustbrush

cord. Be suretoprovideenough clearancetopivotheaterand reach

toremovedustand otherforeignmaterialfromthegrilles.

adjustmentknobs.


CEILING

MOUNT


Always unplugcordand wraparoundheaterwhen notinuse. Move floor


mountedheaterstoa safelocationforstorage.

Thisheatermay be mountedtoany ceilingthatwillsupporttheweightof


theheater.


SERVICE

Firstremovethemountingstandfromtheheater,thenremovefourrubber

Thisheaterdoes notrequireany routinemaintenanceotherthanocca-


sionalcleaningtopreventcloggingofintakegrilleopening.To cleanair


WAR

N IN G


!


intakegrille,usevacuum withbrushattachmentorhighpressureair.The


motorispermanentlubricatedy.


TO PREVENT

HEATER


FROM

POSSIBLY


FALLING,

DO NOT

USE


KEYHOLE

SLOTS

FOR

CEILING

MOUNT

APPLICATION.

SEE

ALSO


Do notoperatetheheaterwitha damaged cordorplugoriftheheatermal-


WARNING

NO. 13.


functionsorhas been damaged inany manner. Returnheatertoautho-


rizedservicefacilityforexamination,electrical,ormechanicaladjustment,


grommetsfromstand.Secure standtostructuralmembers ofceilingwith

orrepair.

four1/4” diameterbolts(notprovided)In. wood joistuse1-1/2” longlag


boltsIn. steelbeams usemachine boltsecuredwithnutsand lockwash-

Callthetoll-freenumberlistedforassistanceinlocatingtheMarleyautho-

ers.Neveruseboltsmallerthan1/4” diameter.


rizedservicecenterinyourarea.

2

Page 2
Image 2
Marley Engineered Products PH4AB manual Ge Ne Ra L, N In G