ASSEMBLY
•BEFORE ASSEMBLY READ ALL INSTRUCTIONS CAREFULLY.
•ASSEMBLE UNIT ON A CLEAN, FLAT SURFACE.
•TOOL NEEDED: PHILLIPS HEAD SCREWDRIVER
•UNPACK ALL PARTS AND LAY OUT IN FRONT OF YOU. CHECK TO MAKE SURE ALL PARTS ARE IDENTIFIED AND ACCOUNTED FOR.
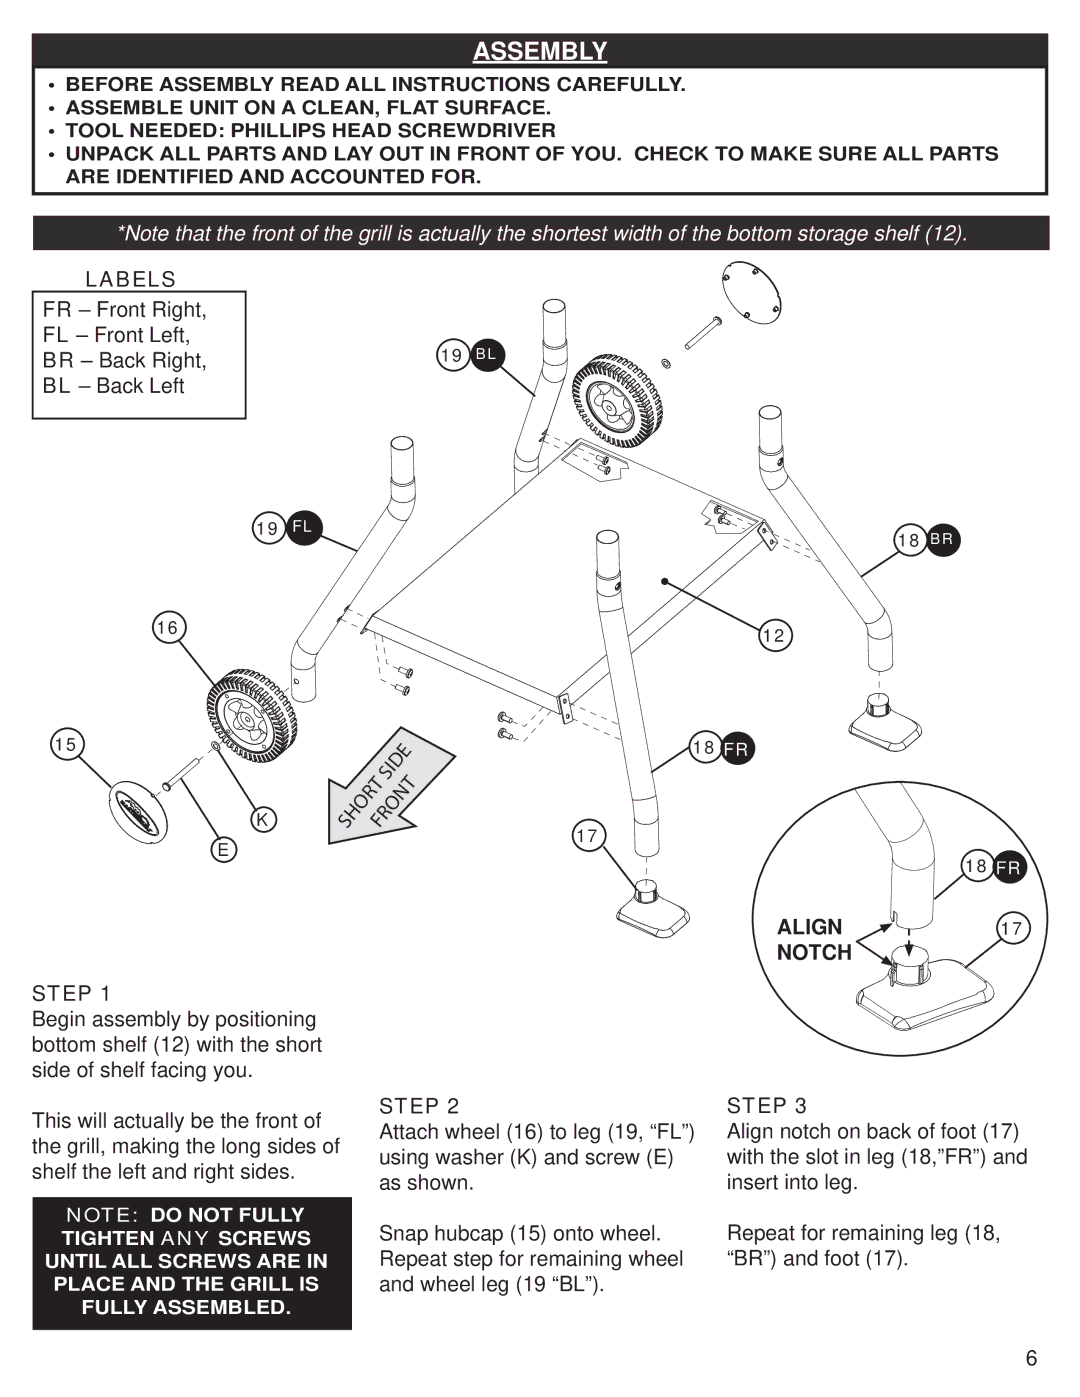
*Note that the front of the grill is actually the shortest width of the bottom storage shelf (12).
LABELS
FR – Front Right,
FL – Front Left,
BR – Back Right,
BL – Back Left
16
19 BL
19 FL
18 BR
12
15 |
| SIDE |
|
| |
| K | SHORTFRONT |
|
|
E
18 FR
17
18 FR
STEP 1
Begin assembly by positioning bottom shelf (12) with the short side of shelf facing you.
ALIGN | 17 |
NOTCH |
|
This will actually be the front of the grill, making the long sides of shelf the left and right sides.
NOTE: DO NOT FULLY TIGHTEN ANY SCREWS UNTIL ALL SCREWS ARE IN PLACE AND THE GRILL IS FULLY ASSEMBLED.
STEP 2
Attach wheel (16) to leg (19, “FL”) using washer (K) and screw (E) as shown.
Snap hubcap (15) onto wheel. Repeat step for remaining wheel and wheel leg (19 “BL”).
STEP 3
Align notch on back of foot (17) with the slot in leg (18,”FR”) and insert into leg.
Repeat for remaining leg (18, “BR”) and foot (17).
6
