ASSEMBLY
•BEFORE ASSEMBLY READ ALL INSTRUCTIONS CAREFULLY.
•ASSEMBLE UNIT ON A CLEAN, FLAT SURFACE.
•TOOLS NEEDED: ADJUSTABLE WRENCH, PHILLIPS HEAD SCREWDRIVER
PRE-SEASON INSTRUCTIONS
Curing your smoker will rid the unit of chemicals and oils left over by the manufacturing process allowing them to burn off. Preseason smoker prior to first use.
4a
A
4b
1
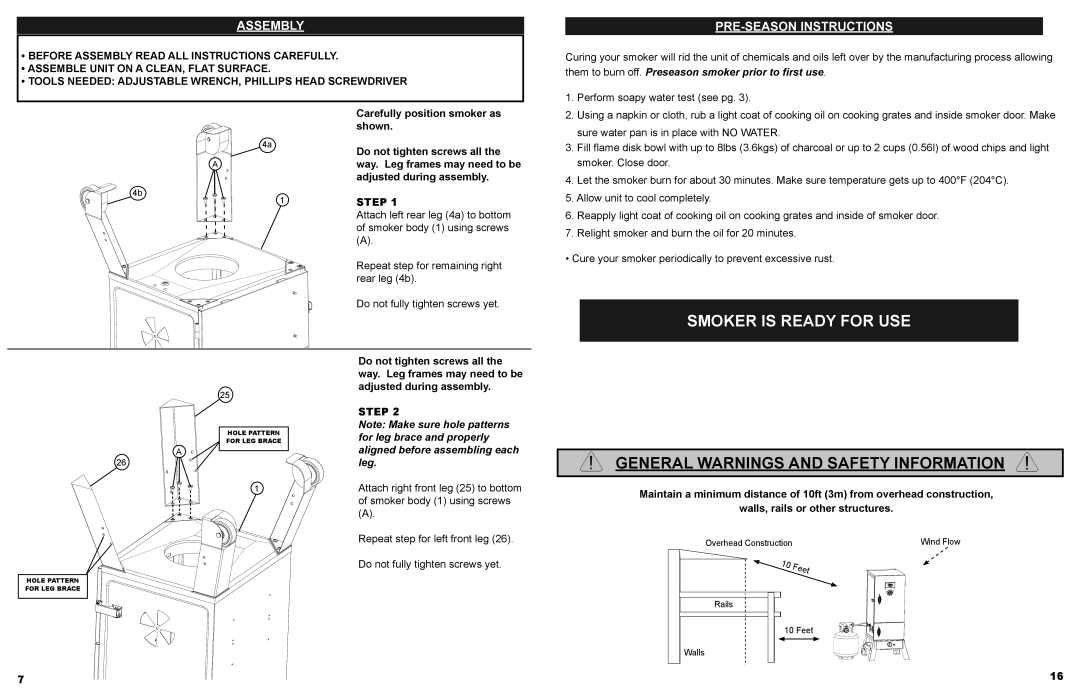
Carefully position smoker as shown.
Do not tighten screws all the way. Leg frames may need to be adjusted during assembly.
STEP 1
Attach left rear leg (4a) to bottom of smoker body (1) using screws
(A).
Repeat step for remaining right rear leg (4b).
Do not fully tighten screws yet.
1.Perform soapy water test (see pg. 3).
2.Using a napkin or cloth, rub a light coat of cooking oil on cooking grates and inside smoker door. Make sure water pan is in place with NO WATER.
3.Fill flame disk bowl with up to 8lbs (3.6kgs) of charcoal or up to 2 cups (0.56l) of wood chips and light smoker. Close door.
4.Let the smoker burn for about 30 minutes. Make sure temperature gets up to 400°F (204°C).
5.Allow unit to cool completely.
6.Reapply light coat of cooking oil on cooking grates and inside of smoker door.
7.Relight smoker and burn the oil for 20 minutes.
• Cure your smoker periodically to prevent excessive rust.
SMOKER IS READY FOR USE
A
26
25
HOLE PATTERN FOR LEG BRACE
1
Do not tighten screws all the way. Leg frames may need to be adjusted during assembly.
STEP 2
Note: Make sure hole patterns for leg brace and properly aligned before assembling each leg.
Attach right front leg (25) to bottom of smoker body (1) using screws
(A).
Repeat step for left front leg (26).
Do not fully tighten screws yet.
GENERAL WARNINGS AND SAFETY INFORMATION
Maintain a minimum distance of 10ft (3m) from overhead construction,
walls, rails or other structures.
Overhead Construction | Wind Flow |
HOLE PATTERN
FOR LEG BRACE
Rails
10 Feet
Walls
7 | 16 |