ASSEMBLY
STEP 17
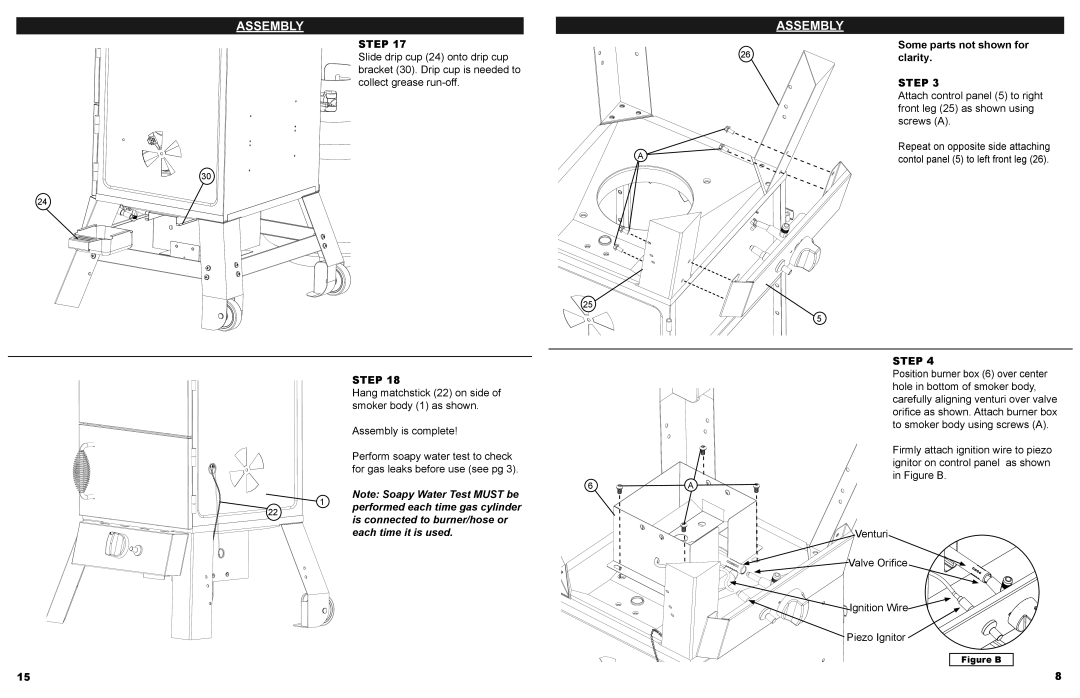
Slide drip cup (24) onto drip cup
![]()


![]()
![]()
![]()
![]() bracket (30). Drip cup is needed to
bracket (30). Drip cup is needed to
![]()
![]()
![]()
![]()
![]()
![]()
![]()
![]() collect grease
collect grease
30
24
ASSEMBLY
26
A
25
5
Some parts not shown for clarity.
STEP 3
Attach control panel (5) to right front leg (25) as shown using screws (A).
Repeat on opposite side attaching
contol panel (5) to left front leg (26).
|
| STEP 18 | |
|
| Hang matchstick (22) on side of | |
|
| smoker body (1) as shown. | |
|
| Assembly is complete! | |
|
| Perform soapy water test to check | |
|
| for gas leaks before use (see pg 3). | |
| 1 | Note: Soapy Water Test MUST be | |
22 | performed each time gas cylinder | ||
| |||
| is connected to burner/hose or | ||
|
| ||
|
| each time it is used. |
STEP 4
Position burner box (6) over center hole in bottom of smoker body, carefully aligning venturi over valve orifice as shown. Attach burner box to smoker body using screws (A).
Firmly attach ignition wire to piezo ignitor on control panel as shown in Figure B.
6A
![]()
![]()
![]()
![]()
![]() Venturi
Venturi
Valve Orifice
![]()
![]()
![]() Ignition Wire
Ignition Wire
Piezo Ignitor
Figure B
15 | 8 |