Service and Maintenance (cont’d)
Element Cleaning/
Replacement (cont’d)
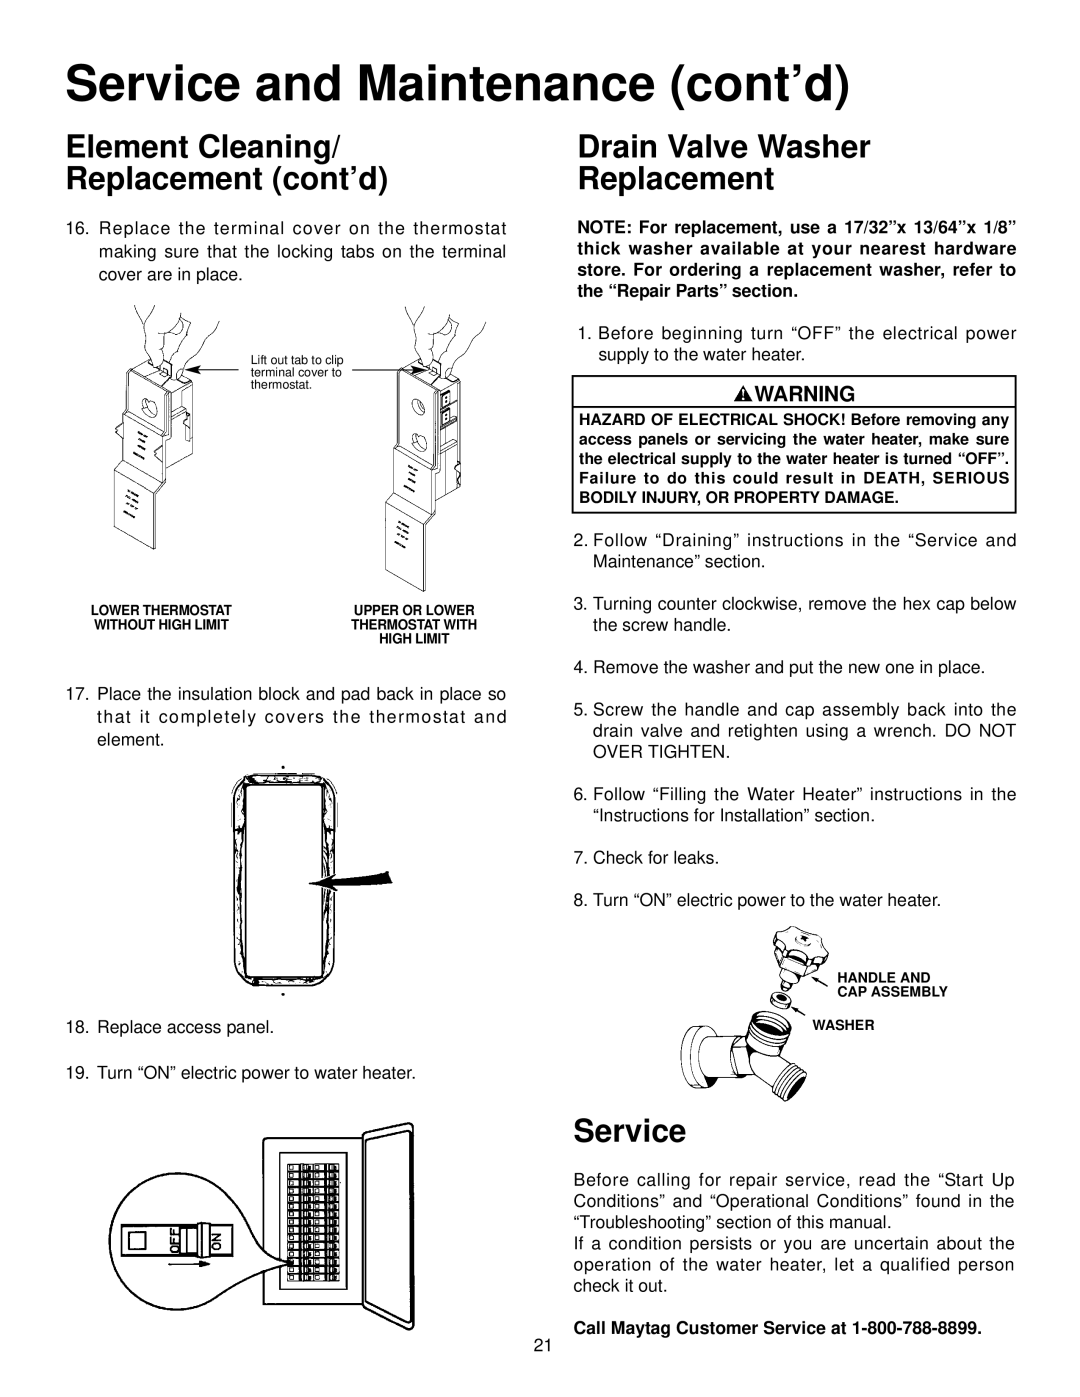
16.Replace the terminal cover on the thermostat making sure that the locking tabs on the terminal cover are in place.
Lift out tab to clip terminal cover to thermostat.
LOWER THERMOSTAT | UPPER OR LOWER |
WITHOUT HIGH LIMIT | THERMOSTAT WITH |
| HIGH LIMIT |
17.Place the insulation block and pad back in place so that it completely covers the thermostat and element.
18.Replace access panel.
19.Turn “ON” electric power to water heater.
Drain Valve Washer
Replacement
NOTE: For replacement, use a 17/32”x 13/64”x 1/8” thick washer available at your nearest hardware store. For ordering a replacement washer, refer to the “Repair Parts” section.
1.Before beginning turn “OFF” the electrical power supply to the water heater.
![]() WARNING
WARNING
HAZARD OF ELECTRICAL SHOCK! Before removing any access panels or servicing the water heater, make sure the electrical supply to the water heater is turned “OFF”. Failure to do this could result in DEATH, SERIOUS BODILY INJURY, OR PROPERTY DAMAGE.
2.Follow “Draining” instructions in the “Service and Maintenance” section.
3.Turning counter clockwise, remove the hex cap below the screw handle.
4.Remove the washer and put the new one in place.
5.Screw the handle and cap assembly back into the drain valve and retighten using a wrench. DO NOT OVER TIGHTEN.
6.Follow “Filling the Water Heater” instructions in the “Instructions for Installation” section.
7.Check for leaks.
8.Turn “ON” electric power to the water heater.
HANDLE AND
CAP ASSEMBLY
WASHER
Service
Before calling for repair service, read the “Start Up Conditions” and “Operational Conditions” found in the “Troubleshooting” section of this manual.
If a condition persists or you are uncertain about the operation of the water heater, let a qualified person check it out.
Call Maytag Customer Service at
21