NOTE: If microwave oven does not need to be adjusted, skip steps 7-9.

7.If adjustment is required, rotate microwave oven downward. Using 2 or more people, lift microwave oven off of mounting plate, and set aside on a covered surface.

8.Loosen mounting plate screws. Adjust mounting plate and retighten screws.

9.Repeat steps 3-6.

10.With the microwave oven centered, and with at least one person holding it in place, insert bolts through upper cabinet into microwave oven. Tighten bolts until there is no gap between upper cabinet and microwave oven.

NOTES:

Some upper cabinets may require bolts longer or shorter than 3" (7.6 cm). Longer or shorter bolts are available at most hardware stores.

Overtightening bolts may warp the top of the microwave oven. To avoid warping, wood filler blocks (installer to provide) may be added. The blocks must be the same thickness as the space between the upper cabinet bottom and the microwave oven.

A

A. Bolts

For Roof Venting Installation Only

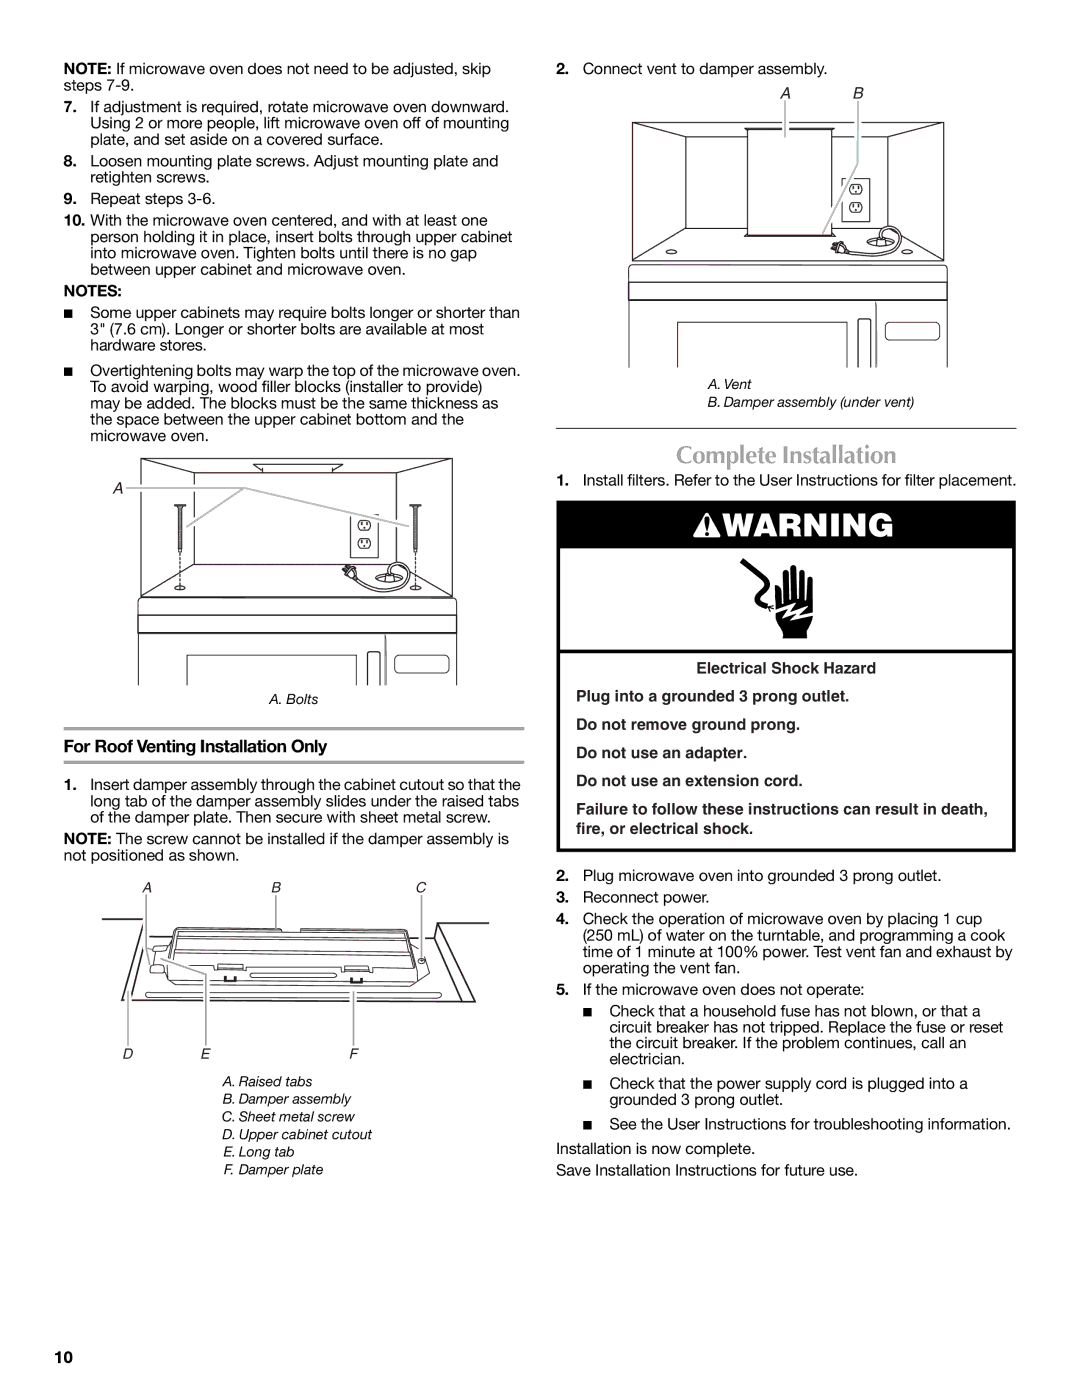
1.Insert damper assembly through the cabinet cutout so that the long tab of the damper assembly slides under the raised tabs of the damper plate. Then secure with sheet metal screw.

NOTE: The screw cannot be installed if the damper assembly is not positioned as shown.

ABC

DEF

A. Raised tabs

B. Damper assembly

C. Sheet metal screw

D. Upper cabinet cutout

E. Long tab

F. Damper plate

2.Connect vent to damper assembly.

A B

A.Vent

B.Damper assembly (under vent)

Complete Installation

1.Install filters. Refer to the User Instructions for filter placement.

WARNING

Electrical Shock Hazard

Plug into a grounded 3 prong outlet.

Do not remove ground prong.

Do not use an adapter.

Do not use an extension cord.

Failure to follow these instructions can result in death, fire, or electrical shock.

2.Plug microwave oven into grounded 3 prong outlet.

3.Reconnect power.

4.Check the operation of microwave oven by placing 1 cup

(250 mL) of water on the turntable, and programming a cook time of 1 minute at 100% power. Test vent fan and exhaust by operating the vent fan.

5.If the microwave oven does not operate:

Check that a household fuse has not blown, or that a circuit breaker has not tripped. Replace the fuse or reset the circuit breaker. If the problem continues, call an electrician.

Check that the power supply cord is plugged into a grounded 3 prong outlet.

See the User Instructions for troubleshooting information.

Installation is now complete.

Save Installation Instructions for future use.

10

Page 10
Image 10
Maytag MMV5208WS installation instructions Complete Installation

MMV5208WS specifications

The Maytag MMV5208WS is a powerful and versatile microwave that brings efficiency and practicality to your kitchen. With an array of features designed to enhance cooking performance, this model is an ideal companion for anyone looking to streamline meal preparation.

One of the standout characteristics of the MMV5208WS is its spacious 2.0 cubic foot capacity, which provides ample space for cooking a variety of dishes. This size makes it suitable for families or individuals who frequently prepare large portions or use oversized containers. The microwave has a robust 1000 watts of cooking power, ensuring that your food is heated evenly and quickly.

Equipped with an innovative sensor cooking technology, the MMV5208WS automatically detects the moisture level in food. This feature adjusts cooking times and power levels, eliminating the guesswork and ensuring perfectly cooked meals every time. Additionally, the microwave features a range of pre-programmed settings for tasks including popcorn, beverages, and baked potatoes, making meal prep even more straightforward.

Another key feature of this microwave is its easy-to-read digital controls. These controls simplify operation and allow users to input their desired settings efficiently. The brightly lit LED display enhances visibility, ensuring that you can track cooking times without any hassle.

The Maytag MMV5208WS also boasts a sleek stainless steel finish, enhancing the aesthetic appeal of your kitchen while ensuring durability and easy cleaning. The microwave’s design includes a quiet ventilation system that effectively removes smoke and odors from your kitchen without excessive noise, contributing to a more pleasant cooking environment.

Moreover, with its built-in invert technology, the MMV5208WS maintains consistent power levels, resulting in more thorough and even cooking. The microwave also includes a convenient microwave popcorn setting that allows you to enjoy perfectly popped corn without any burnt kernels.

In conclusion, the Maytag MMV5208WS is a reliable and efficient microwave oven that combines advanced technology, ample cooking capacity, and user-friendly features. It is designed to suit the demands of modern kitchens, making it an excellent choice for anyone looking to improve their cooking experience.