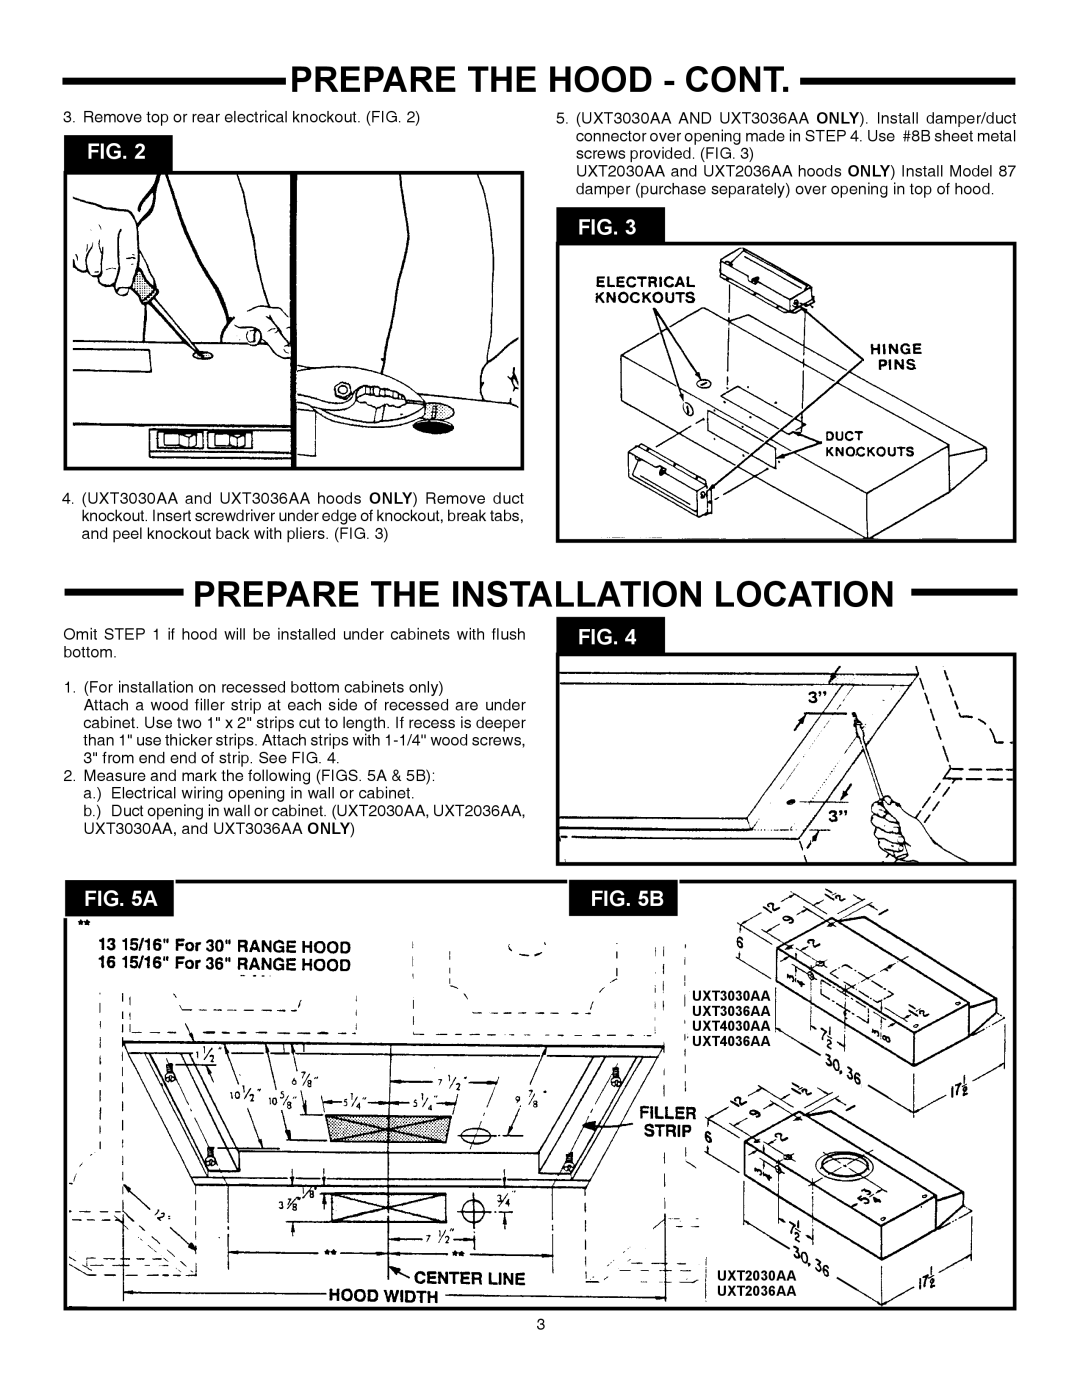
UXT4036AA, UXT2036AA, UXT3036AA, UXT3030AA, UXT4030AA specifications
The Maytag UXT2030AA, UXT4030AA, UXT3030AA, UXT3036AA, and UXT2036AA are an impressive range of under-cabinet ventilation hoods designed to enhance kitchen performance while adding a sleek, modern touch. These models boast a blend of powerful functionality, innovative technology, and aesthetic appeal.One of the standout features of these Maytag models is their powerful ventilation capabilities. Equipped with high-performance motors, they efficiently eliminate smoke, steam, and cooking odors, ensuring a fresh atmosphere in the kitchen. The UXT4030AA, with its robust airflow, is ideal for larger kitchens or frequent cooking, while the UXT2030AA, with a slightly lesser capacity, suits smaller spaces without compromising on efficiency.
User-friendly controls are a hallmark of these hoods. The push-button controls on these models allow for easy operation, enabling users to select from multiple fan speeds to adjust ventilation based on cooking intensity. The integrated lighting feature is another practical aspect. With bright bulbs, the hoods illuminate the cooking surface, providing optimal visibility during meal preparation.
In terms of design, the Maytag under-cabinet hoods showcase a polished, stainless-steel finish that complements various kitchen styles. Their streamlined profiles fit seamlessly into cabinetry, creating a sophisticated look without being obtrusive. The UXT3030AA and UXT3036AA come with a slightly larger width, accommodating a broader range of kitchen layouts and cooking appliances.
The installation of these hoods is straightforward, compatible with standard under-cabinet placements, making them ideal for both new builds and remodels. Moreover, they feature dishwasher-safe aluminum grease filters that ensure easy maintenance and cleanliness, contributing to the longevity of the appliance.
With Whisper Quiet technology, these hoods offer a quieter operation compared to many other models, allowing for pleasant cooking experiences and conversation-friendly environments. This feature is particularly beneficial in open-concept spaces where kitchen and living areas blend.
In summary, the Maytag UXT2030AA, UXT4030AA, UXT3030AA, UXT3036AA, and UXT2036AA under-cabinet ventilation hoods combine high efficiency and attractive design with user-centric features. With powerful ventilation, easy controls, ample lighting, and a focus on quiet operation, they are excellent choices for those looking to enhance their kitchen experience.

