FIG.2A
A
FIG.2B
C
B
FIG. 2C | FIG. 2D | FIG. 2E |
• CONVERSION TO BLOWER
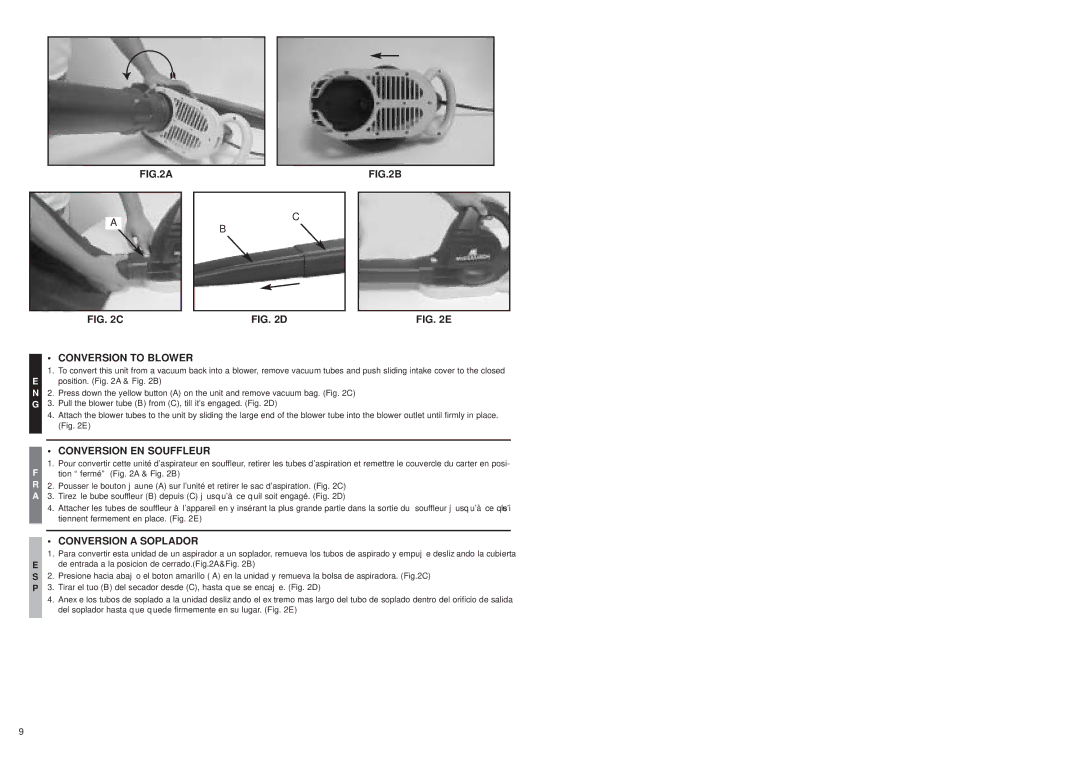
1.To convert this unit from a vacuum back into a blower, remove vacuum tubes and push sliding intake cover to the closed E position. (Fig. 2A & Fig. 2B)
N 2. Press down the yellow button (A) on the unit and remove vacuum bag. (Fig. 2C)
G3. Pull the blower tube (B) from (C), till it’s engaged. (Fig. 2D)
4.Attach the blower tubes to the unit by sliding the large end of the blower tube into the blower outlet until firmly in place. (Fig. 2E)
• CONVERSION EN SOUFFLEUR
1.Pour convertir cette unité d’aspirateur en souffleur, retirer les tubes d’aspiration et remettre le couvercle du carter en posi- F tion “fermé” (Fig. 2A & Fig. 2B)
R 2. Pousser le bouton jaune (A) sur l’unité et retirer le sac d’aspiration. (Fig. 2C) A 3. Tirez le bube souffleur (B) depuis (C) jusqu’à ce quil soit engagé. (Fig. 2D)
4.Attacher les tubes de souffleur à l’appareil en y insérant la plus grande partie dans la sortie du souffleur jusqu’à ce qu’ils tiennent fermement en place. (Fig. 2E)
• CONVERSION A SOPLADOR
1. Para convertir esta unidad de un aspirador a un soplador, remueva los tubos de aspirado y empuje deslizando la cubierta
Ede entrada a la posicion de cerrado.(Fig.2A&Fig. 2B)
S2. Presione hacia abajo el boton amarillo ( A) en la unidad y remueva la bolsa de aspiradora. (Fig.2C) P 3. Tirar el tuo (B) del secador desde (C), hasta que se encaje. (Fig. 2D)
4.Anexe los tubos de soplado a la unidad deslizando el extremo mas largo del tubo de soplado dentro del orificio de salida del soplador hasta que quede firmemente en su lugar. (Fig. 2E)
9
