DESCRIPTION
CONTROLS' LOCATION AND FUNCTION
16
115
14
2
3
4
5
6
7
13
12
11
8![]() 10
10
9
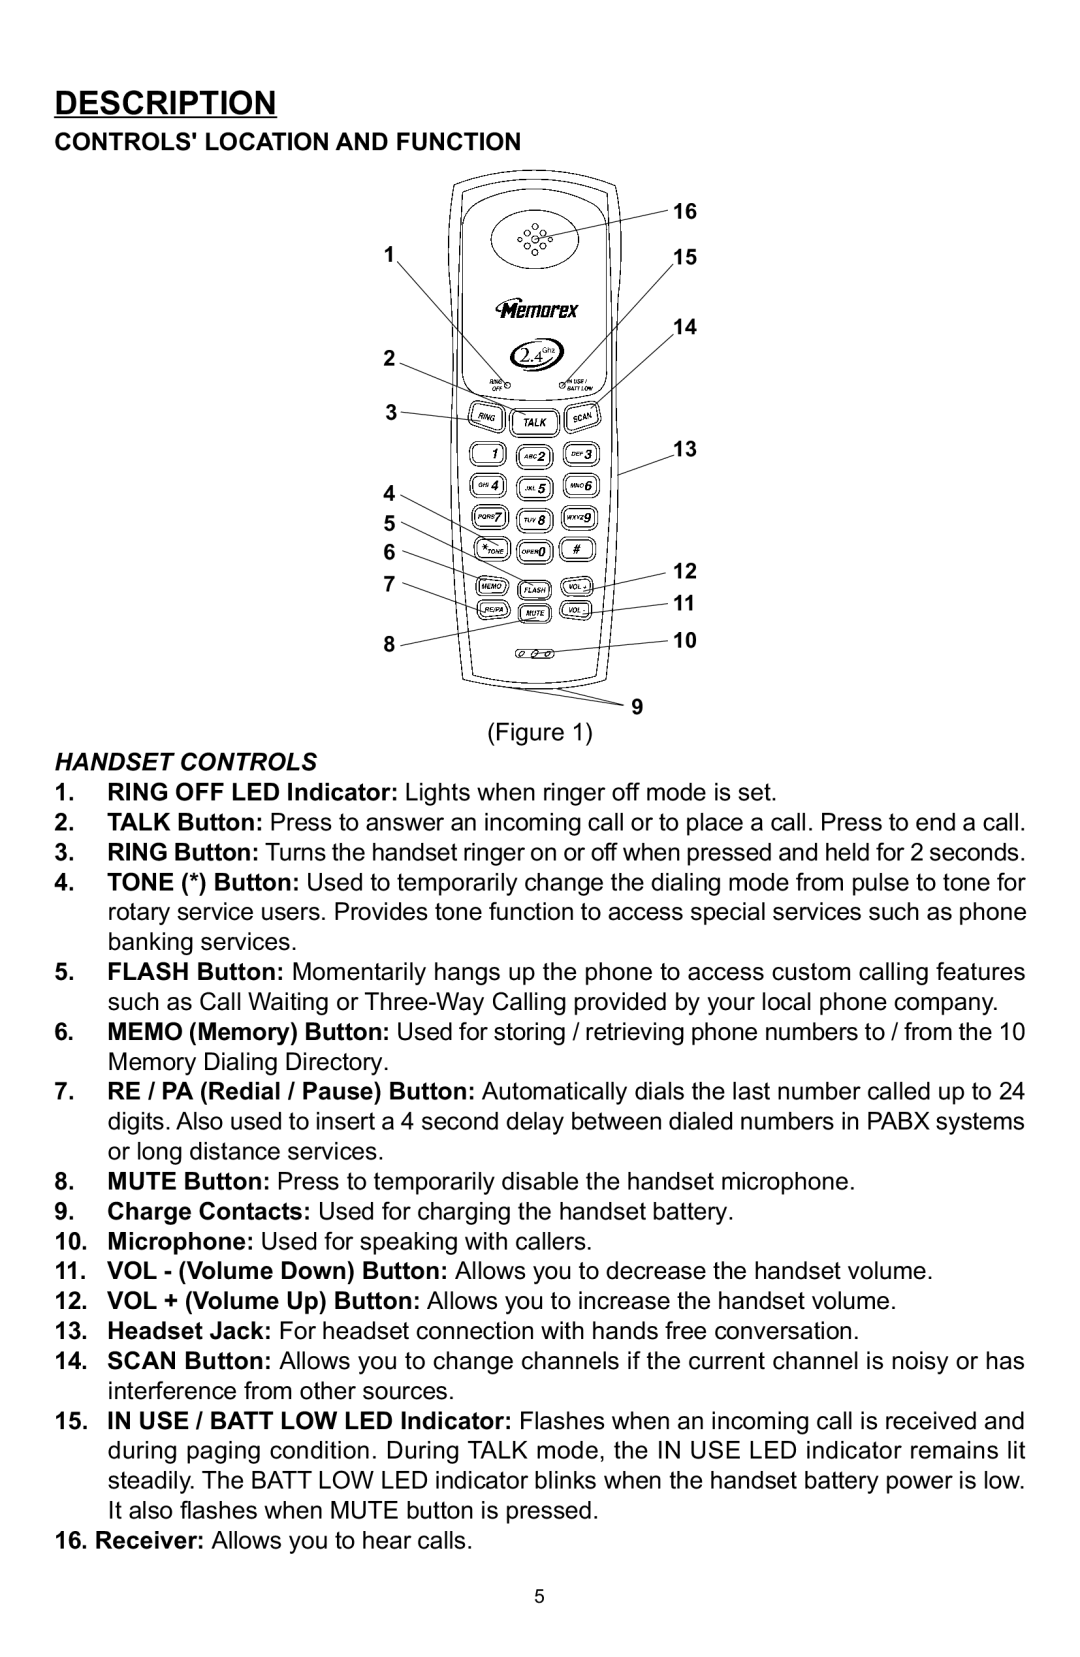
(Figure 1)
HANDSET CONTROLS
1.RING OFF LED Indicator: Lights when ringer off mode is set.
2.TALK Button: Press to answer an incoming call or to place a call. Press to end a call.
3.RING Button: Turns the handset ringer on or off when pressed and held for 2 seconds.
4.TONE (*) Button: Used to temporarily change the dialing mode from pulse to tone for rotary service users. Provides tone function to access special services such as phone banking services.
5.FLASH Button: Momentarily hangs up the phone to access custom calling features such as Call Waiting or
6.MEMO (Memory) Button: Used for storing / retrieving phone numbers to / from the 10 Memory Dialing Directory.
7.RE / PA (Redial / Pause) Button: Automatically dials the last number called up to 24 digits. Also used to insert a 4 second delay between dialed numbers in PABX systems or long distance services.
8.MUTE Button: Press to temporarily disable the handset microphone.
9.Charge Contacts: Used for charging the handset battery.
10.Microphone: Used for speaking with callers.
11.VOL - (Volume Down) Button: Allows you to decrease the handset volume.
12.VOL + (Volume Up) Button: Allows you to increase the handset volume.
13.Headset Jack: For headset connection with hands free conversation.
14.SCAN Button: Allows you to change channels if the current channel is noisy or has interference from other sources.
15.IN USE / BATT LOW LED Indicator: Flashes when an incoming call is received and during paging condition. During TALK mode, the IN USE LED indicator remains lit steadily. The BATT LOW LED indicator blinks when the handset battery power is low. It also flashes when MUTE button is pressed.
16.Receiver: Allows you to hear calls.
5
