
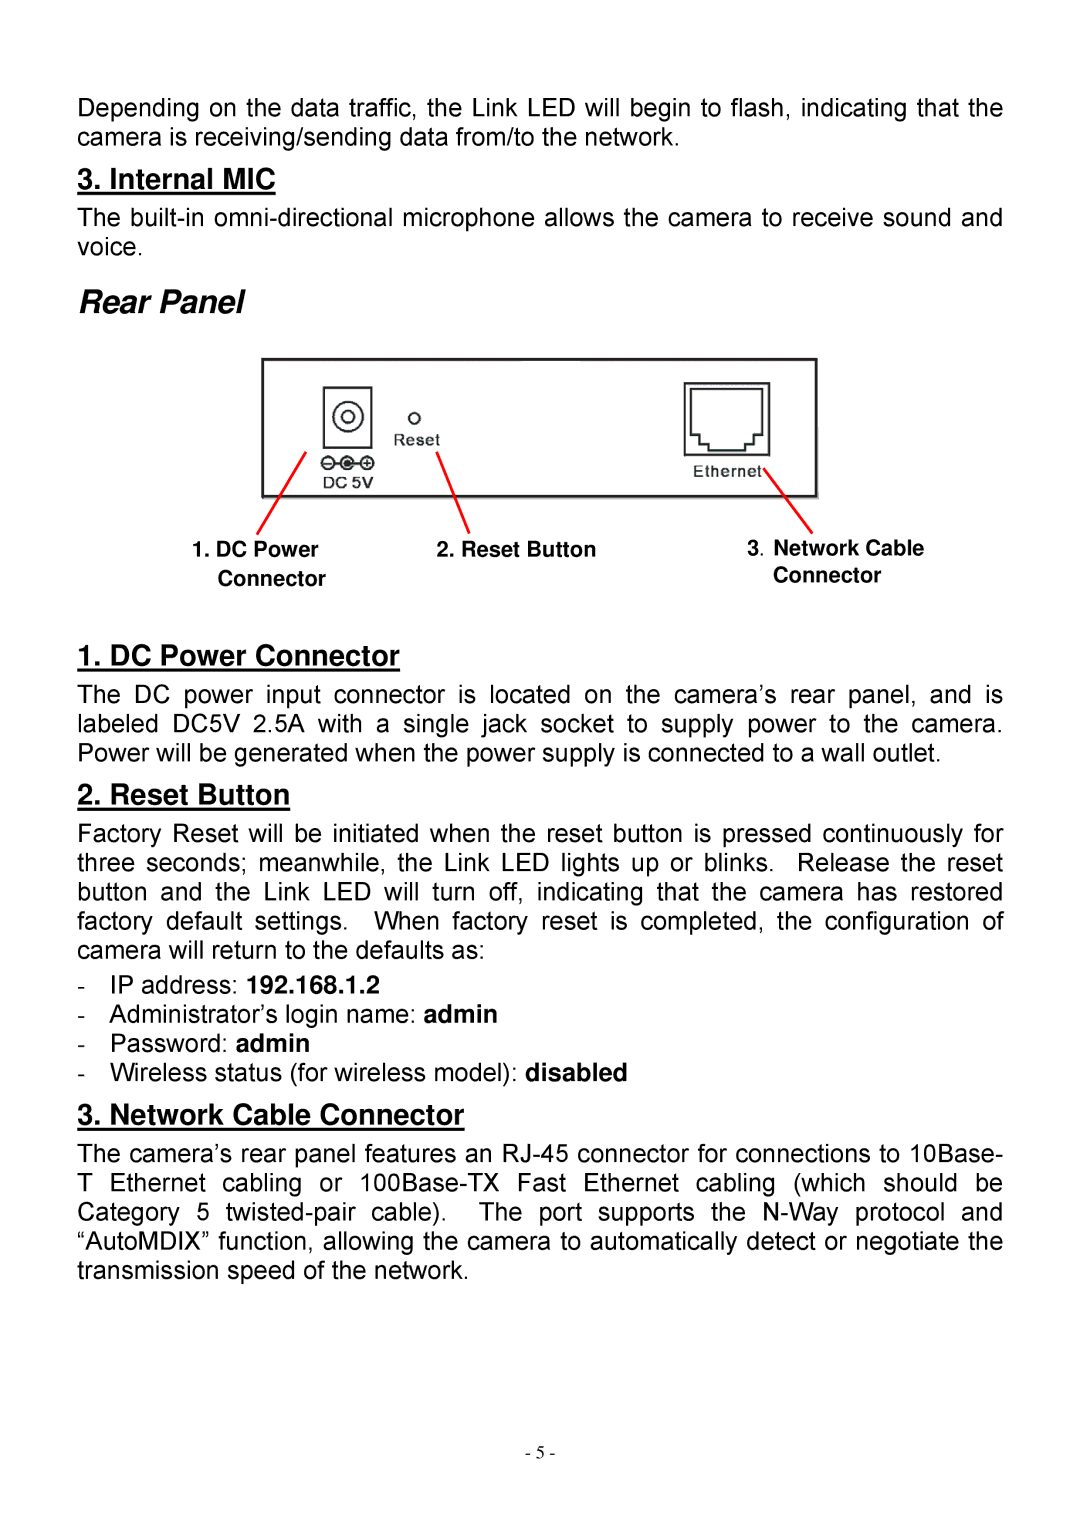
SP5530 specifications
MicroNet Technology SP5530 is an advanced integrated circuit designed to meet the demands of modern data processing applications. Positioned at the forefront of microcontroller technology, the SP5530 combines high performance, low power consumption, and versatile connectivity options, making it an ideal choice for a variety of embedded systems and IoT devices.One of the standout features of the SP5530 is its powerful ARM Cortex-M4 processor core, which operates at a clock speed of up to 120 MHz. This robust processing capability ensures quick and efficient handling of complex algorithms and data-intensive tasks. Alongside the processing power, the SP5530 integrates a floating-point unit (FPU) that enhances the performance of mathematical computations, crucial for applications such as digital signal processing and control systems.
Power efficiency is another key characteristic of the SP5530. With its low-power design, the microcontroller is suitable for battery-powered devices, allowing for extended operational lifetimes. The device features multiple power modes that allow it to enter sleep or deep-sleep states when inactive, conserving energy while maintaining quick wake-up times.
In terms of connectivity, the SP5530 supports a range of interfaces including SPI, I2C, UART, and PWM. This flexibility facilitates seamless communication with other devices and sensors, enabling developers to create sophisticated systems that can easily interact with the environment. Additionally, the SP5530 features an integrated ADC (Analog-to-Digital Converter) that provides high-resolution readings from analog sensors, further enhancing its usability in IoT applications.
The SP5530 also boasts robust memory options, including flash memory for program storage and RAM for data processing. This allows developers to implement complex applications without the need for external memory components, simplifying circuit design and reducing overall system cost.
Overall, the MicroNet Technology SP5530 microcontroller is a versatile and efficient solution tailored for today's requirements in embedded systems and IoT environments. With its combination of processing power, energy efficiency, rich connectivity options, and integrated features, it stands out as a reliable choice for developers aiming to push the boundaries of innovation in their projects.