4 INSTALLATION
4.1Contents of package
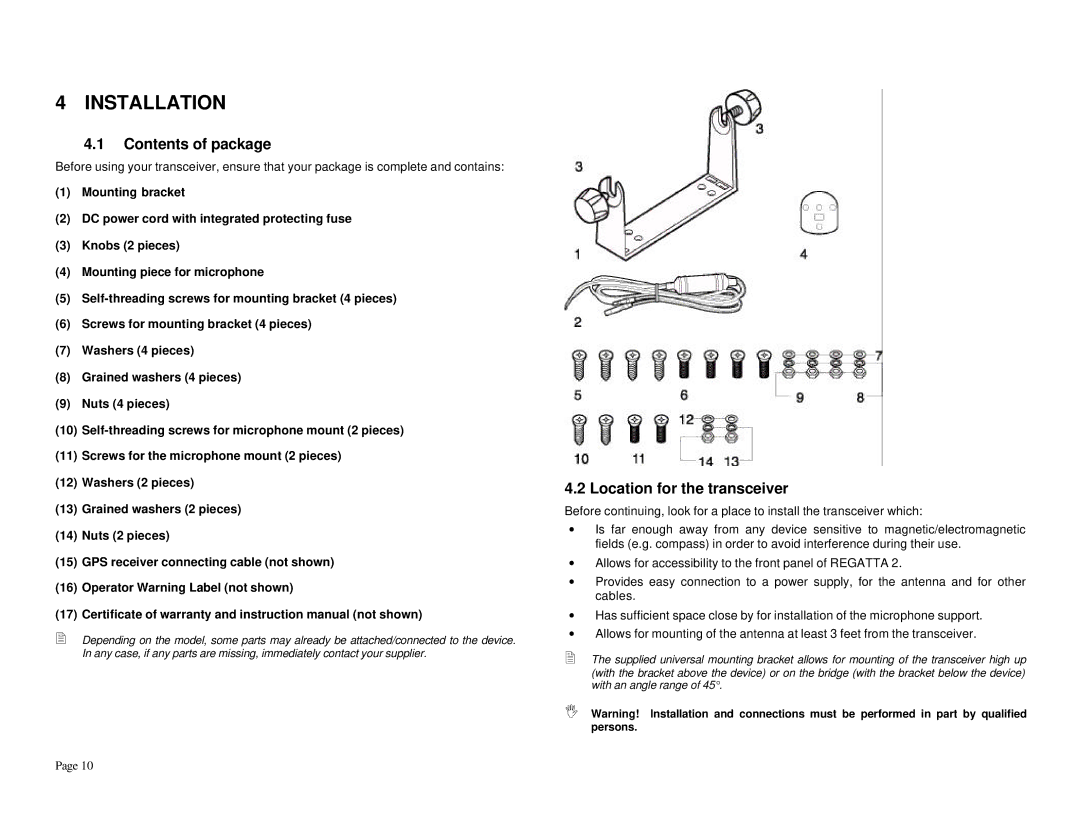
Before using your transceiver, ensure that your package is complete and contains:
(1)Mounting bracket
(2)DC power cord with integrated protecting fuse
(3)Knobs (2 pieces)
(4)Mounting piece for microphone
(5)
(6)Screws for mounting bracket (4 pieces)
(7)Washers (4 pieces)
(8)Grained washers (4 pieces)
(9)Nuts (4 pieces)
(10)
(11)Screws for the microphone mount (2 pieces)
(12)Washers (2 pieces)
(13)Grained washers (2 pieces)
(14)Nuts (2 pieces)
(15)GPS receiver connecting cable (not shown)
(16)Operator Warning Label (not shown)
(17)Certificate of warranty and instruction manual (not shown)
2Depending on the model, some parts may already be attached/connected to the device. In any case, if any parts are missing, immediately contact your supplier.
4.2 Location for the transceiver
Before continuing, look for a place to install the transceiver which:
∙Is far enough away from any device sensitive to magnetic/electromagnetic fields (e.g. compass) in order to avoid interference during their use.
∙Allows for accessibility to the front panel of REGATTA 2.
∙Provides easy connection to a power supply, for the antenna and for other cables.
∙Has sufficient space close by for installation of the microphone support.
∙Allows for mounting of the antenna at least 3 feet from the transceiver.
2The supplied universal mounting bracket allows for mounting of the transceiver high up (with the bracket above the device) or on the bridge (with the bracket below the device) with an angle range of 45°.
IWarning! Installation and connections must be performed in part by qualified persons.
Page 10