1 3
4
5
2 |
|
Tools Needed: | Use tab connector only with insulated wires. |
|
1Connector
2Run Wire
3Tap Wire
Place unstripped run wire in slotted channel.
Insert unstripped tap wire into other channel until it hits internal stop.
4Contact
59 Inch Linemans Pliers
Use pliers to push contact down flush with top of connector.
Close top cover.
Ref.
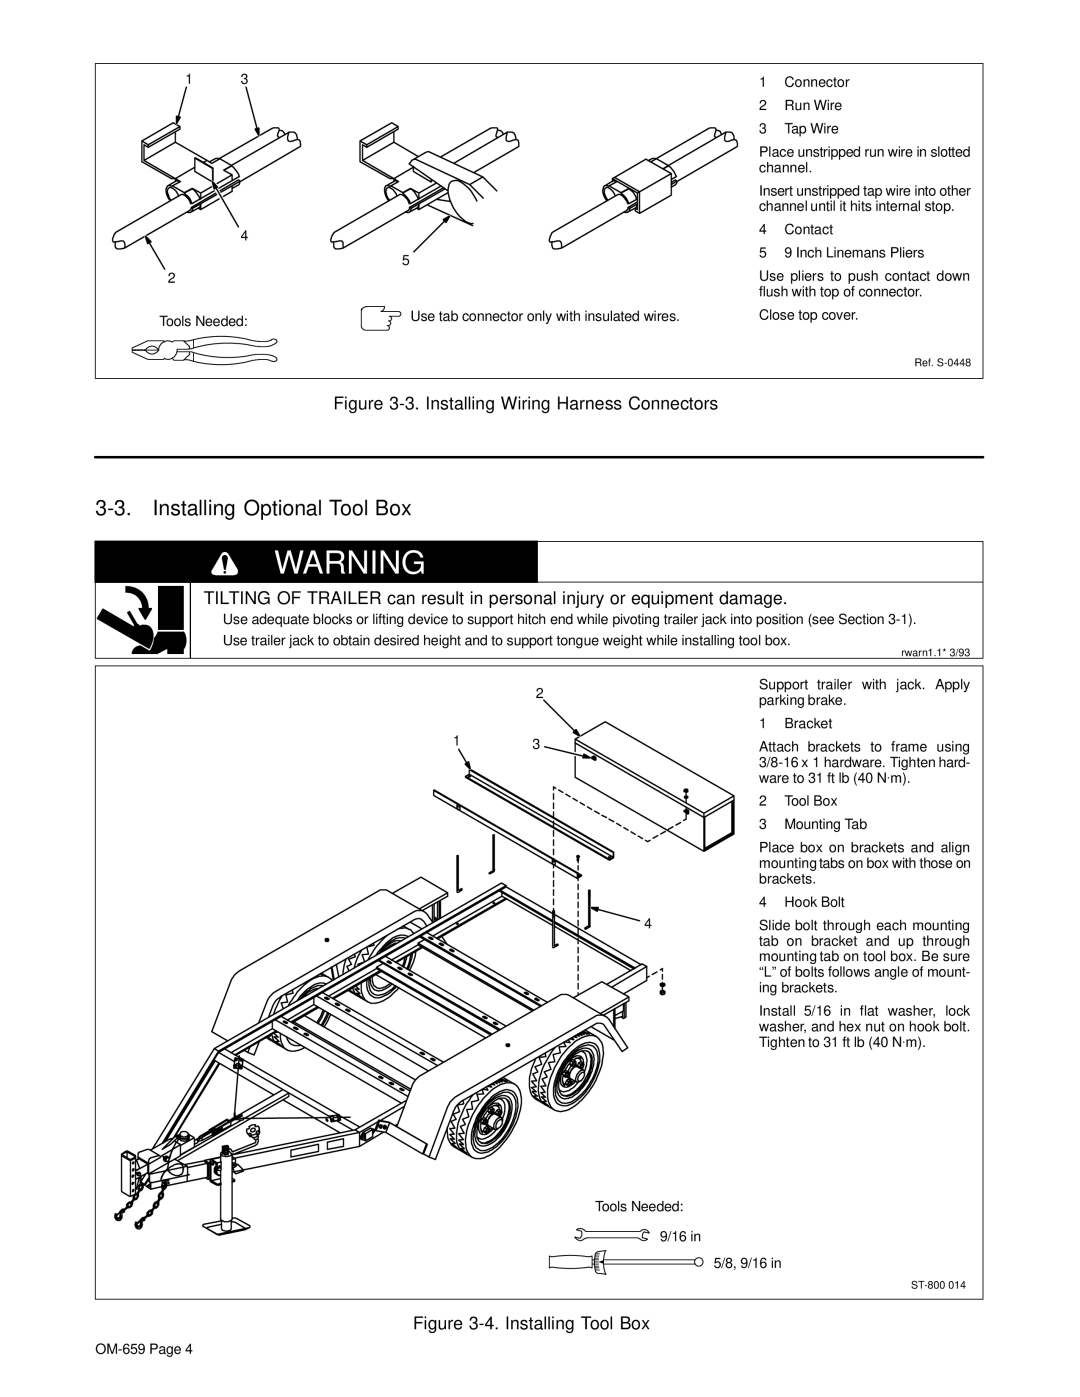
Figure 3-3. Installing Wiring Harness Connectors
3-3. Installing Optional Tool Box
WARNING
TILTING OF TRAILER can result in personal injury or equipment damage.
• Use adequate blocks or lifting device to support hitch end while pivoting trailer jack into position (see Section
•Use trailer jack to obtain desired height and to support tongue weight while installing tool box.
rwarn1.1* 3/93
2
13
4
Tools Needed:
9/16 in
Support trailer with jack. Apply parking brake.
1 Bracket
Attach brackets to frame using
2Tool Box
3Mounting Tab
Place box on brackets and align mounting tabs on box with those on brackets.
4 Hook Bolt
Slide bolt through each mounting tab on bracket and up through mounting tab on tool box. Be sure “L” of bolts follows angle of mount- ing brackets.
Install 5/16 in flat washer, lock washer, and hex nut on hook bolt. Tighten to 31 ft lb (40 N.m).
5/8, 9/16 in