.A complete Parts List is available at www.MillerWelds.com
5-2. Controls (CE Models)
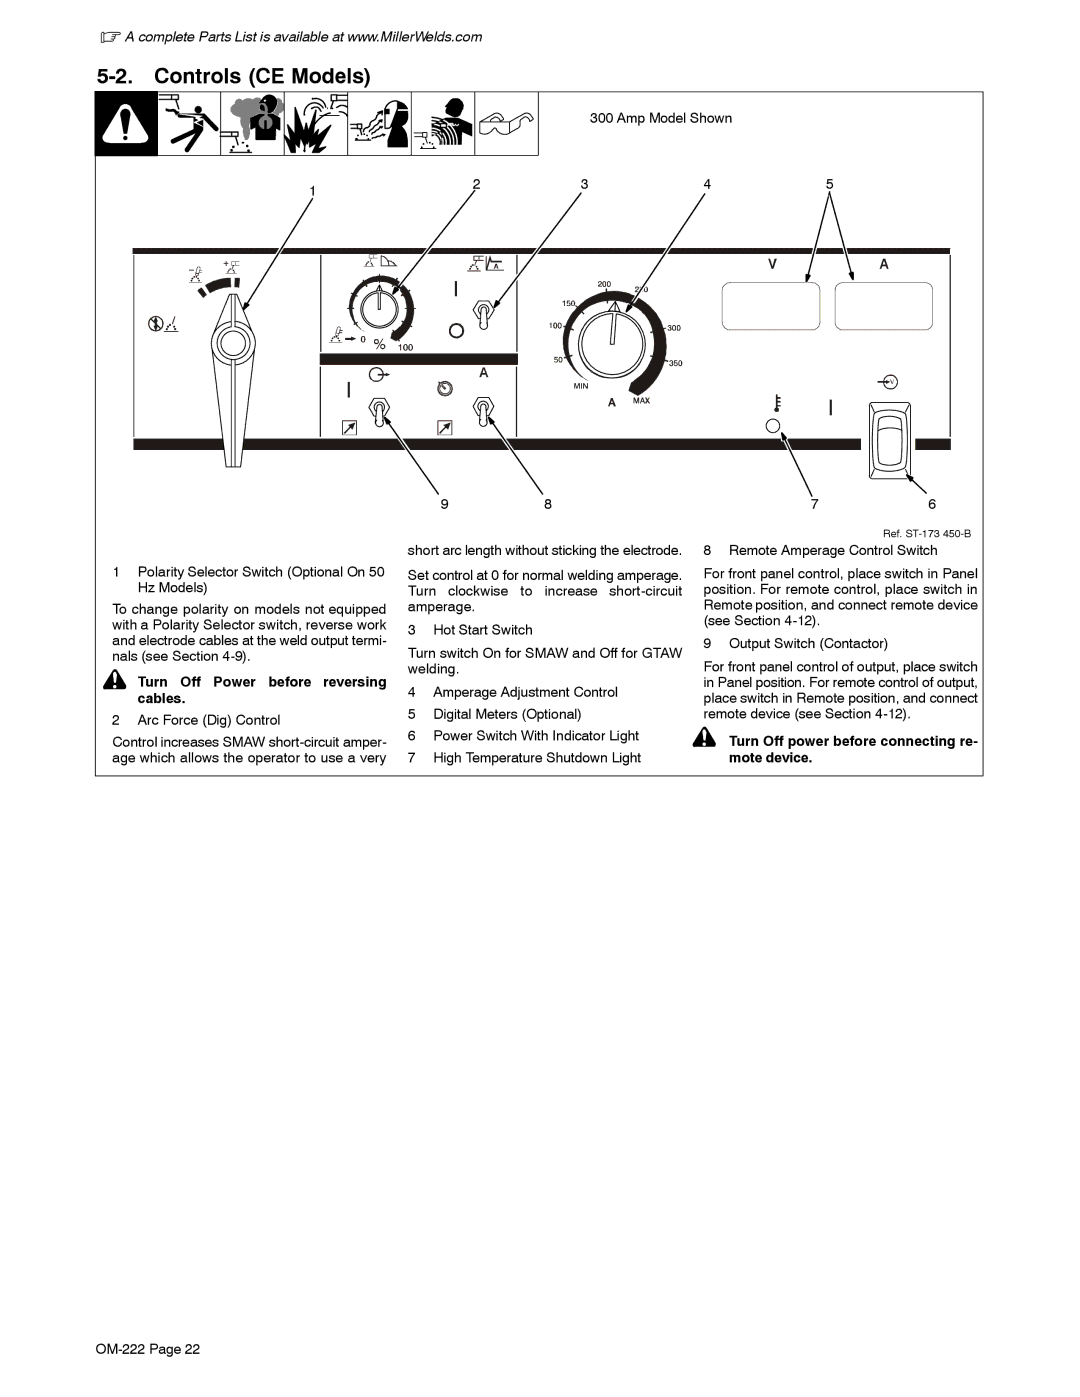
300 Amp Model Shown
1 | 2 | 3 | 4 | 5 |
|
|
|
|
9 | 8 | 7 | 6 |
Ref.
1Polarity Selector Switch (Optional On 50 Hz Models)
To change polarity on models not equipped with a Polarity Selector switch, reverse work and electrode cables at the weld output termi- nals (see Section
! Turn Off Power before reversing cables.
2 Arc Force (Dig) Control
Control increases SMAW
short arc length without sticking the electrode.
Set control at 0 for normal welding amperage. Turn clockwise to increase
3 Hot Start Switch
Turn switch On for SMAW and Off for GTAW welding.
4Amperage Adjustment Control
5Digital Meters (Optional)
6Power Switch With Indicator Light
7High Temperature Shutdown Light
8 Remote Amperage Control Switch
For front panel control, place switch in Panel position. For remote control, place switch in Remote position, and connect remote device (see Section
9 Output Switch (Contactor)
For front panel control of output, place switch in Panel position. For remote control of output, place switch in Remote position, and connect remote device (see Section
