DISMOUNTING LOADER
FIG. 1
|
| FIG. 2 |
|
|
|
|
|
|
|
|
|
| Stand Legs |
| |
|
|
|
|
|
|
| |
|
|
|
|
|
|
| |
|
|
|
|
|
|
| |
FIG. 3 |
|
|
|
|
|
|
|
|
|
|
|
|
|
|
|
|
|
|
|
|
|
|
|
|
|
|
|
|
| FIG. 5 |
|
|
| FIG. 4 |
| ||||
|
|
|
|
|
|
| |
|
|
|
|
|
|
|
|
FIG. 6A
|
| FIG. 6B |
|
|
|
| FIG. 7 | ||
Upright Mast |
|
| ||
|
|
| ||
|
|
|
|
|
Pillar Mount
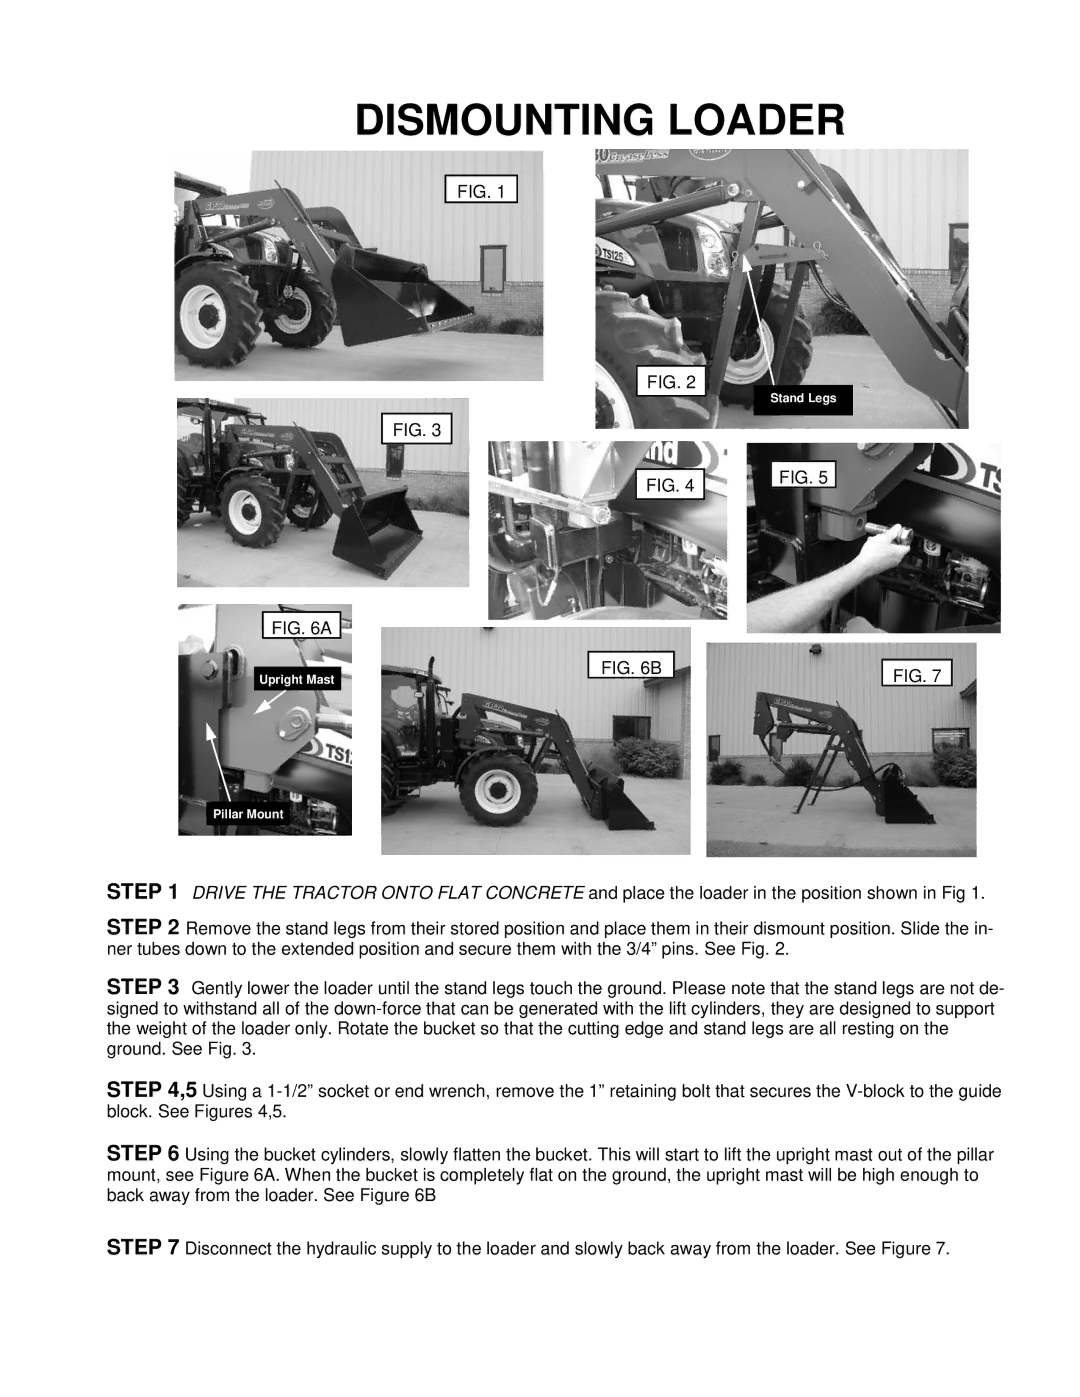
STEP 1 DRIVE THE TRACTOR ONTO FLAT CONCRETE and place the loader in the position shown in Fig 1.
STEP 2 Remove the stand legs from their stored position and place them in their dismount position. Slide the in- ner tubes down to the extended position and secure them with the 3/4” pins. See Fig. 2.
STEP 3 Gently lower the loader until the stand legs touch the ground. Please note that the stand legs are not de- signed to withstand all of the
STEP 4,5 Using a
STEP 6 Using the bucket cylinders, slowly flatten the bucket. This will start to lift the upright mast out of the pillar mount, see Figure 6A. When the bucket is completely flat on the ground, the upright mast will be high enough to back away from the loader. See Figure 6B
STEP 7 Disconnect the hydraulic supply to the loader and slowly back away from the loader. See Figure 7.
