3-4. Installing Wiring Harness Tab Connectors
NOTE
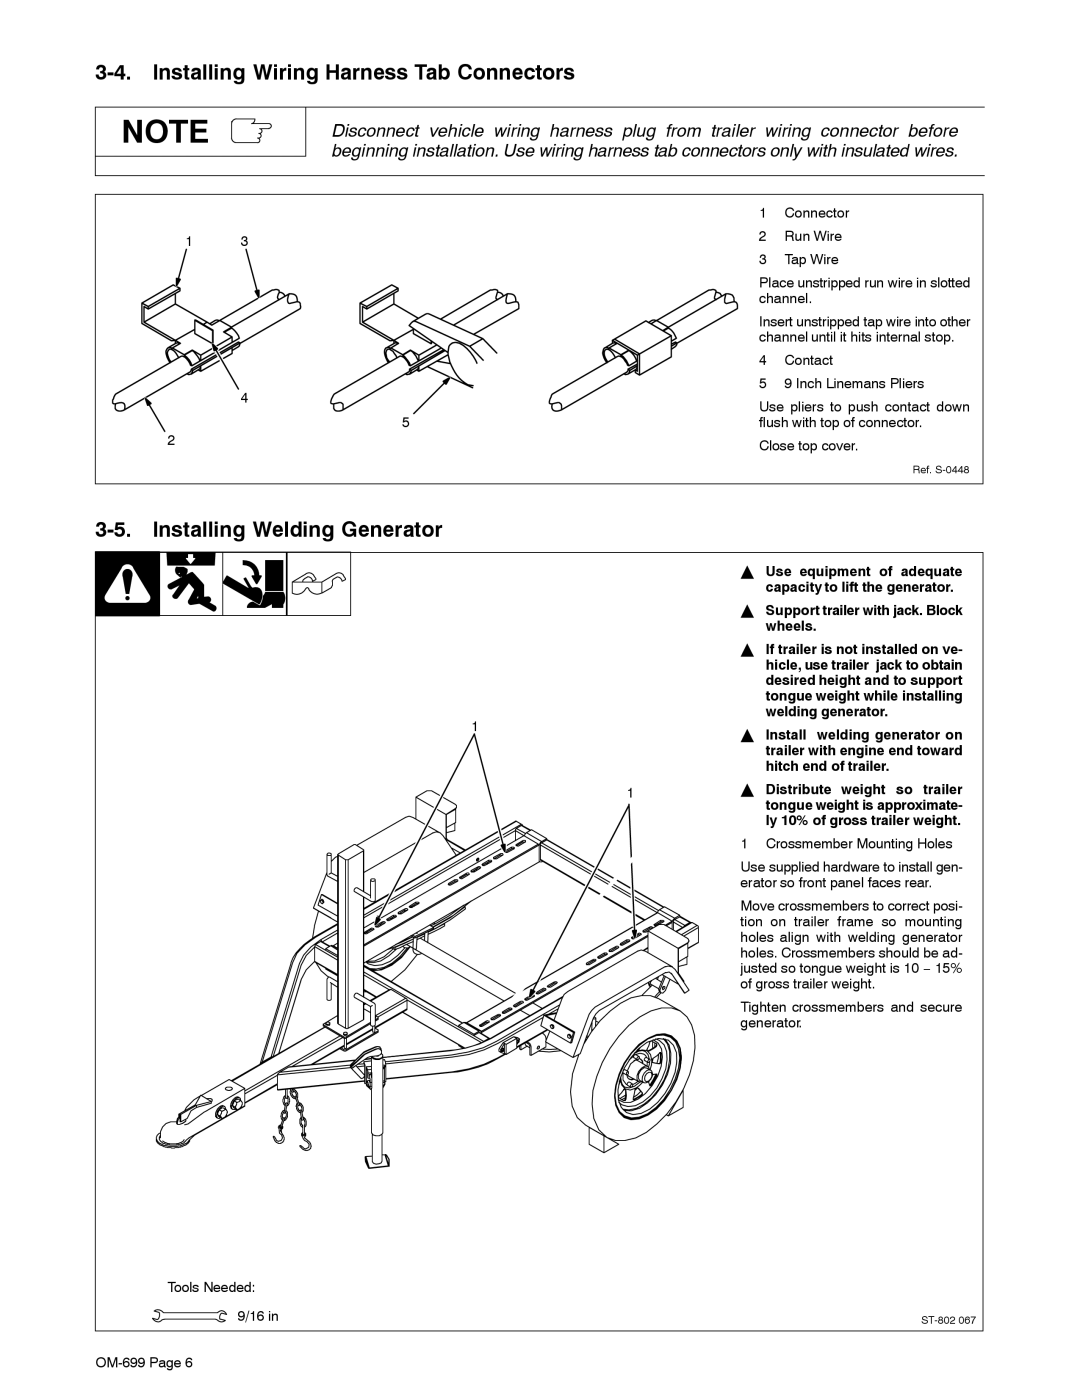
Disconnect vehicle wiring harness plug from trailer wiring connector before beginning installation. Use wiring harness tab connectors only with insulated wires.
|
| 1 | Connector |
1 | 3 | 2 | Run Wire |
|
| ||
|
| 3 | Tap Wire |
|
| Place unstripped run wire in slotted | |
|
| channel. | |
|
| Insert unstripped tap wire into other | |
|
| channel until it hits internal stop. | |
|
| 4 | Contact |
| 4 | 5 | 9 Inch Linemans Pliers |
| Use pliers to push contact down | ||
|
| ||
| 5 | flush with top of connector. | |
2 | Close top cover. |
| |
| Ref. |
3-5. Installing Welding Generator
Y Use equipment of adequate
|
| capacity to lift the generator. | |
| Y Support trailer with jack. Block | ||
|
| wheels. | |
| Y If trailer is not installed on ve- | ||
|
| hicle, use trailer jack to obtain | |
|
| desired height and to support | |
|
| tongue weight while installing | |
1 |
| welding generator. | |
Y | Install welding generator on | ||
| |||
|
| trailer with engine end toward | |
|
| hitch end of trailer. | |
1 | Y Distribute weight so trailer | ||
|
| tongue weight is approximate- | |
|
| ly 10% of gross trailer weight. | |
| 1 | Crossmember Mounting Holes | |
| Use supplied hardware to install gen- | ||
| erator so front panel faces rear. | ||
| Move crossmembers to correct posi- | ||
| tion on trailer frame so mounting | ||
| holes align with welding generator | ||
| holes. Crossmembers should be ad- | ||
| justed so tongue weight is 10 − 15% | ||
| of gross trailer weight. | ||
| Tighten crossmembers and secure | ||
| generator. | ||
Tools Needed:
9/16 in