3-2. Installing Hitch And Safety Chains
7
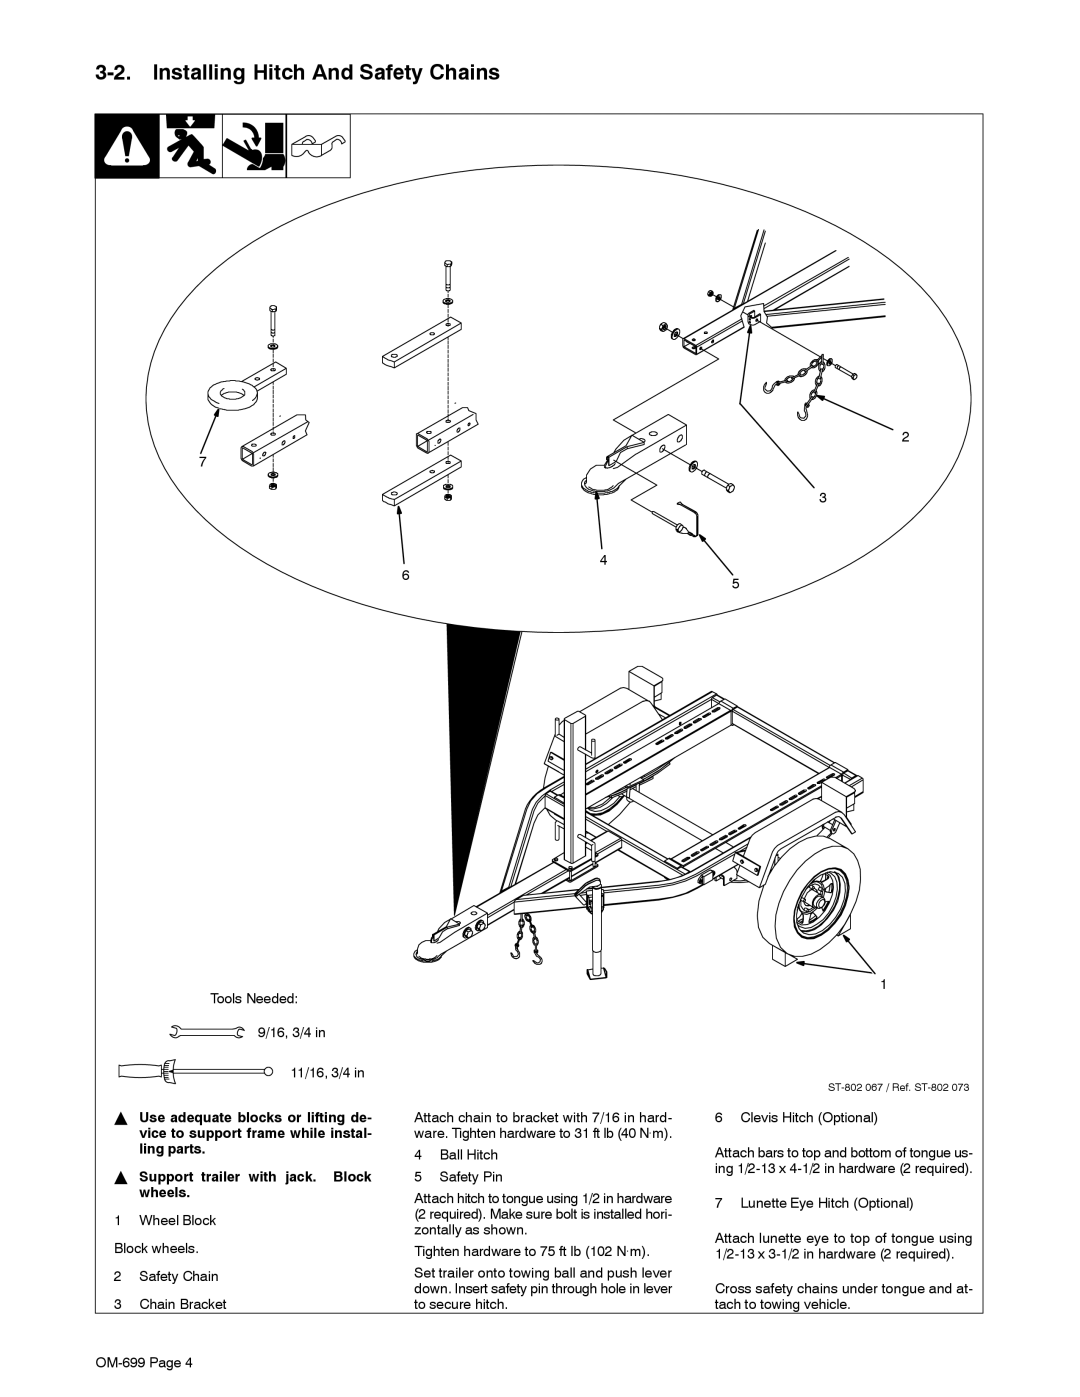
Tools Needed:
9/16, 3/4 in
11/16, 3/4 in
YUse adequate blocks or lifting de- vice to support frame while instal- ling parts.
YSupport trailer with jack. Block wheels.
1Wheel Block Block wheels.
2Safety Chain
3Chain Bracket
4
6
Attach chain to bracket with 7/16 in hard- ware. Tighten hardware to 31 ft lb (40 N.m).
4Ball Hitch
5Safety Pin
Attach hitch to tongue using 1/2 in hardware (2 required). Make sure bolt is installed hori- zontally as shown.
Tighten hardware to 75 ft lb (102 N.m).
Set trailer onto towing ball and push lever down. Insert safety pin through hole in lever to secure hitch.
2
3
5
1
6 Clevis Hitch (Optional)
Attach bars to top and bottom of tongue us- ing
7 Lunette Eye Hitch (Optional)
Attach lunette eye to top of tongue using
Cross safety chains under tongue and at- tach to towing vehicle.