1670-1 specifications
Milwaukee 1670-1 is a robust tool that exemplifies the brand's commitment to power, durability, and user-friendly design. This model belongs to the Milwaukee lineup renowned for its heavy-duty electric tools that cater primarily to professionals in construction, manufacturing, and maintenance.One of the defining features of the Milwaukee 1670-1 is its powerful motor. The unit is equipped with a high-performance 7.5-amp motor that provides ample torque, making it suitable for various applications, from cutting to drilling. This motor ensures that the tool can handle tough materials such as metal and wood with ease, making it a versatile addition to any tradesperson's toolkit.
In terms of technology, the Milwaukee 1670-1 incorporates advanced features designed to enhance user experience and safety. It boasts a variable speed control, allowing operators to adjust the speed of the tool based on the specific task at hand. This flexibility enables precision work while maintaining efficiency. The tool also includes an electronic clutch, which helps prevent damage to the workpiece and the tool itself by disengaging motor power during stalling conditions.
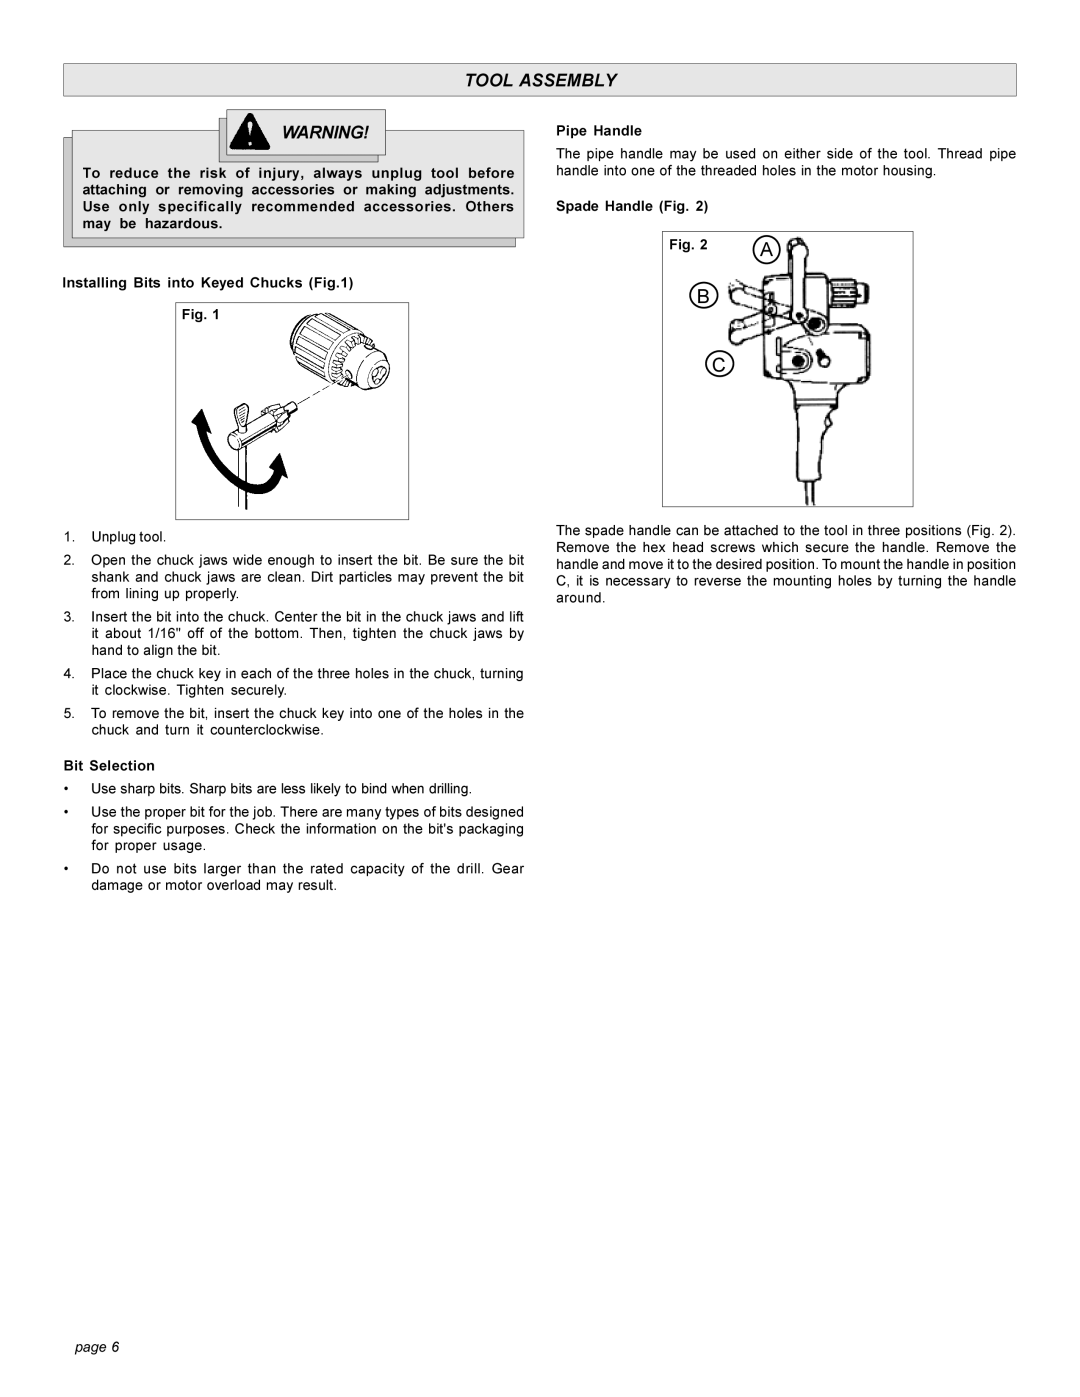
Another noteworthy characteristic of the Milwaukee 1670-1 is its ergonomic design. The handle is designed for maximum comfort and control, reducing user fatigue during prolonged use. The rubber overmold provides a secure grip even in wet or oily conditions, ensuring safety and stability. Additionally, the compact design of the tool allows for easy maneuverability in tight spaces, an essential factor for both professional and DIY projects.
Durability is a hallmark of Milwaukee products, and the 1670-1 is no exception. The tool’s housing is constructed from magnesium, which not only contributes to its lightweight design but also enhances its sturdiness. This construction helps to mitigate damage from falls and accidents on the job site, prolonging the life of the tool.
In conclusion, Milwaukee 1670-1 combines power, safety features, ergonomic design, and robust construction, making it an essential tool for anyone in need of reliable performance. Whether for heavy-duty industrial applications or everyday tasks, this model stands out as a trusted choice in the Milwaukee lineup.