Chain oil (Fig. 12)
Fig. 12
Adjusting chain brake
The brake should be checked for normal
APPLICATIONS
A ![]()
Proper lubrication prolongs chain and guide bar life. In warm weather use a
Automatic oiler
Catalog number 6215 Chain Saw is equipped with an automatic oiler. The oiler is preset at the factory to provide continu- ous guide bar lubrication while the saw is running. To check if oiler is working prop- erly, hold the nose of the chain saw about 4" from the log and run the chain saw. If the oiler is working properly the log should be spotted with oil.
Chain brake (Fig. 13)
The chain saw is equipped with a brake that is actuated by the movement of the hand guard/brake. The movement of the hand guard/brake opens a spring loaded switch that interrupts the power and me- chanically stops the chain until the hand guard/brake is returned to the operating position.
NOTE: Do not attempt to remove the chain brake from the saw. Using the chain saw without a chain brake will prohibit the user’s ability to stop the chain abruptly and may increase the risk of personal injury.
Fig. 13
Operating Braking
position position
operation before each period of use.
Push the hand guard/ brake into the brak- ing position.
If the brake doesn't stop the chain abruptly when it is applied, the brake needs adjusting. Take the saw to an authorized MILWAUKEE service center for repair and/ or adjustment.
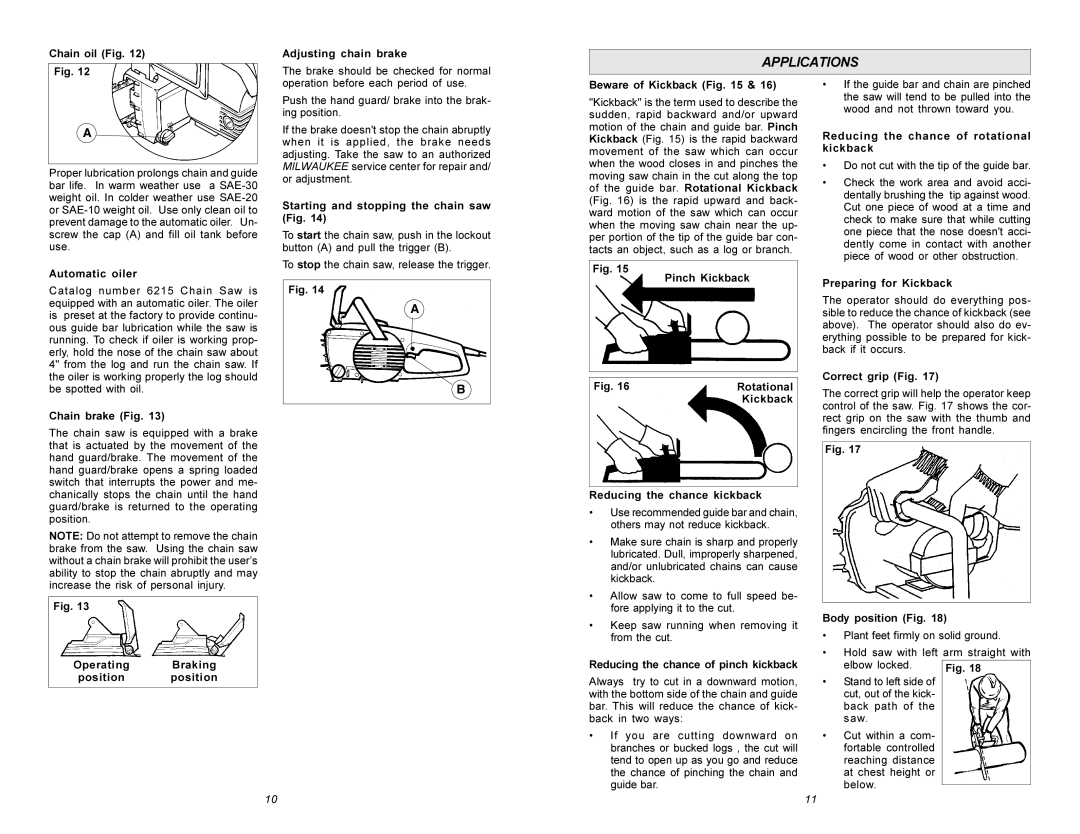
Starting and stopping the chain saw (Fig. 14)
To start the chain saw, push in the lockout button (A) and pull the trigger (B).
To stop the chain saw, release the trigger.
Fig. 14
A
B
Beware of Kickback (Fig. 15 & 16)
"Kickback" is the term used to describe the sudden, rapid backward and/or upward motion of the chain and guide bar. Pinch Kickback (Fig. 15) is the rapid backward movement of the saw which can occur when the wood closes in and pinches the moving saw chain in the cut along the top of the guide bar. Rotational Kickback (Fig. 16) is the rapid upward and back- ward motion of the saw which can occur when the moving saw chain near the up- per portion of the tip of the guide bar con- tacts an object, such as a log or branch.
Fig. 15
Pinch Kickback
Fig. 16 | Rotational |
| Kickback |
Reducing the chance kickback
•Use recommended guide bar and chain, others may not reduce kickback.
•Make sure chain is sharp and properly lubricated. Dull, improperly sharpened, and/or unlubricated chains can cause kickback.
•Allow saw to come to full speed be- fore applying it to the cut.
•Keep saw running when removing it from the cut.
Reducing the chance of pinch kickback
Always try to cut in a downward motion, with the bottom side of the chain and guide bar. This will reduce the chance of kick- back in two ways:
•If you are cutting downward on branches or bucked logs , the cut will tend to open up as you go and reduce the chance of pinching the chain and guide bar.
•If the guide bar and chain are pinched the saw will tend to be pulled into the wood and not thrown toward you.
Reducing the chance of rotational kickback
•Do not cut with the tip of the guide bar.
•Check the work area and avoid acci- dentally brushing the tip against wood. Cut one piece of wood at a time and check to make sure that while cutting one piece that the nose doesn't acci- dently come in contact with another piece of wood or other obstruction.
Preparing for Kickback
The operator should do everything pos- sible to reduce the chance of kickback (see above). The operator should also do ev- erything possible to be prepared for kick- back if it occurs.
Correct grip (Fig. 17)
The correct grip will help the operator keep control of the saw. Fig. 17 shows the cor- rect grip on the saw with the thumb and fingers encircling the front handle.
Fig. 17
Body position (Fig. 18)
•Plant feet firmly on solid ground.
•Hold saw with left arm straight with
elbow locked.
•Stand to left side of cut, out of the kick- back path of the saw.
•Cut within a com- fortable controlled reaching distance at chest height or below.
10 | 11 |
