MANUAL EXPOSURE - M
Manual exposure mode allows individual selection of shutter speeds and apertures. This mode overrides the exposure system giving the photographer total control over the final exposure. The shutter speeds and aperture values can be changed in half stop increments. The shutter speed range in manual exposure mode is 15 to 1/2000 second including bulb when camera sensitivity is set to auto (p.
71). The camera sensitivity is set to ISO 100, but can be changed with the function dial (p. 48).
As changes are made to the exposure, the effect will be visible on the monitors. The
BULB EXPOSURES
Bulb photographs can be taken in the
Use the control dial (1) to decrease the |
|
|
|
|
| 1 |
| |
until “bulb” is displayed. |
|
|
|
|
|
|
| |
To set the aperture value, turn the digital effects switch to |
|
|
|
|
|
|
| |
|
|
|
|
|
|
| ||
|
|
|
|
|
|
| ||
exposure compensation (2) position. While pressing |
|
|
|
|
|
|
|
|
|
|
|
|
|
|
|
| |
the digital effects button (3), turn the control dial (1) |
|
|
|
|
|
|
|
|
| 2 |
| ||||||
until the correct aperture is displayed. |
|
|
| |||||
To take the picture, press and hold the |
| 3 |
|
|
|
|
|
|
button for the duration of the exposure. Releasing the |
|
|
|
|
|
|
|
|
|
|
|
|
|
|
|
| |
|
|
|
|
|
|
| ||
shutter button will end the exposure. |
|
|
|
|
|
|
| |
The monitors will be blank during the exposure. If on, the shutter sound effect will signal the end of the exposure. The monitors will remain blank for a period equal to the exposure time while
3 |
1
2
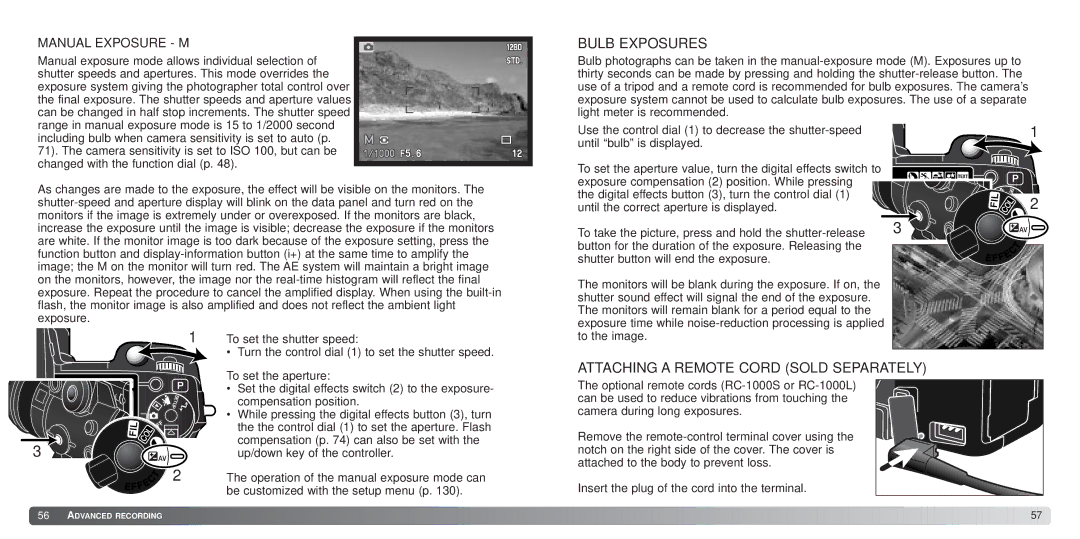
To set the shutter speed:
• Turn the control dial (1) to set the shutter speed.
To set the aperture:
•Set the digital effects switch (2) to the exposure- compensation position.
•While pressing the digital effects button (3), turn the the control dial (1) to set the aperture. Flash compensation (p. 74) can also be set with the up/down key of the controller.
The operation of the manual exposure mode can be customized with the setup menu (p. 130).
to the image.
ATTACHING A REMOTE CORD (SOLD SEPARATELY)
The optional remote cords
Remove the
Insert the plug of the cord into the terminal.
![]() 56
56![]()
![]() ADVANCED RECORDING
ADVANCED RECORDING ![]()
![]()
![]()
![]()
![]()
![]()
![]()
![]()
![]()
![]()
![]()
![]()
![]()
![]()
![]()
![]()
![]()
![]()
![]()
![]()
![]()
![]()
![]()
![]()
![]()
![]()
![]()
![]()
![]()
![]()
![]()
![]()
![]()
![]()
![]()
![]()
![]()
![]()
![]()
![]()
![]()
![]()
![]()
![]()
![]()
![]()
![]()
![]()
![]()
![]()
![]()
![]()
![]()
![]()
![]()
![]()
![]()
![]()
![]()
![]()
![]()
![]()
![]()
![]()
![]()
![]()
![]()
![]()
![]()
![]()
![]()
![]()
![]()
![]()
![]()
![]()
![]()
![]()
![]()
![]()
![]()
![]()
![]()
![]()
![]()
![]()
![]()
![]()
![]()
![]()
![]()
![]()
![]()
![]()
![]()
57