Hardware | Installation Steps |
Installation |
Read completely, then follow
•The appliance shall be installed in accordance with national wiring regulation.
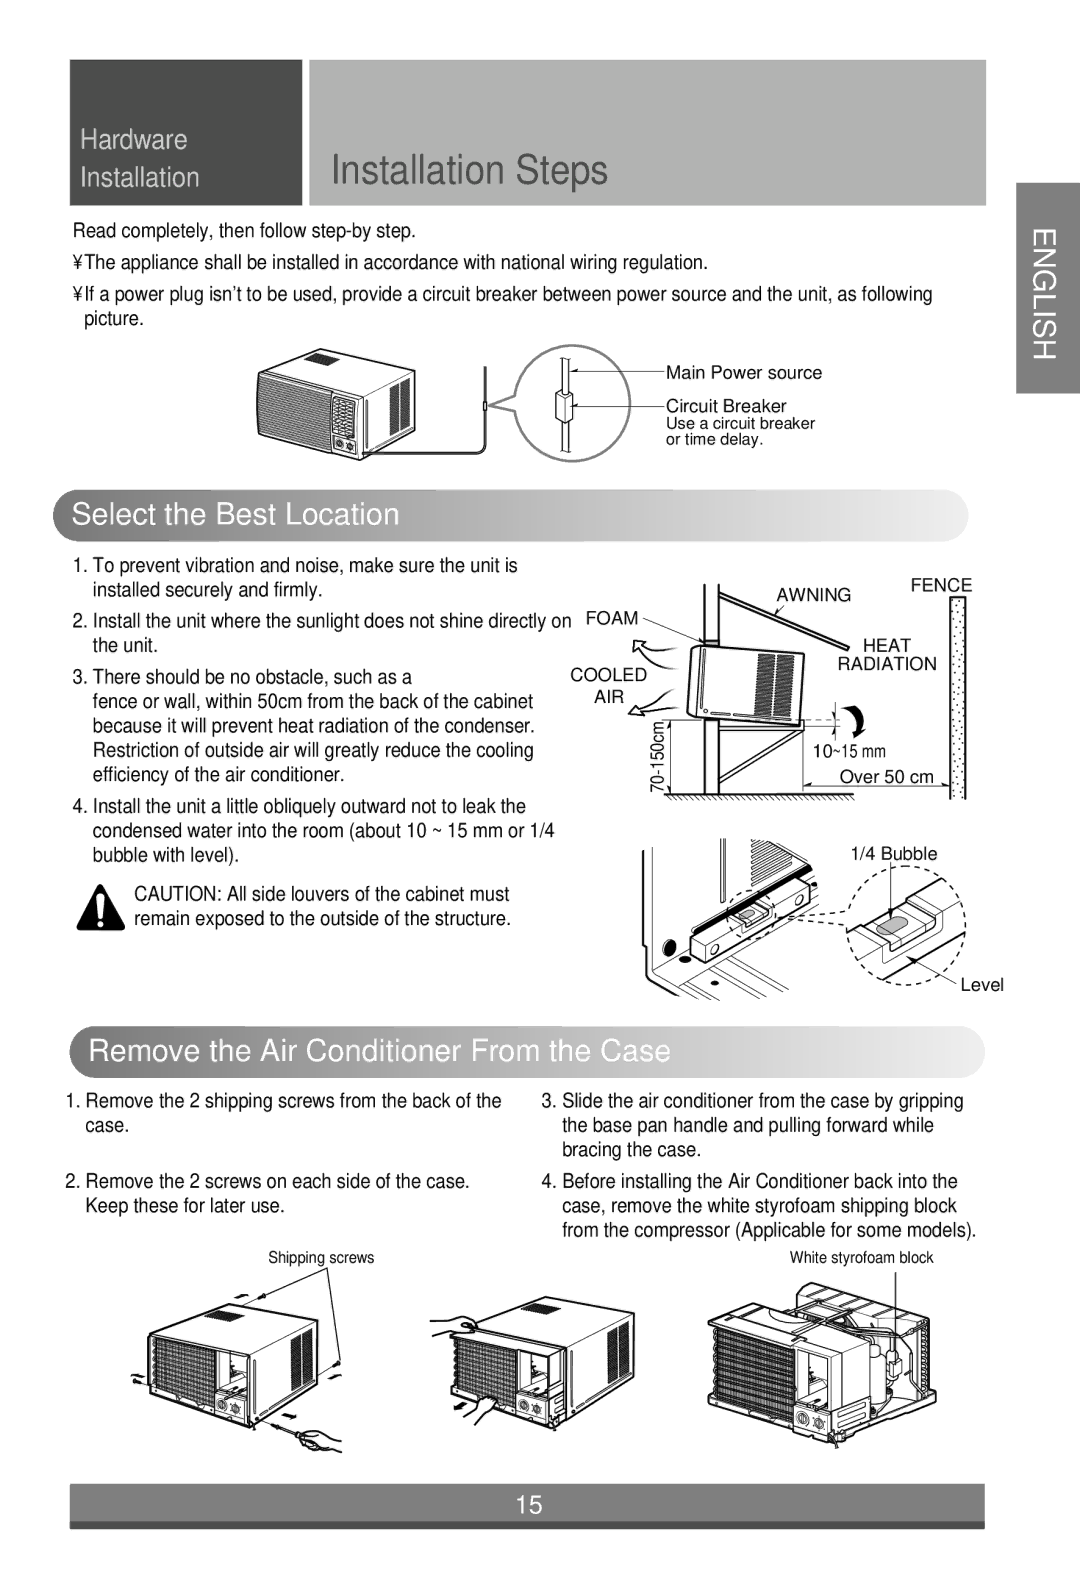
•If a power plug isn't to be used, provide a circuit breaker between power source and the unit, as following picture.
Main Power source
![]() Circuit Breaker
Circuit Breaker
Use a circuit breaker or time delay.
ENGLISH

 Select
 the
the Best
Best Location


1.To prevent vibration and noise, make sure the unit is installed securely and firmly.
2. Install the unit where the sunlight does not shine directly on FOAM the unit.
AWNING FENCE
HEAT
RADIATION
3.There should be no obstacle, such as a
fence or wall, within 50cm from the back of the cabinet because it will prevent heat radiation of the condenser. Restriction of outside air will greatly reduce the cooling efficiency of the air conditioner.
4.Install the unit a little obliquely outward not to leak the condensed water into the room (about 10 ~ 15 mm or 1/4 bubble with level).
COOLED
AIR ![]()
![]()
![]()
![]()
![]()
10~15 mm Over 50 cm
1/4 Bubble
CAUTION: All side louvers of the cabinet must remain exposed to the outside of the structure.
Level

 Remove
 the
the Air
Air Conditioner
 From
From the
the Case
Case


1. | Remove the 2 shipping screws from the back of the | 3. | Slide the air conditioner from the case by gripping |
| case. |
| the base pan handle and pulling forward while |
|
|
| bracing the case. |
2. | Remove the 2 screws on each side of the case. | 4. | Before installing the Air Conditioner back into the |
| Keep these for later use. |
| case, remove the white styrofoam shipping block |
|
|
| from the compressor (Applicable for some models). |
| Shipping screws |
| White styrofoam block |
15
