English | Follow these steps to install the monitor |
| INSTALLATION |
1.Before you connect the cables, make sure the monitor and system unit power switches are OFF.
2.Plug one end of the
3.Attach the power cord to the “POWER IN” jack of the LCD monitor. Plug the end of power cord into an AC wall outlet.
5. Turn on your computer and your LCD monitor.
u |
v |
w |
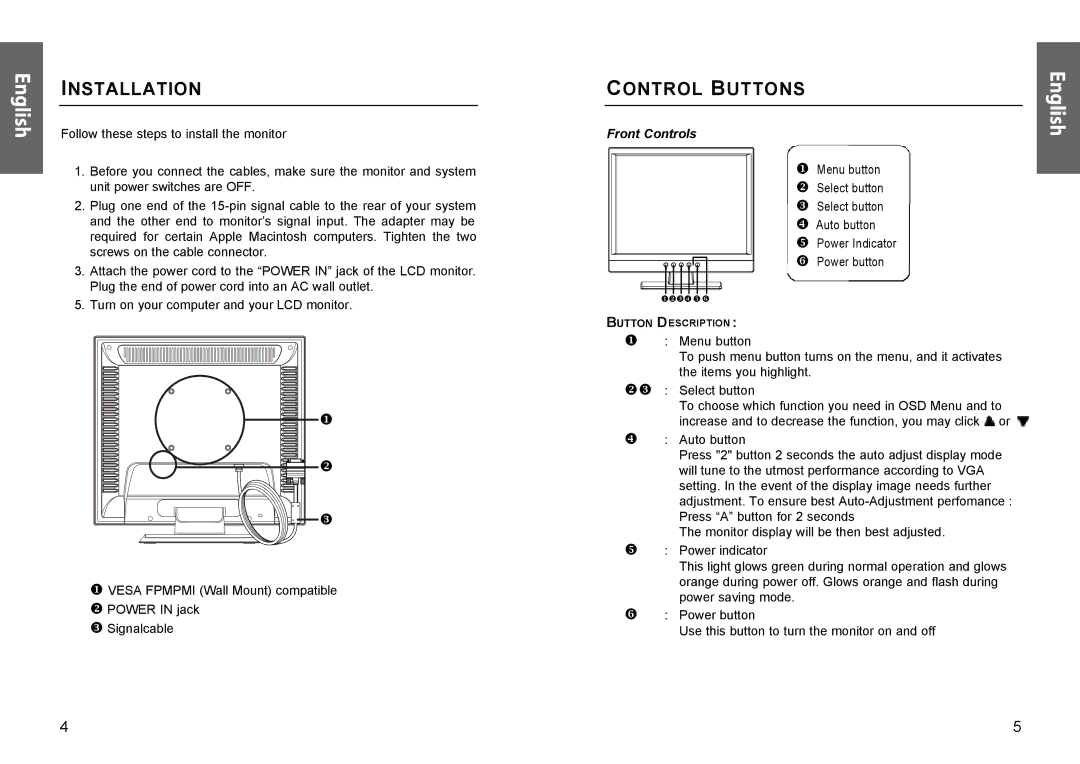
uVESA FPMPMI (Wall Mount) compatible v POWER IN jack
w Signalcable
CONTROL BUTTONS
Front Controls
uMenu button v Select button w Select button x Auto button y Power Indicator
z Power button
uvwxyz
BUTTON DESCRIPTION :
u: Menu button
To push menu button turns on the menu, and it activates the items you highlight.
vw : Select button
To choose which function you need in OSD Menu and to increase and to decrease the function, you may click ![]() or
or ![]()
x: Auto button
Press "2" button 2 seconds the auto adjust display mode will tune to the utmost performance according to VGA setting. In the event of the display image needs further adjustment. To ensure best
The monitor display will be then best adjusted.
y: Power indicator
This light glows green during normal operation and glows orange during power off. Glows orange and flash during power saving mode.
z: Power button
Use this button to turn the monitor on and off
English
4 | 5 |