Copying recorded images
You can copy the still image being displayed to a USB memory device or DVD/CD disc as a still or moving image
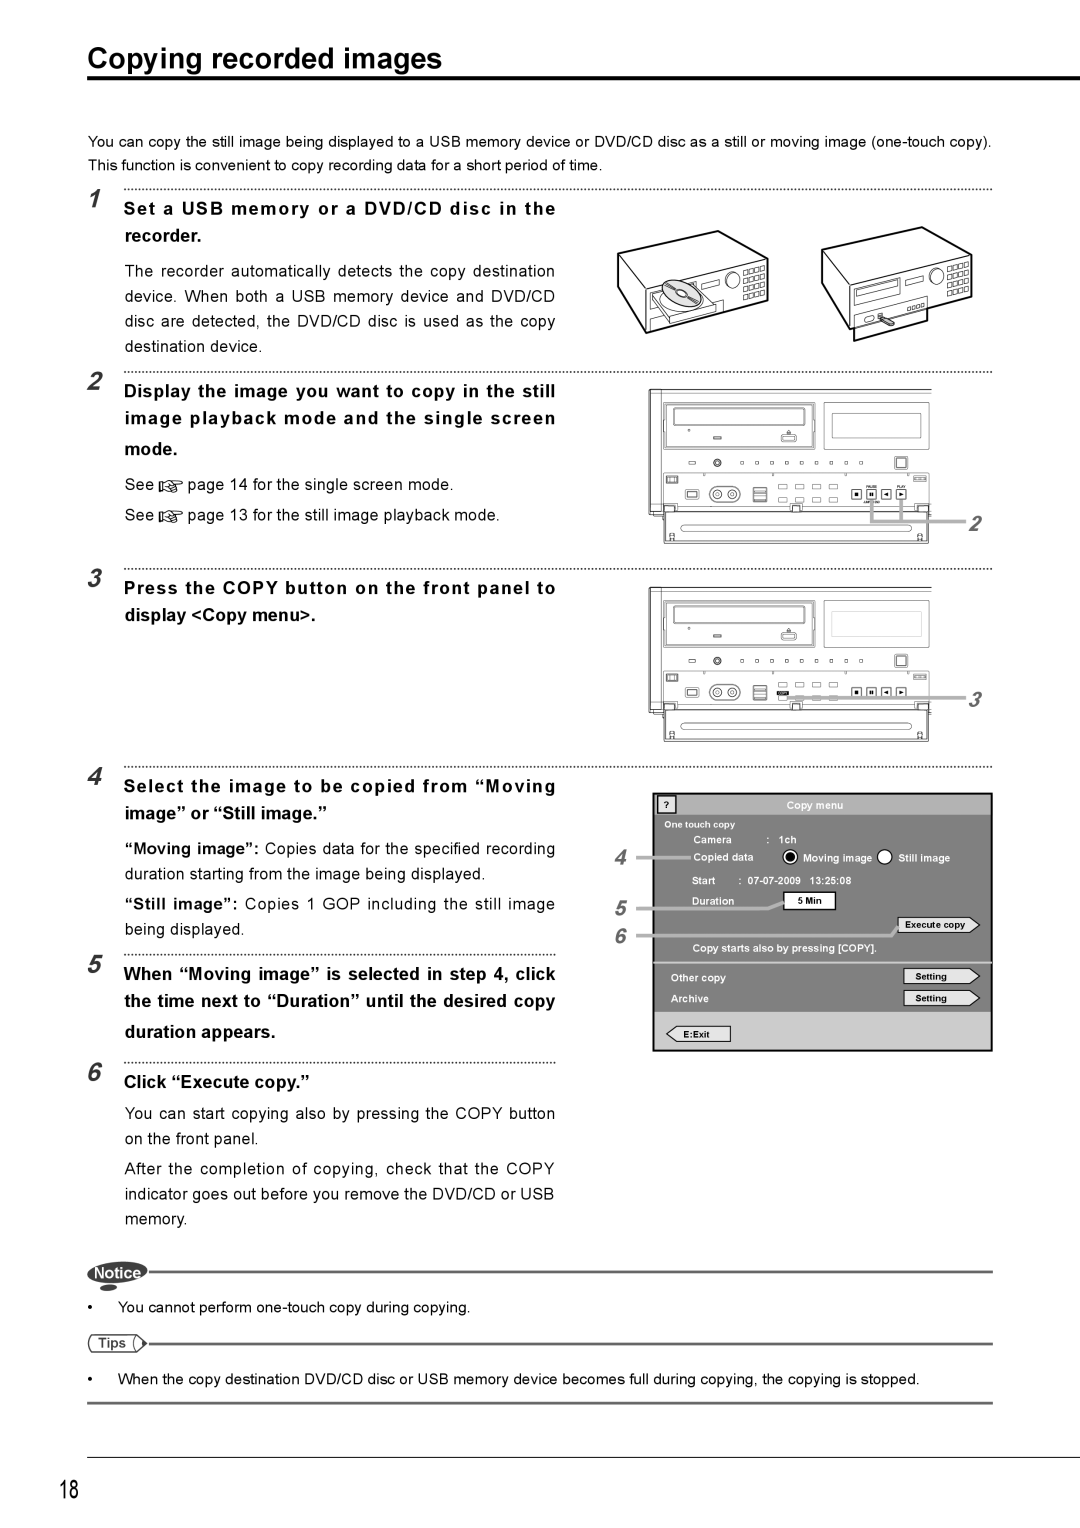
1 Set a USB memory or a DVD/CD disc in the recorder.
The recorder automatically detects the copy destination device. When both a USB memory device and DVD/CD disc are detected, the DVD/CD disc is used as the copy destination device.
2 Display the image you want to copy in the still image playback mode and the single screen mode.
See ![]() page 14 for the single screen mode.
page 14 for the single screen mode.
See ![]() page 13 for the still image playback mode.
page 13 for the still image playback mode.
3 Press the COPY button on the front panel to display <Copy menu>.
4 | Select the image to be copied from “Moving |
| image” or “Still image.” |
| “Moving image”: Copies data for the specified recording |
| duration starting from the image being displayed. |
| “Still image”: Copies 1 GOP including the still image |
| being displayed. |
5 | When “Moving image” is selected in step 4, click |
| the time next to “Duration” until the desired copy |
| duration appears. |
6 | Click “Execute copy.” |
2
3
?Copy menu
| One touch copy |
|
|
|
|
|
| Camera |
| : 1ch |
| ||
4 | Copied data |
| Moving image | Still image | ||
| Start | : |
| |||
5 | Duration |
|
| 5 Min |
|
|
|
|
|
|
| Execute copy | |
6 |
|
|
|
|
| |
Copy starts also by pressing [COPY]. |
| |||||
|
| |||||
|
|
|
|
|
|
|
| Other copy |
|
|
|
| Setting |
| Archive |
|
|
|
| Setting |
|
|
|
|
|
|
|
| E:Exit |
|
|
|
|
|
|
|
|
|
|
|
|
You can start copying also by pressing the COPY button on the front panel.
After the completion of copying, check that the COPY indicator goes out before you remove the DVD/CD or USB memory.
Notice
•You cannot perform
Tips ![]()
![]()
•When the copy destination DVD/CD disc or USB memory device becomes full during copying, the copying is stopped.
18
