grating step aft. Square these areas and sand the deck smooth (see Figure 4).
At this stage, the hull is fully shaped. Go over the entire hull with sandpaper, using #220 grit for the final smoothing. Be careful not to round the upper edges of the rail, the hull angle aft, and the bot- tom (waterline). These should be sharp corners.
Before proceeding to the next stage, it would be a good idea to drill a couple of pilot holes in the bottom of the hull if you intend to have the boat mounted on a baseboard.
STAGE B
COMPLETING THE BASIC HULL
1. Installing the Stem
Precut the stem and glue it to the bow. The stem should have a very slight taper to it. Make sure the grain of the wood is in line with the piece.
2. Installing the
Rubbing Strakes
Using a 1/16" strip,
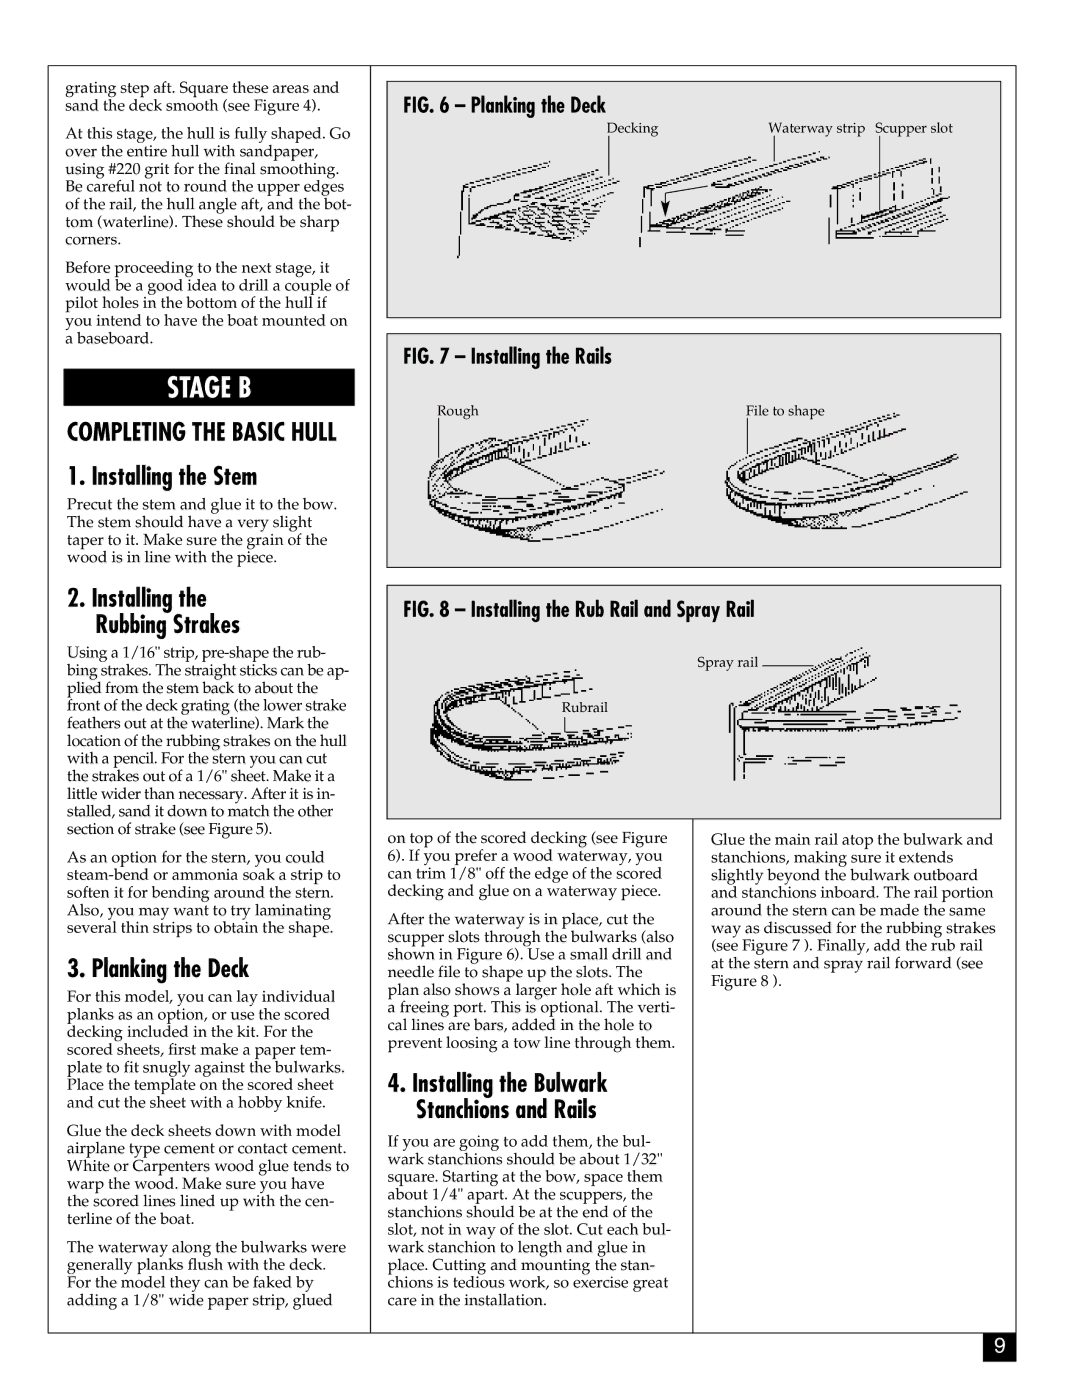
FIG. 6 – Planking the Deck
Decking | Waterway strip Scupper slot |
FIG. 7 – Installing the Rails
Rough | File to shape |
FIG. 8 – Installing the Rub Rail and Spray Rail
Spray rail
Rubrail
As an option for the stern, you could
3. Planking the Deck
For this model, you can lay individual planks as an option, or use the scored decking included in the kit. For the scored sheets, first make a paper tem- plate to fit snugly against the bulwarks. Place the template on the scored sheet and cut the sheet with a hobby knife.
Glue the deck sheets down with model airplane type cement or contact cement. White or Carpenters wood glue tends to warp the wood. Make sure you have the scored lines lined up with the cen- terline of the boat.
The waterway along the bulwarks were generally planks flush with the deck. For the model they can be faked by adding a 1/8" wide paper strip, glued
on top of the scored decking (see Figure 6). If you prefer a wood waterway, you can trim 1/8" off the edge of the scored decking and glue on a waterway piece.
After the waterway is in place, cut the scupper slots through the bulwarks (also shown in Figure 6). Use a small drill and needle file to shape up the slots. The plan also shows a larger hole aft which is a freeing port. This is optional. The verti- cal lines are bars, added in the hole to prevent loosing a tow line through them.
4.Installing the Bulwark Stanchions and Rails
If you are going to add them, the bul- wark stanchions should be about 1/32" square. Starting at the bow, space them about 1/4" apart. At the scuppers, the stanchions should be at the end of the slot, not in way of the slot. Cut each bul- wark stanchion to length and glue in place. Cutting and mounting the stan- chions is tedious work, so exercise great care in the installation.
Glue the main rail atop the bulwark and stanchions, making sure it extends slightly beyond the bulwark outboard and stanchions inboard. The rail portion around the stern can be made the same way as discussed for the rubbing strakes (see Figure 7 ). Finally, add the rub rail at the stern and spray rail forward (see Figure 8 ).
9