Filter Replacement and Care
Step 4. Setting the Controls
CAUTION: To help retard bacteria growth and keep maximum efficiency, the filter should be replaced at least once per season, or more often under hard water conditions. Use MAF2 replacement filter.
5. Take note of the filter position. |
Remove the filter. You may want |
to clean the base at this time. See |
the “Cleaning and Maintenance” |
section of this manual. |
6. Install a new filter (MAF2) into |
the base. Position the filter |
between the uprights in the bottom |
of the base. The filter should be |
Where you set your desired humidity levels depends on your personal comfort level, outside temperature and inside temperature. A starting Set point of 30%- 40% ROOM humidity is recommended but there may be conditions that require a different setting.
| Recommended |
When Outdoor | Indoor Relative |
Temperature is: | Humidity is: |
| 20% |
2˚F | 25% |
10˚F | 30% |
> 20˚F | 35% |
|
|
WARNING: To reduce the risk of shock or injury from moving parts, always unplug humidifier before removing or replacing any parts.
Replace the evaporative wicking filter at least once per humidification season or more depending on water conditions in your area.
resting on the floor of the base. |
7. Return the upper housing to the |
base by first placing the hooks |
located near the front of the base |
into the mating holes in the upper |
housing. Then tilt the upper |
housing down towards the base |
until the rear snap engages the |
main housing. |
The chart provided offers general guidelines for selecting indoor humidity.
IMPORTANT: Water damage may result if condensation starts to form on windows or walls. Humidity SET point should be lowered until condensation no longer forms. We recommend room humidity levels do not exceed 50%.
Filter Replacement
1.Unplug humidifier. Before removing the filter, move the humidifier to an area not susceptible to water damage. (i.e. kitchen or bath areas).
2.Remove the water bottle and set aside. Be sure not to bump or damage the fill valve.
3.The upper housing and the base are held together by two hooks at the front of the housing and a flexible snap in the rear. To remove the housing, press in on the triangular shaped snap at the rear of the humidifier, below the cord exit, while lifting upward, tilting the upper housing forward to clear the hooks at the front of the base.
4.Set the upper housing aside.
The filter is now accessible.
8. Reposition the humidifier to its |
operating position. |
9. The humidifier is now ready to |
be filled for operation. |
Operating the Controls
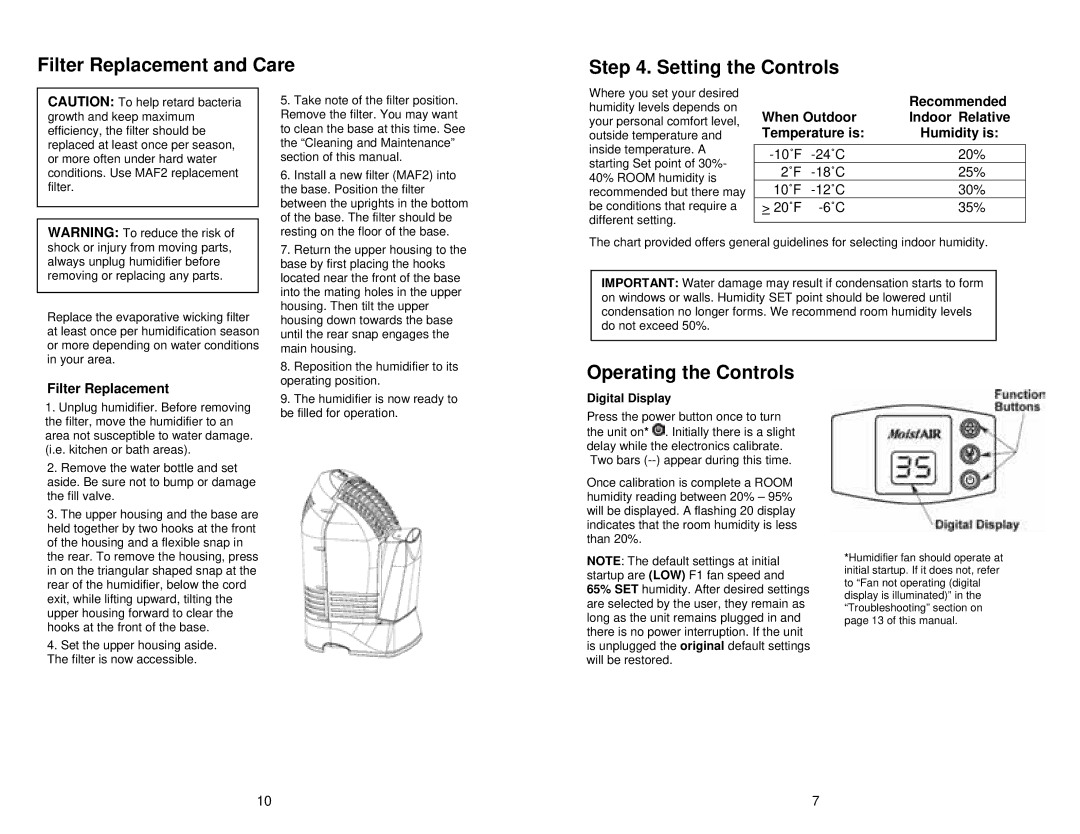
Digital Display
Press the power button once to turn the unit on* ![]() . Initially there is a slight delay while the electronics calibrate. Two bars
. Initially there is a slight delay while the electronics calibrate. Two bars
Once calibration is complete a ROOM humidity reading between 20% – 95% will be displayed. A flashing 20 display indicates that the room humidity is less than 20%.
NOTE: The default settings at initial startup are (LOW) F1 fan speed and
65% SET humidity. After desired settings are selected by the user, they remain as long as the unit remains plugged in and there is no power interruption. If the unit is unplugged the original default settings will be restored.
*Humidifier fan should operate at initial startup. If it does not, refer to “Fan not operating (digital display is illuminated)” in the “Troubleshooting” section on page 13 of this manual.
10 | 7 |