
VFCS20DNV, VFCS20DPV, VFCS30DPV, VFCS30DNV specifications
Monessen Hearth has long been synonymous with high-quality and efficient heating solutions, and their range of direct-vent gas fireplaces, including the VFCS30DNV, VFCS30DPV, VFCS20DPV, and VFCS20DNV models, exemplify this commitment. These fireplaces offer both aesthetic appeal and advanced technology, making them suitable for any home.One of the key features of the VFCS series is its impressive heat output. The VFCS30DNV and VFCS30DPV are designed to deliver substantial warmth, making them ideal for larger spaces. With a heat output of up to 30,000 BTUs, these models ensure consistent and comfortable heating during the cold months. The VFCS20 variants, while slightly smaller, still provide a robust performance with a maximum output of 20,000 BTUs, making them perfect for cozy living rooms or smaller areas.
In terms of design, these fireplaces are incredibly versatile, featuring sleek and modern aesthetic options. The VFCS models come with a wide viewing area, framed with stylish surrounds, which allows for an expansive view of the mesmerizing flame patterns. Additionally, they offer a choice of interior finishes like traditional brick or contemporary black, letting homeowners customize their fireplace to match their interior décor.
Incorporating advanced technology, these fireplaces use a direct vent system, ensuring efficient combustion and optimal heat distribution. This system allows for the safe venting of gases outside, creating a cleaner and healthier indoor atmosphere. The fireplaces operate on natural gas or propane, providing flexibility based on the homeowner's preferences and availability.
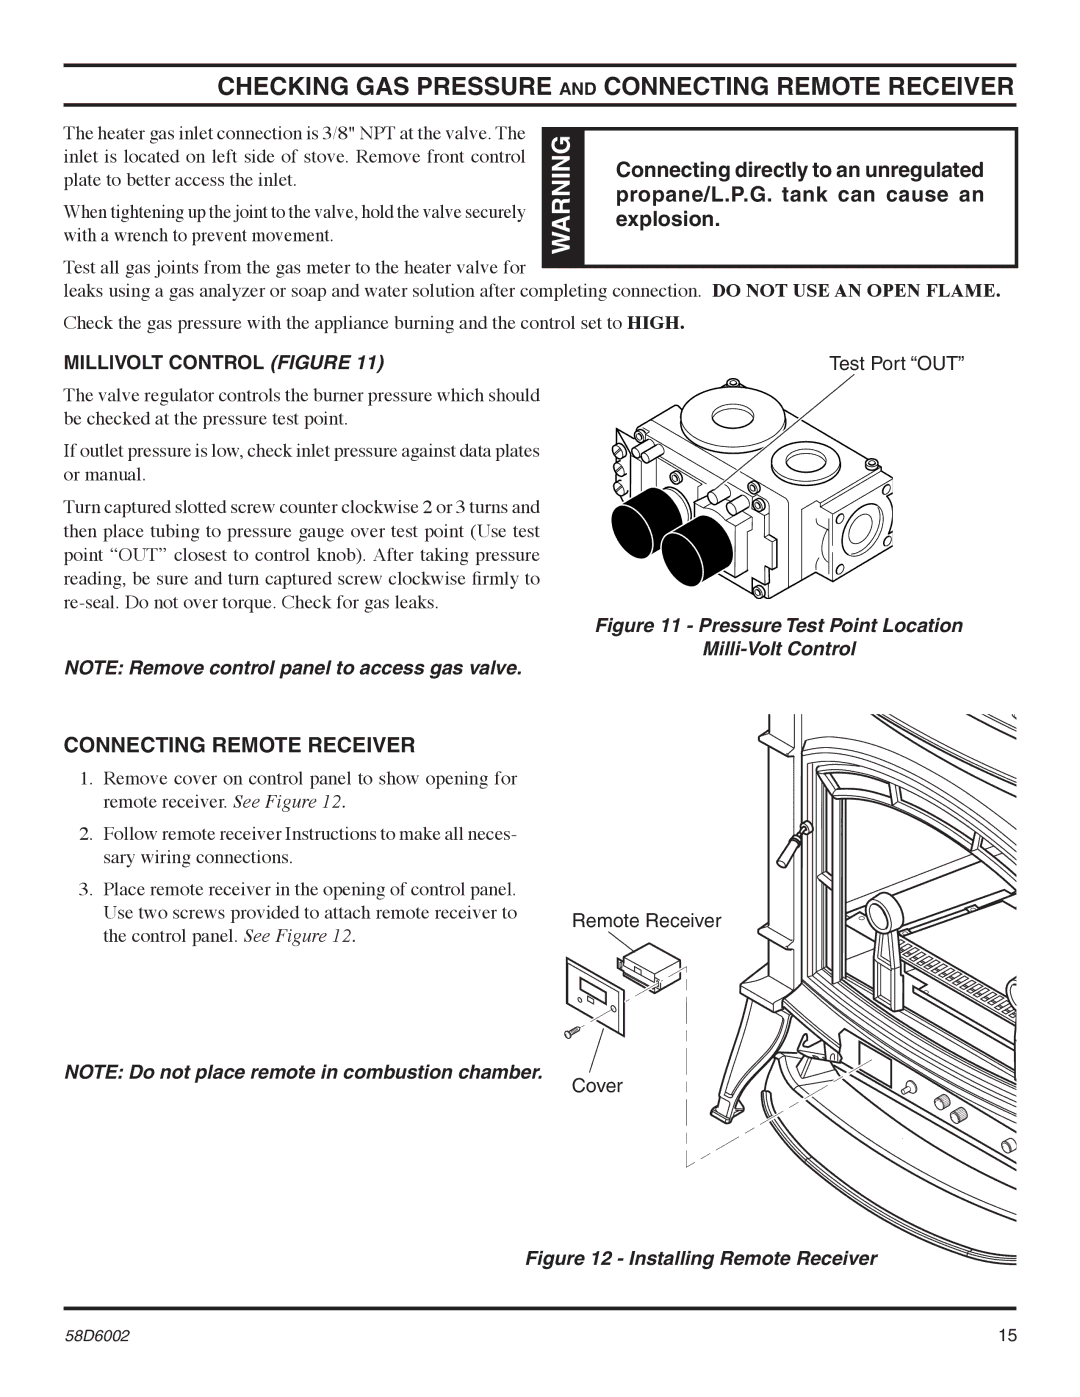
Moreover, Monessen Hearth's VFCS models are equipped with user-friendly controls, enhancing the overall functionality. The optional remote control and wall switch make it easy to operate the fireplace, allowing users to adjust the flame height and heat output according to their comfort level without the need to leave their seat.
Energy efficiency is another hallmark of these fireplaces. With high-efficiency ratings, they provide significant savings on heating bills while delivering a cozy environment. The multi-functionality of the VFCS series also allows for the addition of decorative elements, such as glass media or logs, further enhancing the atmospheric appeal.
In summary, Monessen Hearth's VFCS30DNV, VFCS30DPV, VFCS20DPV, and VFCS20DNV models bring together aesthetics, efficiency, and advanced technology, making them an exceptional choice for anyone looking to add warmth and elegance to their home. Whether for heating a spacious area or a snug room, these direct-vent gas fireplaces meet a variety of needs with style and reliability.