Unpacking
Care must be taken at all times when handling the GSW12 due to the extreme weight of the product. We recommend a
The feet/spike assemblies and mains power cord/s are contained within the packaging and should be removed.
Please select the power cord appropriate to your Country/location. Mains voltage selection for
To remove the GSW12 from its carton, place some protective material on the floor and having removed any items of packing from the top of the pack carefully invert the carton. (Also see icons on the carton). Gradually pull the carton upwards to expose the subwoofer, which will be presented with its base uppermost. Remove fixing tape from the bag and expose the base of the cabinet to allow fitting of the spiked feet into the M10 threaded inserts as described below.
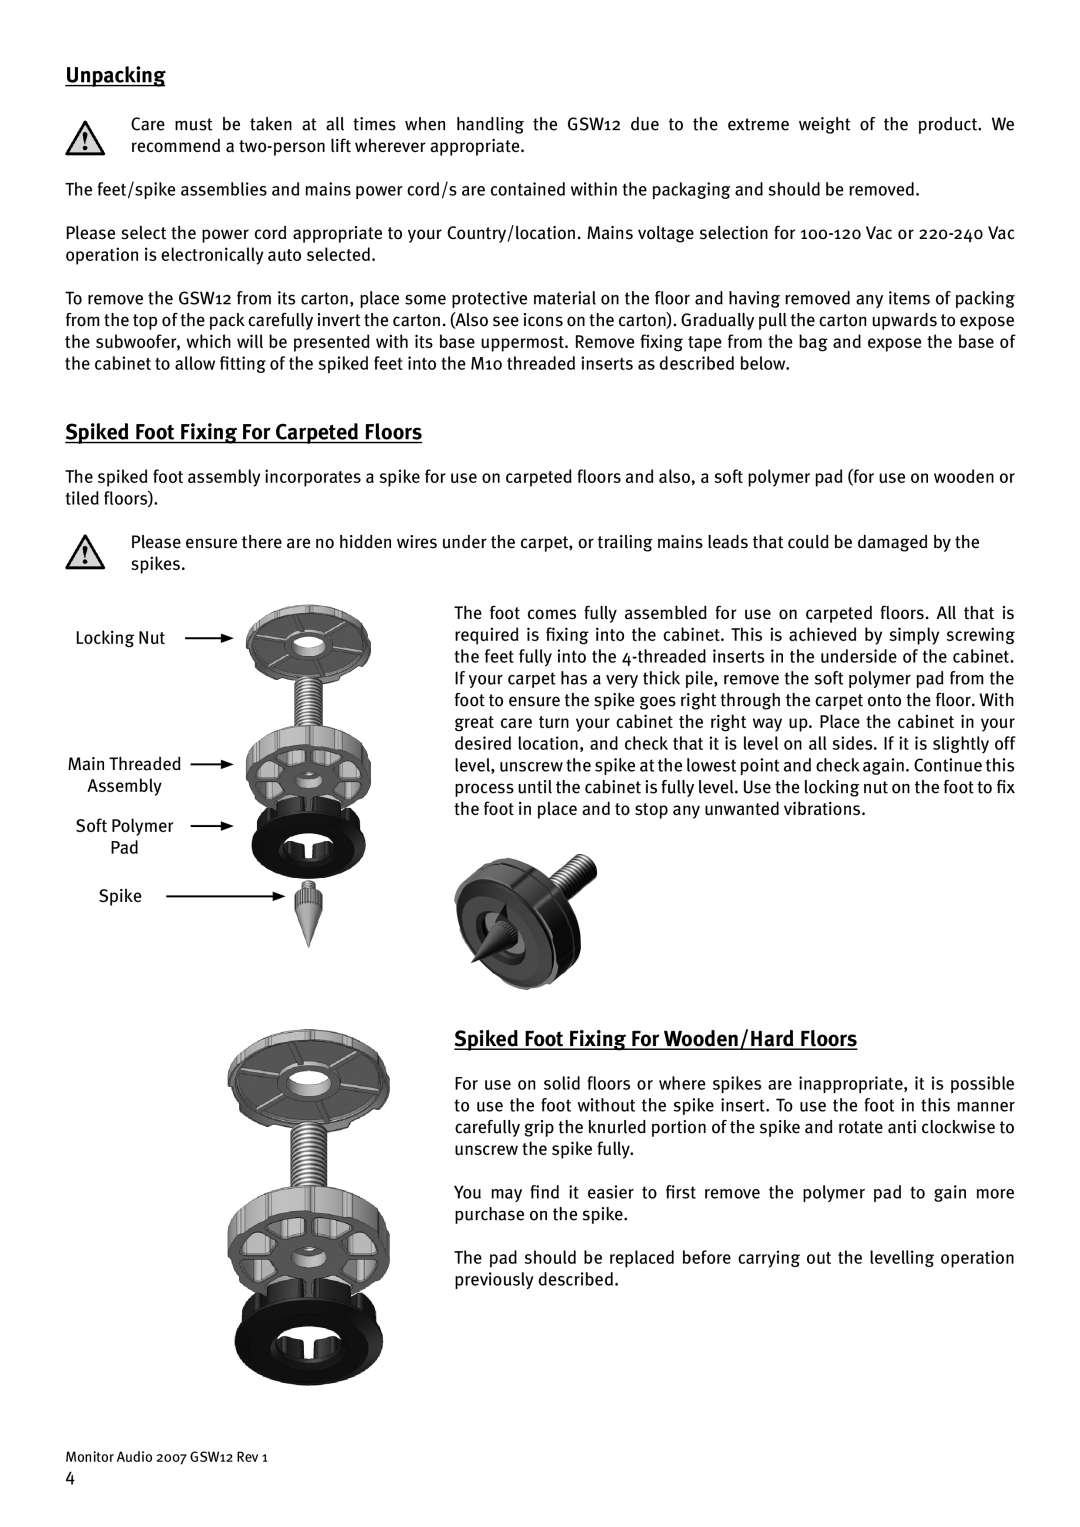
Spiked Foot Fixing For Carpeted Floors
The spiked foot assembly incorporates a spike for use on carpeted floors and also, a soft polymer pad (for use on wooden or tiled floors).
Please ensure there are no hidden wires under the carpet, or trailing mains leads that could be damaged by the spikes.
Locking Nut
Main Threaded ![]() Assembly
Assembly
Soft Polymer
Pad
Spike
The foot comes fully assembled for use on carpeted floors. All that is required is fixing into the cabinet. This is achieved by simply screwing the feet fully into the
Spiked Foot Fixing For Wooden/Hard Floors
For use on solid floors or where spikes are inappropriate, it is possible to use the foot without the spike insert. To use the foot in this manner carefully grip the knurled portion of the spike and rotate anti clockwise to unscrew the spike fully.
You may find it easier to first remove the polymer pad to gain more purchase on the spike.
The pad should be replaced before carrying out the levelling operation previously described.
Monitor Audio 2007 GSW12 Rev 1
4