
3ASR52XXD specifications
The Monte Carlo Fan Company 3ASR52XXD ceiling fan is a perfect blend of modern aesthetics and advanced technology, designed to enhance the ambiance and comfort of any room. With its sleek design and energy-efficient performance, this fan stands out in the competitive ceiling fan market.One of the main features of the 3ASR52XXD is its 52-inch blade span, making it suitable for medium to large rooms while providing an optimal airflow distribution. The fan is engineered with a powerful motor that delivers impressive air movement, ensuring a cool and comfortable environment even in the warmest of settings. The fan operates quietly, allowing for a peaceful atmosphere, which is particularly beneficial for bedrooms and home offices.
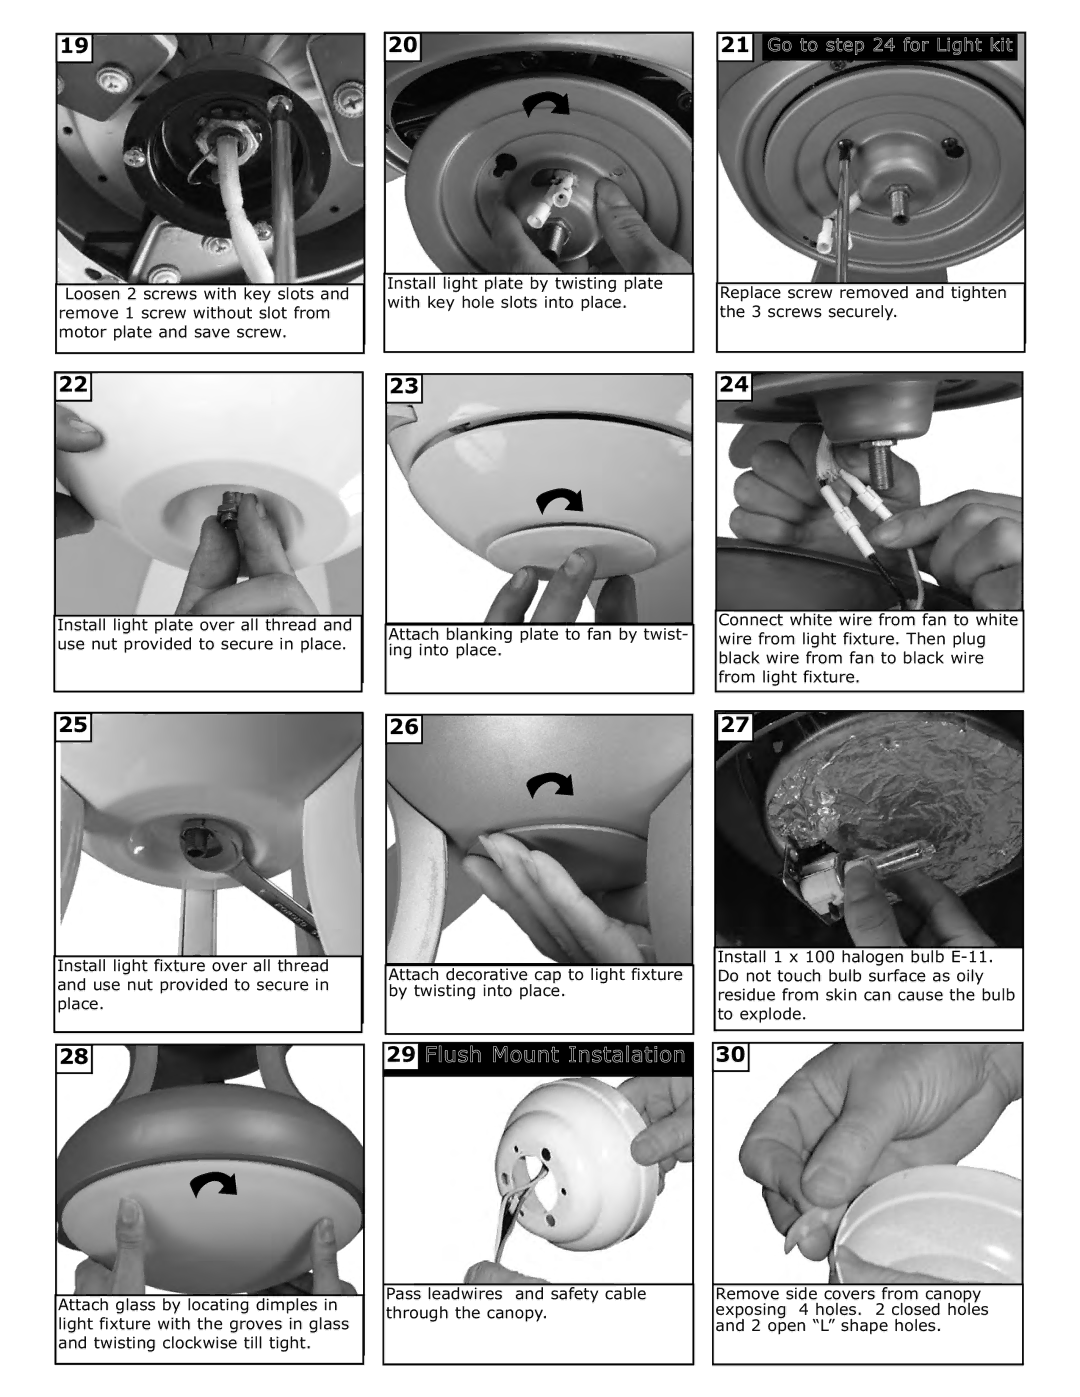
The Monte Carlo 3ASR52XXD is equipped with a variety of technologies that enhance its functionality. One notable feature is the remote control capability, which allows users to easily control the fan speed and light settings from anywhere in the room. This convenience is complemented by the integrated LED light kit, providing energy-efficient illumination that minimizes electricity consumption while delivering ample light.
Another characteristic worth highlighting is the fan's stylish finish. Available in various color options such as matte black, brushed steel, and white, the 3ASR52XXD can seamlessly integrate into any decor style, from contemporary to traditional. The blades are designed for durability and are crafted from high-quality materials that resist warping and fading, ensuring long-lasting performance.
Furthermore, the Monte Carlo Fan Company emphasizes energy efficiency, and the 3ASR52XXD meets the stringent Energy Star requirements. This not only helps in reducing utility bills but also contributes to a more sustainable environment. The fan features three distinct speed settings, allowing for customizable airflow to meet different preferences.
In conclusion, the Monte Carlo Fan Company 3ASR52XXD ceiling fan is a remarkable choice for those seeking a stylish, efficient, and functional ceiling fan. Its blend of powerful performance, modern design, and innovative features makes it a valuable addition to any home setting. Whether for cooling a living space, providing ambient lighting, or simply enhancing decor, the 3ASR52XXD is an excellent investment.