
5AYR54 Series specifications
The Monte Carlo Fan Company 5AYR54 Series is a standout in the world of ceiling fans, combining modern design with superior engineering to deliver both style and functionality. With a sleek and sophisticated aesthetic, this fan is designed to complement a wide range of interior designs, making it an excellent choice for any room in your home.One of the main features of the 5AYR54 Series is its 54-inch blade span, which allows for optimal airflow in medium to large spaces. This size strikes a perfect balance, ensuring adequate coverage while maintaining a stylish appearance. The blades are crafted from durable materials that provide longevity and stability, contributing to the fan's overall performance.
Equipped with a powerful yet quiet motor, the Monte Carlo 5AYR54 Series ensures a smooth operation while effectively circulating air. This technology allows homeowners to enjoy a comfortable living environment without the disturbance of excessive noise. Additionally, the fan operates with multiple speed settings, enabling users to adjust the airflow according to their preferences and seasonal needs.
The 5AYR54 Series stands out with its integrated LED light kit, offering energy-efficient illumination to brighten living spaces. The light kit is not only functional but is designed to blend seamlessly with the fan's overall look. The LED bulbs provide ample light while consuming minimal energy, aligning with modern sustainability practices.
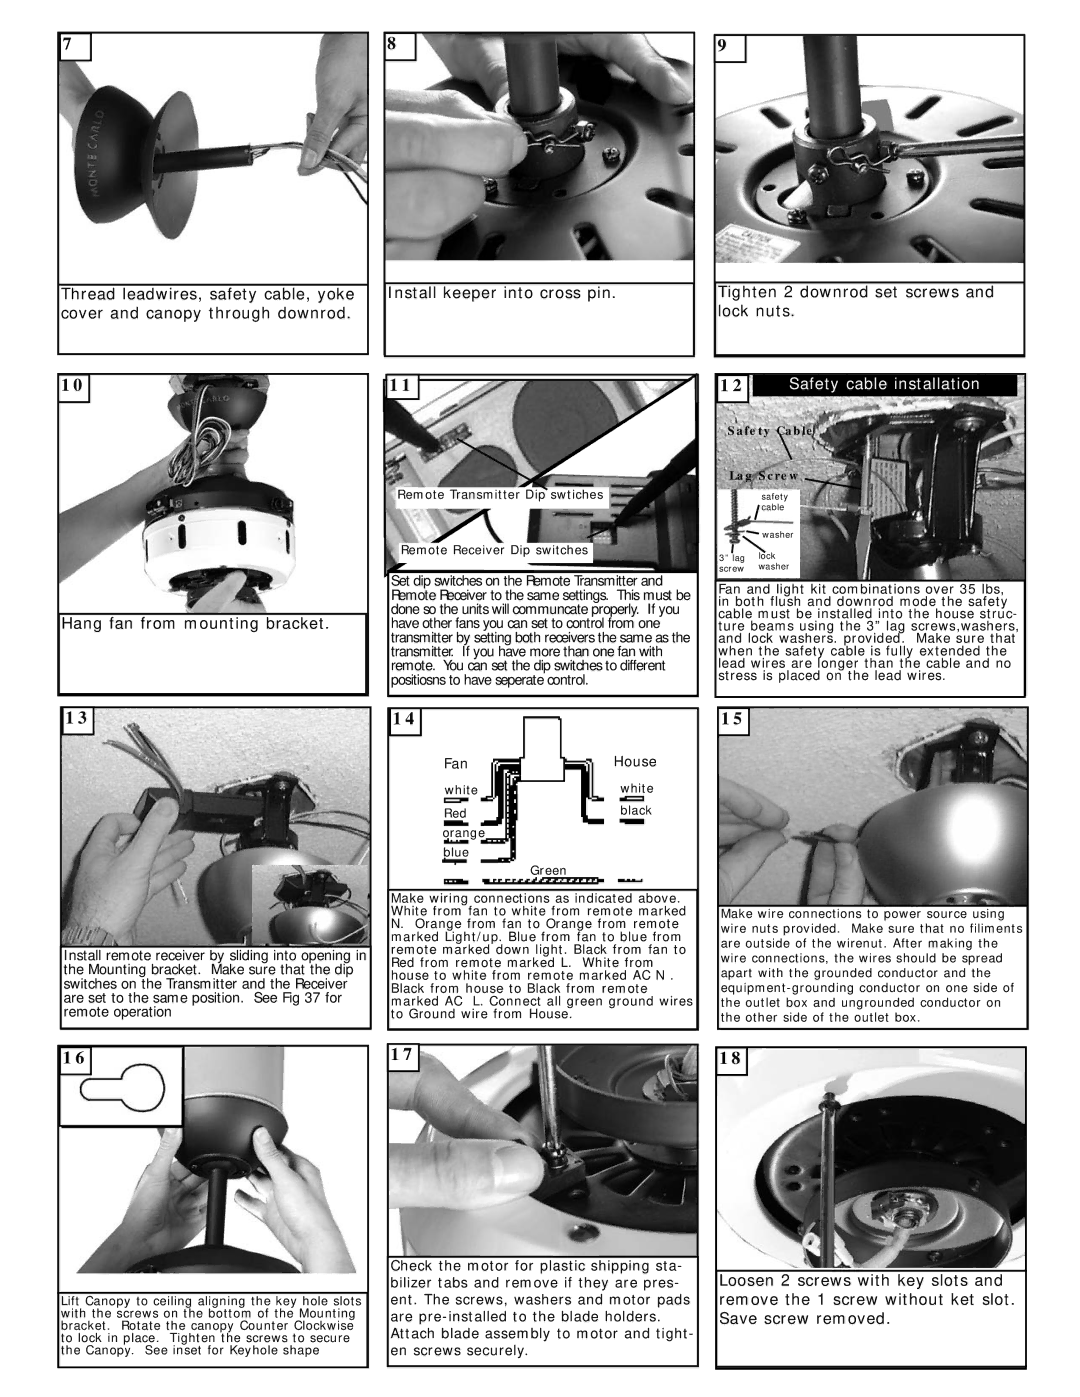
Another notable characteristic of the Monte Carlo 5AYR54 Series is its easy installation process. Designed for convenience, the fan includes a comprehensive instruction manual that guides homeowners through installation with ease. Its versatile mounting options allow for both standard and angled ceilings, making it suitable for various rooms, including living rooms, bedrooms, and even outdoor patios.
The fan also features a reversible motor, which enables it to provide cool breezes during the warmer months and redistribute warm air during colder periods. This versatility enhances the fan's functionality year-round, making it a wise investment for homeowners.
In summary, the Monte Carlo Fan Company 5AYR54 Series exemplifies a perfect blend of style, technology, and efficiency. With a powerful motor, integrated LED lighting, and versatile functionality, it serves as an excellent cooling solution for contemporary living spaces while effortlessly enhancing the decor. Whether you are looking for comfort or appealing aesthetics, this ceiling fan is sure to deliver on all fronts.