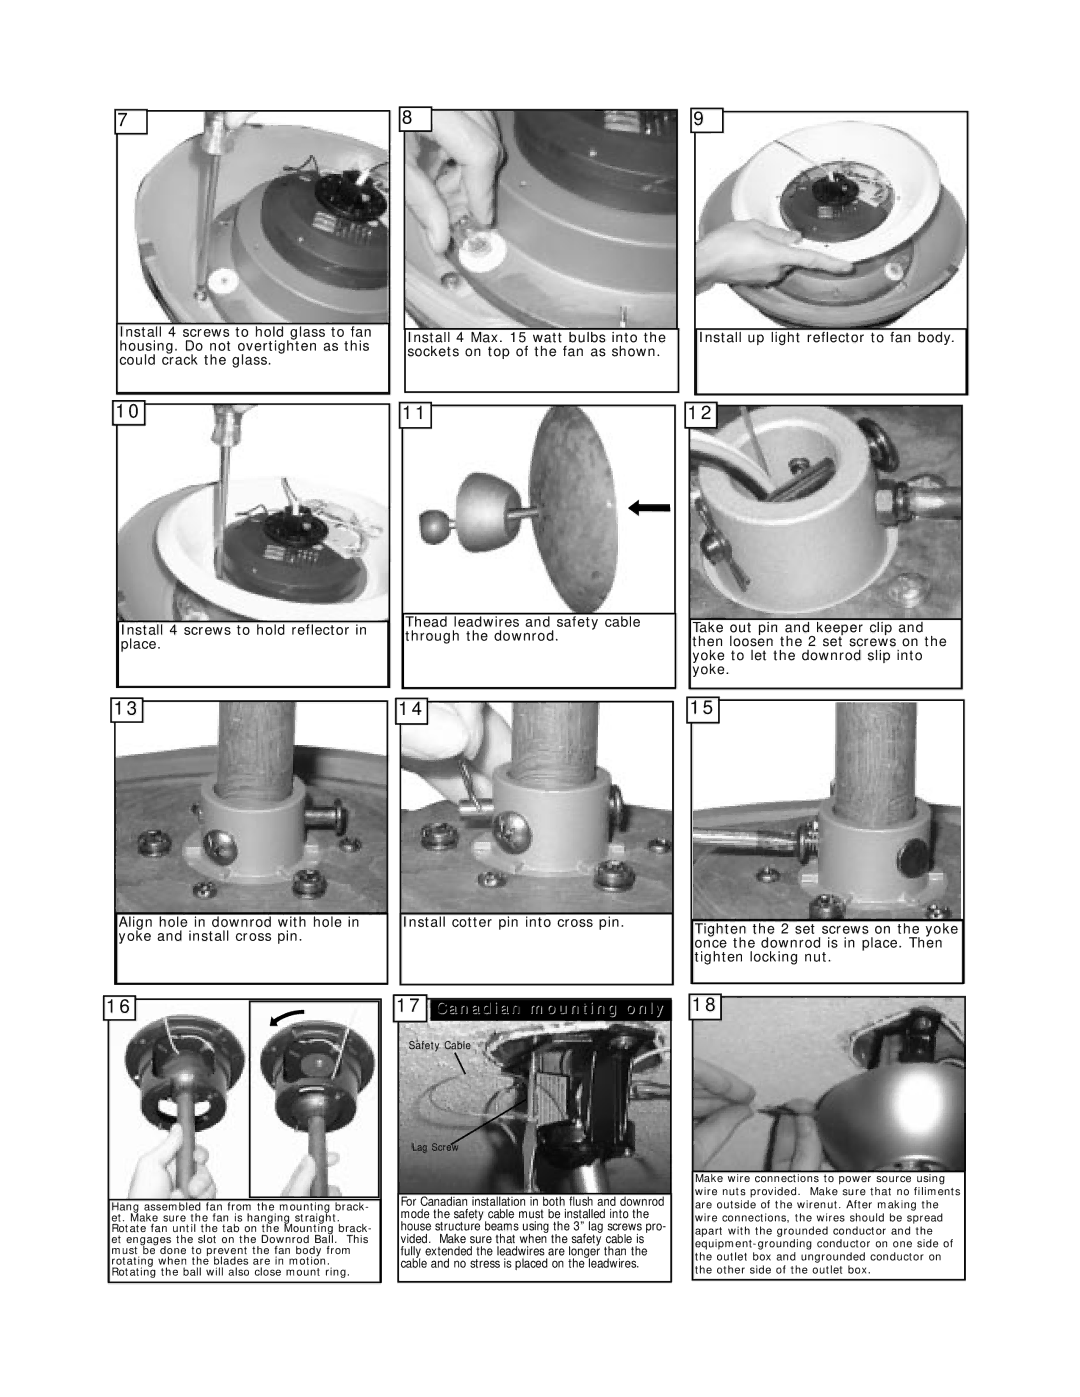
7
Install 4 screws to hold glass to fan housing. Do not overtighten as this could crack the glass.
8
Install 4 Max. 15 watt bulbs into the sockets on top of the fan as shown.
9
Install up light reflector to fan body.
10
Install 4 screws to hold reflector in place.
11
Thead leadwires and safety cable through the downrod.
12
Take out pin and keeper clip and then loosen the 2 set screws on the yoke to let the downrod slip into yoke.
13
Align hole in downrod with hole in yoke and install cross pin.
14
Install cotter pin into cross pin.
15
Tighten the 2 set screws on the yoke once the downrod is in place. Then tighten locking nut.
16
Hang assembled fan from the mounting brack- et. Make sure the fan is hanging straight. Rotate fan until the tab on the Mounting brack- et engages the slot on the Downrod Ball. This must be done to prevent the fan body from rotating when the blades are in motion. Rotating the ball will also close mount ring.
17Canadian mounting only
Safety Cable
Lag Screw
For Canadian installation in both flush and downrod mode the safety cable must be installed into the house structure beams using the 3” lag screws pro- vided. Make sure that when the safety cable is fully extended the leadwires are longer than the cable and no stress is placed on the leadwires.
18
Make wire connections to power source using wire nuts provided. Make sure that no filiments are outside of the wirenut. After making the wire connections, the wires should be spread apart with the grounded conductor and the