45076 rev1 22/3/07 08:52 Page 6
BEFORE FIRST USE
Refer to the assembly sequence in section ‘Assembly/disassembly sequence’.
When unpacking the fryer, make sure all packaging material is removed.
WARNING: make sure that your fryer is disconnected from the electricity supply.
Please note: Remove the filter from the lid before washing lid.
Remove the oil storage container, ladle, frying basket, non stick oil tank, lid, body and wash these by hand in hot soapy water. Please note: do not leave in water to soak for a long period of time.
WARNING: Do not immerse the control panel in water.
Dry all parts of your fryer thoroughly and replace the oil tank, basket and lid.
Replace the oil tank with the max/min lines to the rear. (Please follow the cleaning instructions).
OPERATION
Lid operation
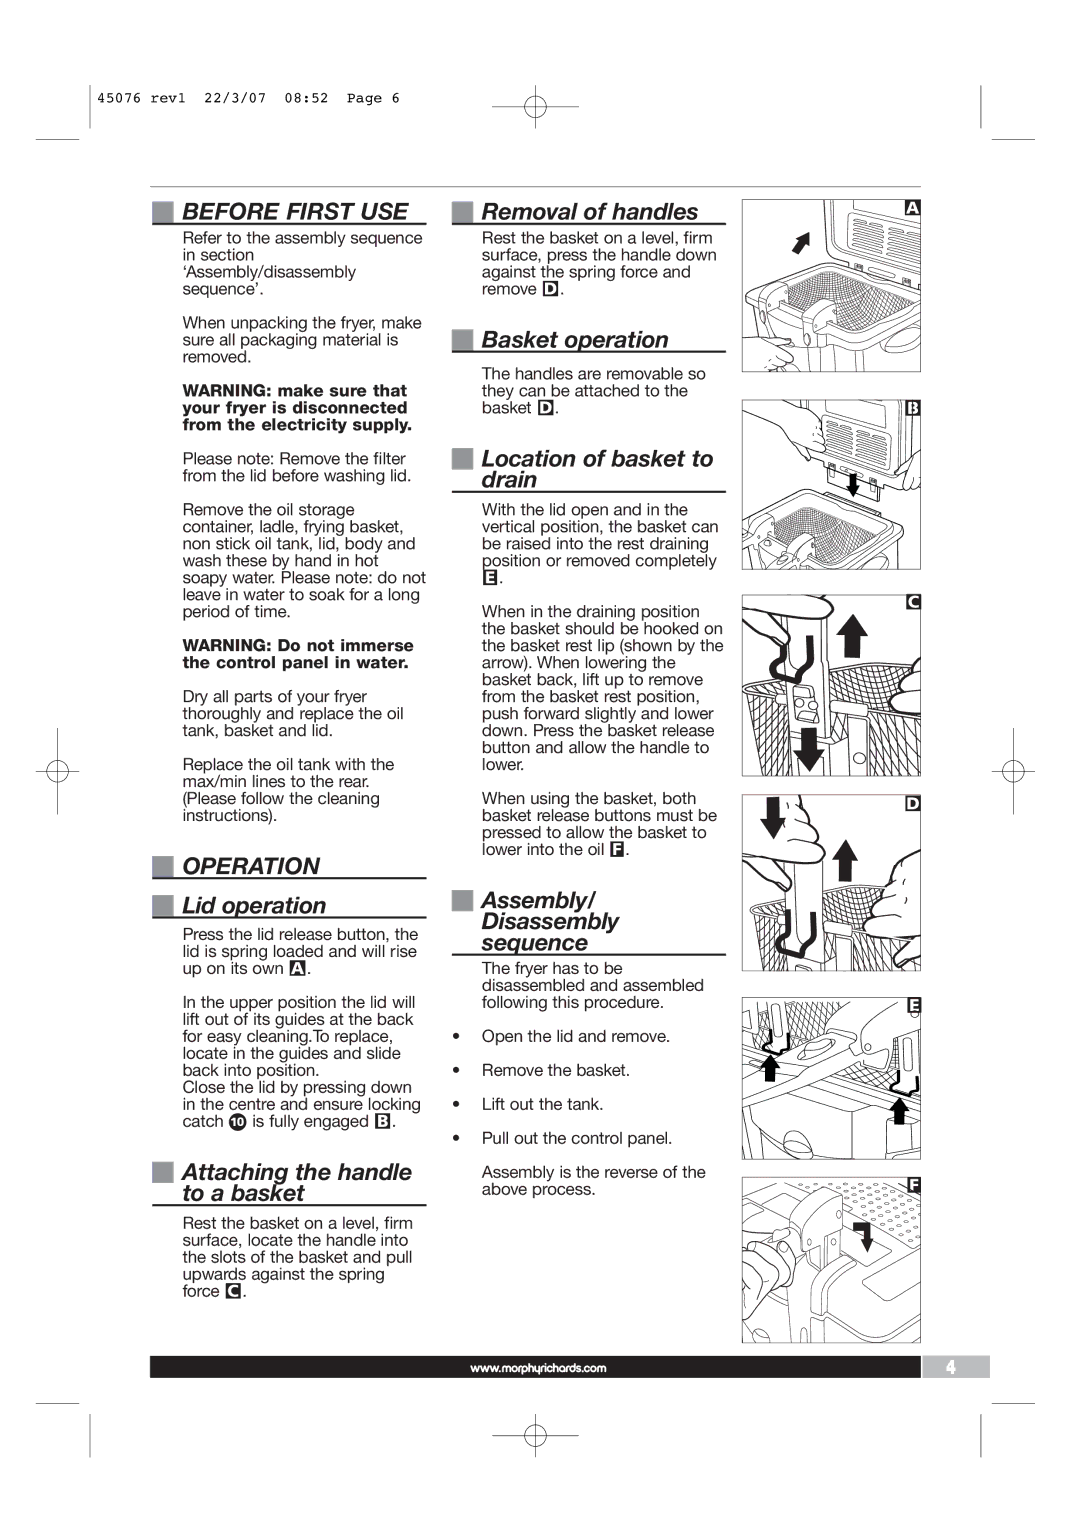
Press the lid release button, the lid is spring loaded and will rise up on its own A.
In the upper position the lid will lift out of its guides at the back for easy cleaning.To replace, locate in the guides and slide back into position.
Close the lid by pressing down in the centre and ensure locking catch „ is fully engaged B.
Attaching the handle to a basket
Rest the basket on a level, firm surface, locate the handle into the slots of the basket and pull upwards against the spring force C.
Removal of handles
Rest the basket on a level, firm surface, press the handle down against the spring force and remove D.
Basket operation
The handles are removable so they can be attached to the basket D.
Location of basket to drain
With the lid open and in the vertical position, the basket can be raised into the rest draining
position or removed completely E.
When in the draining position the basket should be hooked on the basket rest lip (shown by the arrow). When lowering the basket back, lift up to remove from the basket rest position, push forward slightly and lower down. Press the basket release button and allow the handle to lower.
When using the basket, both basket release buttons must be pressed to allow the basket to lower into the oil F.
Assembly/ Disassembly sequence
The fryer has to be disassembled and assembled following this procedure.
•Open the lid and remove.
•Remove the basket.
•Lift out the tank.
•Pull out the control panel.
Assembly is the reverse of the above process.
A |
B |
C |
D |
E |
F |
6 | 4 |
