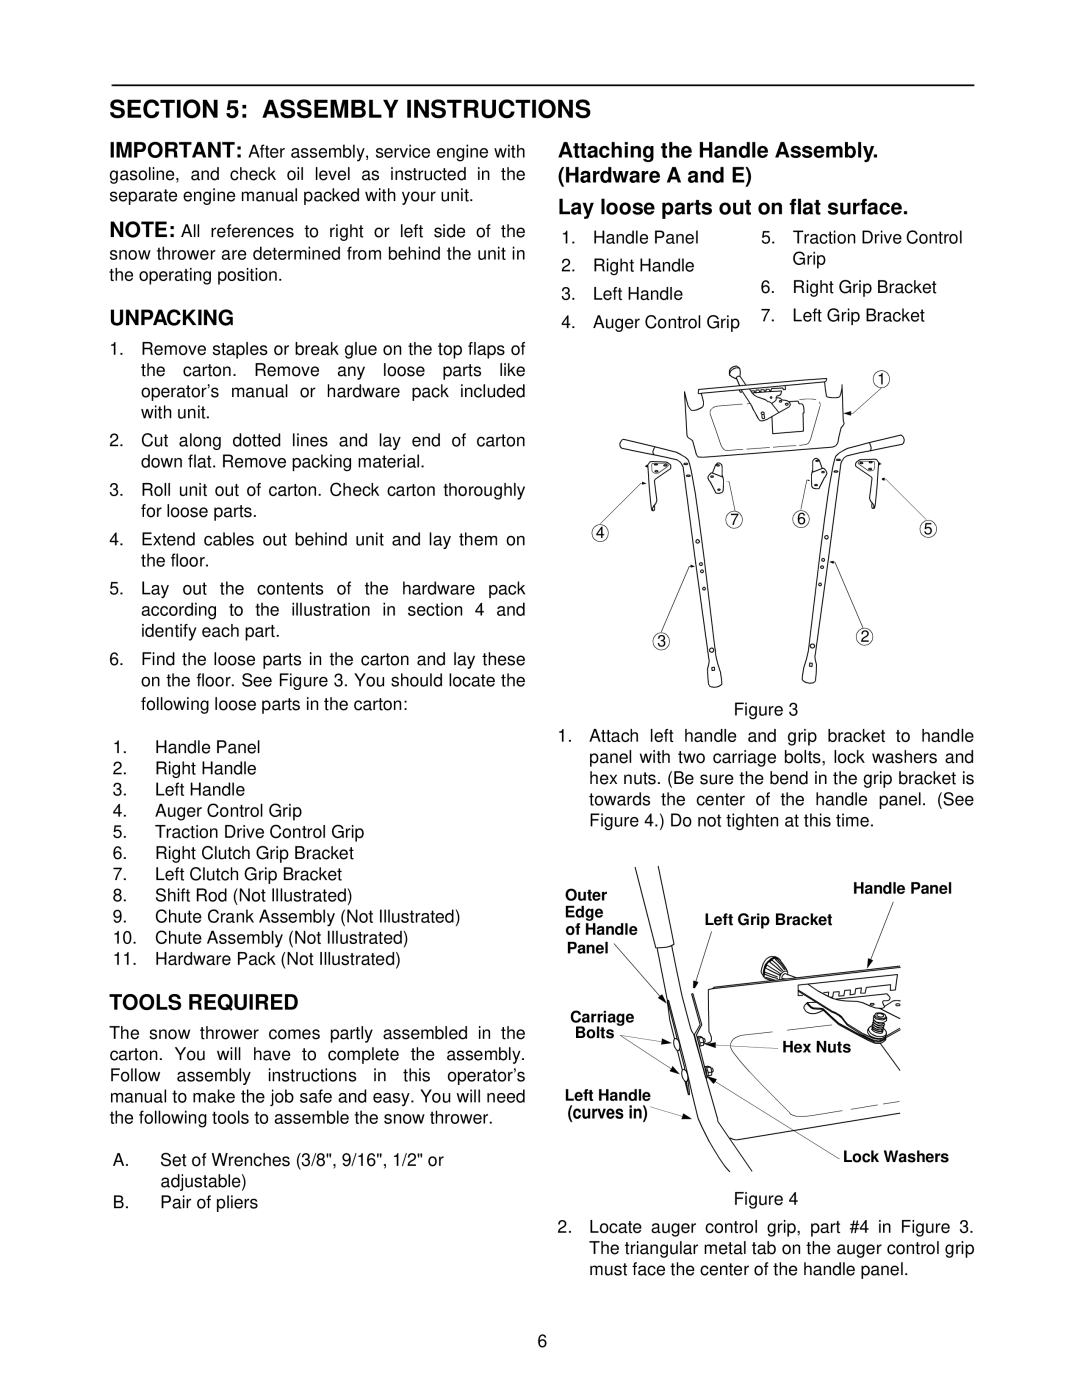
E642E, E644E, E662H, E6A4E, E664F specifications
The MTD E664F, E6A4E, E642E, E644E, and E662H are innovative models within the MTD lineup, showcasing cutting-edge features and advanced technologies designed to provide optimal performance and versatility for various applications.The MTD E664F stands out with its robust build and powerful engine, making it a reliable choice for commercial and heavy-duty tasks. It incorporates a user-friendly control system, enhancing the operator experience and ensuring precise handling. Its high-capacity fuel tank allows for longer work intervals, reducing downtime and increasing productivity.
Meanwhile, the MTD E6A4E model is tailored for efficiency and ease of use. This unit features a compact design, making it ideal for urban environments or smaller workspaces. Its lightweight construction facilitates effortless maneuverability, while the advanced cutting technology ensures a clean and even finish. Users will appreciate the minimal maintenance requirements, further adding to its appeal.
The MTD E642E combines power with versatility. Equipped with a range of adaptable attachments, this model is suitable for multiple applications, from landscaping to snow removal. Its durable chassis and high-torque engine deliver superior performance under varying conditions. Additionally, the model’s ergonomic design ensures operator comfort during extended use, making it a favorite among professionals.
Similar to the E642E, the MTD E644E focuses on flexibility but enhances it with smart technology integration. Featuring an intuitive interface and connectivity options, operators can monitor and manage operations remotely. This connectivity maximizes uptime through predictive maintenance alerts and efficiency tracking.
Lastly, the MTD E662H is a high-performance model that is engineered for heavy-duty applications. Its powerful engine is paired with advanced transmission technology, ensuring smooth operation even under the most demanding conditions. The fully adjustable settings allow operators to customize performance to meet specific requirements, while the rugged construction promises longevity and reliability.
These models collectively embody MTD’s commitment to innovation and quality, offering various features, including durability, adaptability, and user-focused design. Whether for professional landscaping, agriculture, or maintenance tasks, the MTD E664F, E6A4E, E642E, E644E, and E662H provide a comprehensive range of solutions tailored to meet the needs of today’s operators, reinforcing MTD’s reputation in the market.