MIX N' GO MIXER — ASSEMBLY INSTRUCTIONS
Assembly
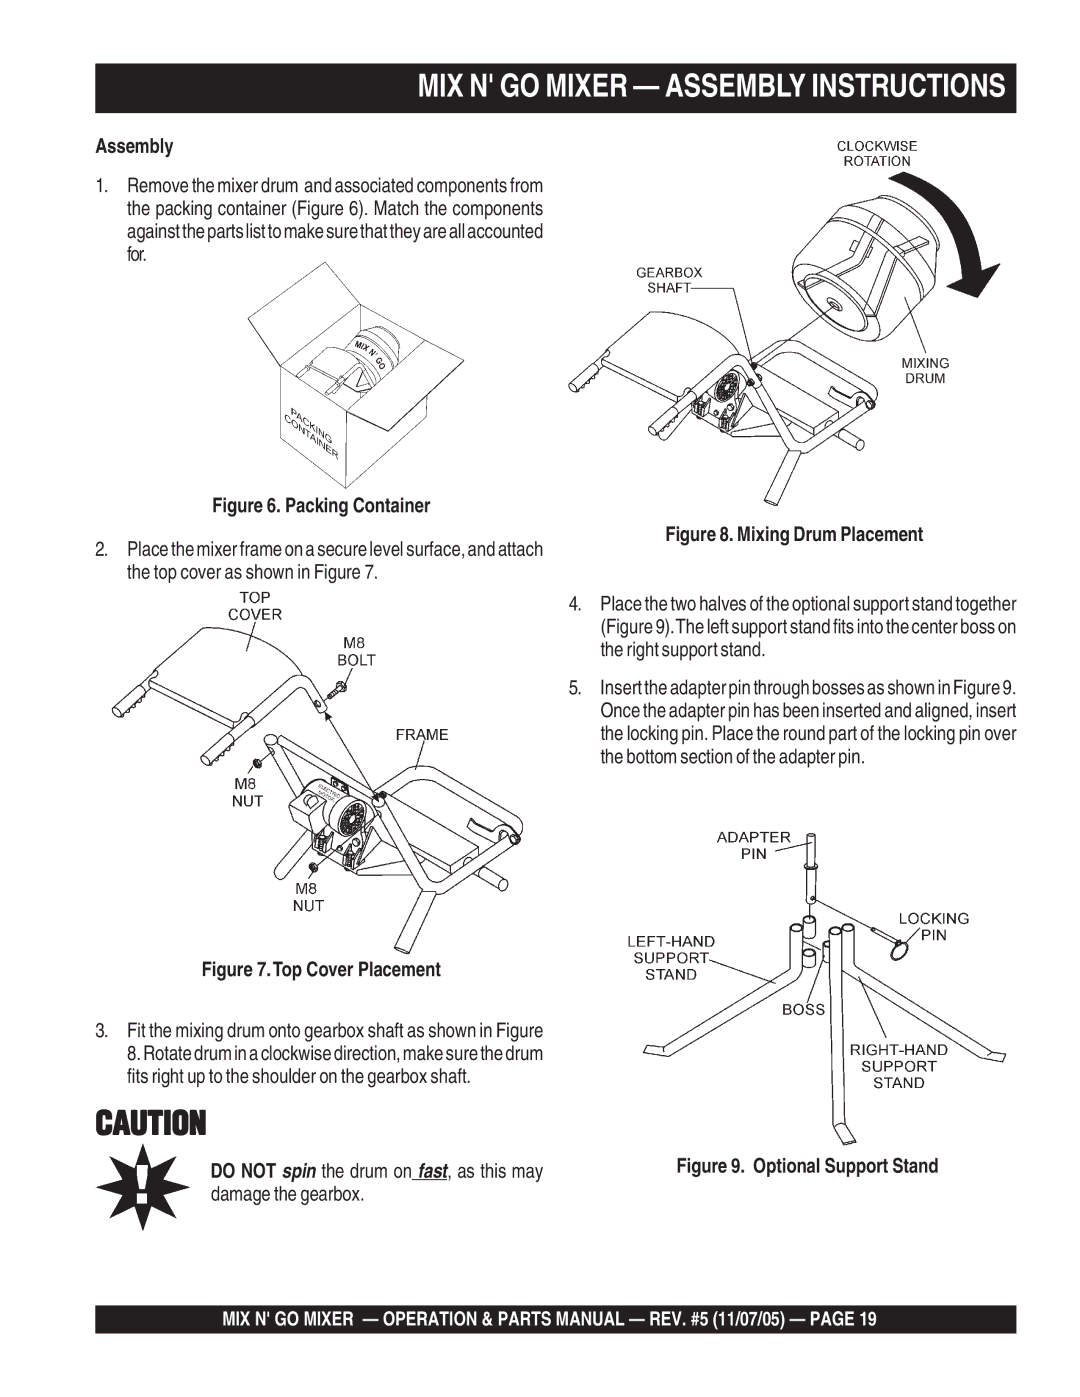
1.Remove the mixer drum and associated components from the packing container (Figure 6). Match the components againstthepartslisttomakesurethattheyareallaccounted for.
Figure 6. Packing Container
Figure 8. Mixing Drum Placement
2.Place the mixer frame on a secure level surface, and attach the top cover as shown in Figure 7.
4. Place the two halves of the optional support stand together (Figure 9).The left support stand fits into the center boss on the right support stand.
5. Insert the adapter pin through bosses as shown in Figure 9. Once the adapter pin has been inserted and aligned, insert the locking pin. Place the round part of the locking pin over the bottom section of the adapter pin.
Figure 7.Top Cover Placement
3.Fit the mixing drum onto gearbox shaft as shown in Figure 8. Rotate drum in a clockwise direction, make sure the drum fits right up to the shoulder on the gearbox shaft.
CAUTION
DO NOT spin the drum on fast, as this may | Figure 9. Optional Support Stand | ||
damage the gearbox. |
|
|
|
MIX N' GO MIXER — OPERATION & PARTS MANUAL — REV. #5 (11/07/05) — PAGE 19
