RMX6 specifications
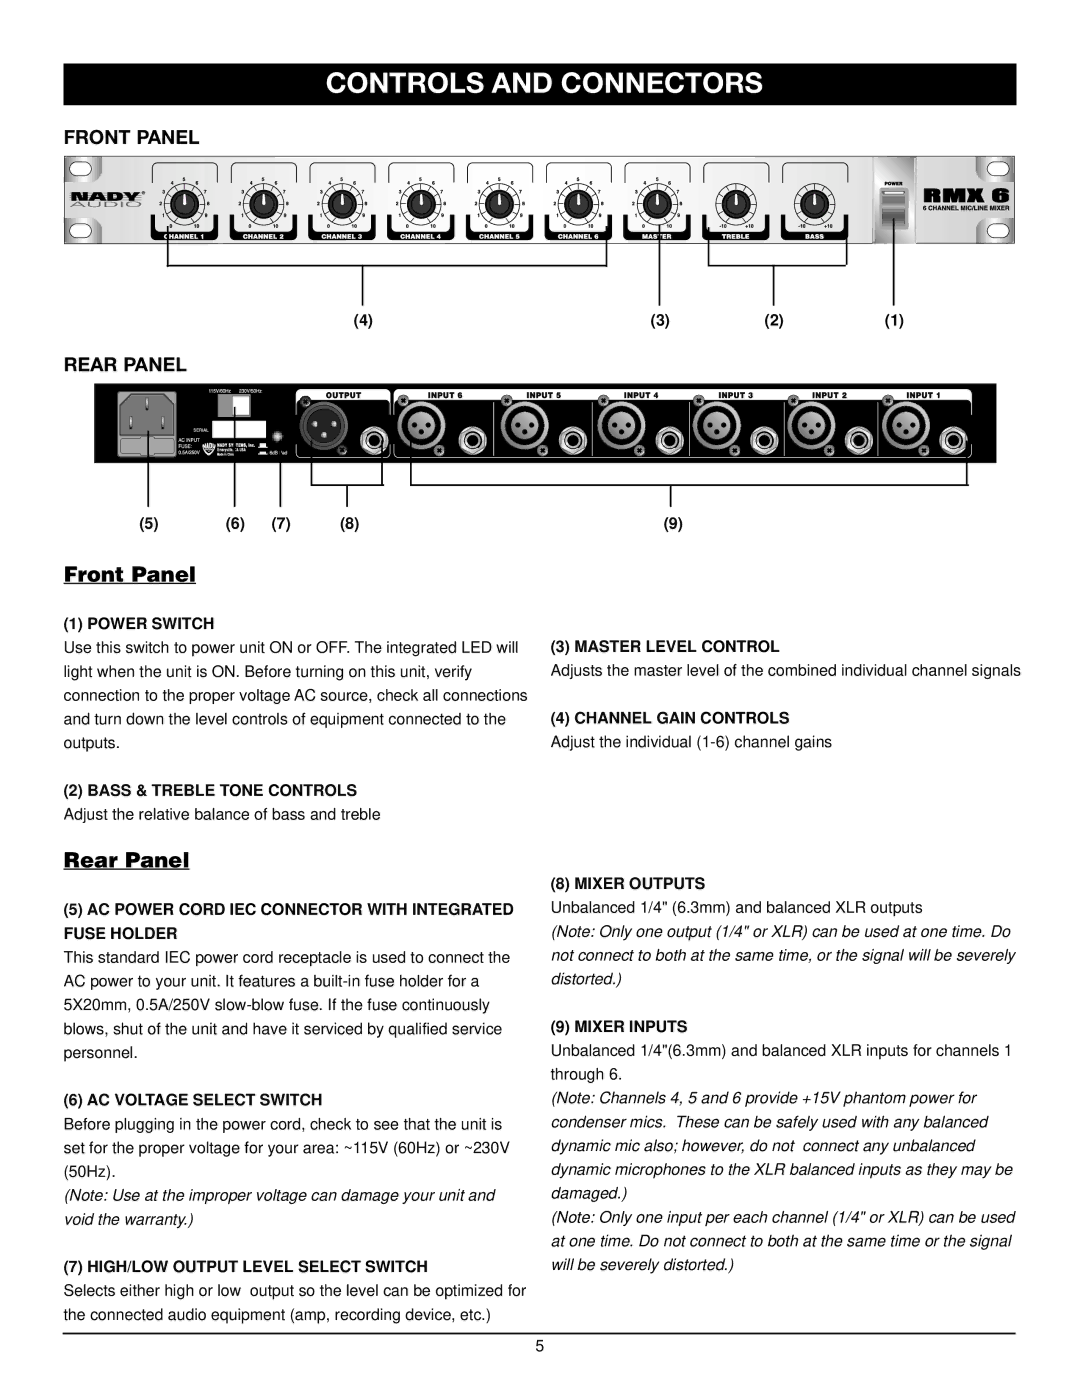
Nady Systems has been a pioneer in wireless technology and audio equipment for over three decades, and its RMX6 portable mixer stands as a testament to their commitment to innovation and quality. The RMX6 is engineered for professionals who require versatility without compromising on sound fidelity, making it an ideal choice for musicians, sound engineers, and event organizers.One of the most notable features of the RMX6 is its compact design. Weighing in at a lightweight 3.5 pounds, it easily fits into any studio setup or travel bag, allowing for seamless portability. This mixer is equipped with six input channels, accommodating a variety of audio sources including microphones, instruments, and line-level devices. The channels are designed with individual gain controls, allowing users to tailor the audio levels for optimal sound clarity.
The RMX6 employs a true stereo output, providing a versatile monitoring option for live performances and studio recordings. Additionally, two built-in effects processors empower users to enhance their audio with reverb and delay effects, adding depth and character to live sound or recordings. The easy-to-navigate control interface allows users to adjust settings quickly, making it popular for fast-paced environments.
Another standout technology in the RMX6 is its robust connectivity options. This mixer features balanced XLR, 1/4-inch, and RCA outputs, ensuring compatibility with professional audio gear. Moreover, it includes a headphone output for direct monitoring, providing the ability to hear audio cues without latency. The RMX6 also incorporates tools like phantom power for condenser microphones, making it suitable for a range of audio applications.
Among the characteristics that set the RMX6 apart is its durability. Constructed with high-quality materials, it is built to withstand the rigors of touring and frequent use. Its intuitive layout encourages quick setup and ease of use, which is paramount in live performance scenarios.
In conclusion, the Nady Systems RMX6 is not just a portable mixer; it is a multifaceted tool that combines portability, versatility, and high-quality sound. Whether used for live performances, studio recordings, or events, the RMX6 stands ready to meet the diverse needs of audio professionals everywhere. As technology continues to advance, the RMX6 remains an essential component for anyone seeking reliable and high-performance audio solutions.

