7. Reverse this process to
NOTE: Use only
Handle with care when removing stand.
NOTE: Match “TOP SIDE” mark on stand to top side of the monitor head when
“TOP SIDE” mark | Hole of “ ” mark |
Please match top side | Please assemble |
of the monitor | then together |
English
Flexible Arm Installation
This LCD monitor is designed for use with a flexible arm. To mount the monitor to a flexible arm:
1.Follow the instructions on how Remove Monitor Stand for Mounting to remove the stand.
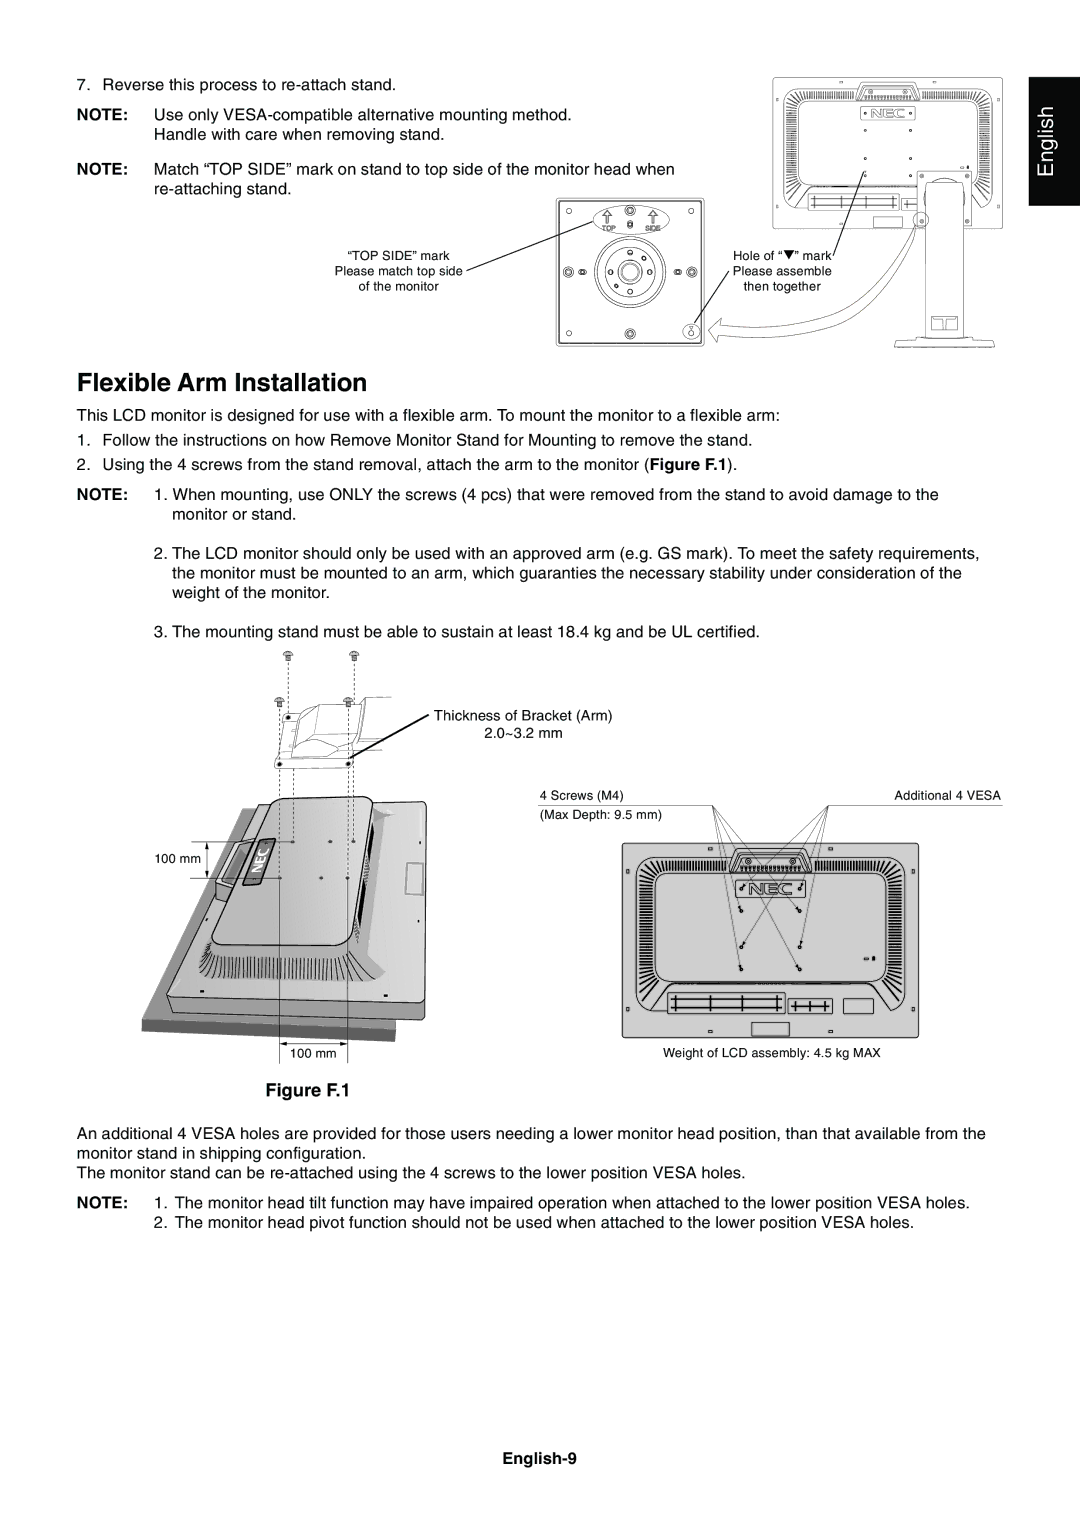
2.Using the 4 screws from the stand removal, attach the arm to the monitor (Figure F.1).
NOTE: 1. When mounting, use ONLY the screws (4 pcs) that were removed from the stand to avoid damage to the monitor or stand.
2.The LCD monitor should only be used with an approved arm (e.g. GS mark). To meet the safety requirements, the monitor must be mounted to an arm, which guaranties the necessary stability under consideration of the weight of the monitor.
3.The mounting stand must be able to sustain at least 18.4 kg and be UL certified.
Thickness of Bracket (Arm)
2.0~3.2 mm
4 Screws (M4) | Additional 4 VESA |
(Max Depth: 9.5 mm)
100 mm
100 mm
Weight of LCD assembly: 4.5 kg MAX
Figure F.1
An additional 4 VESA holes are provided for those users needing a lower monitor head position, than that available from the monitor stand in shipping configuration.
The monitor stand can be
NOTE: 1. The monitor head tilt function may have impaired operation when attached to the lower position VESA holes. 2. The monitor head pivot function should not be used when attached to the lower position VESA holes.