Tag4 | Auto | Automatically adjusts the Image Position and H. Size settings and Fine settings. | ||||||||
| (Analog input only) | Press “SELECT” to activate Auto Adjustment. | ||||||||
|
|
|
|
|
|
|
|
|
|
|
| H. Position | Controls Horizontal Image Position within the display area of the LCD. | ||||||||
|
| Press “+” or | ||||||||
|
|
|
|
|
|
|
|
|
|
|
| V. Position | Controls Vertical Image Position within the display area of the LCD. | ||||||||
|
| Press “+” or | ||||||||
|
|
|
|
|
|
|
|
|
|
|
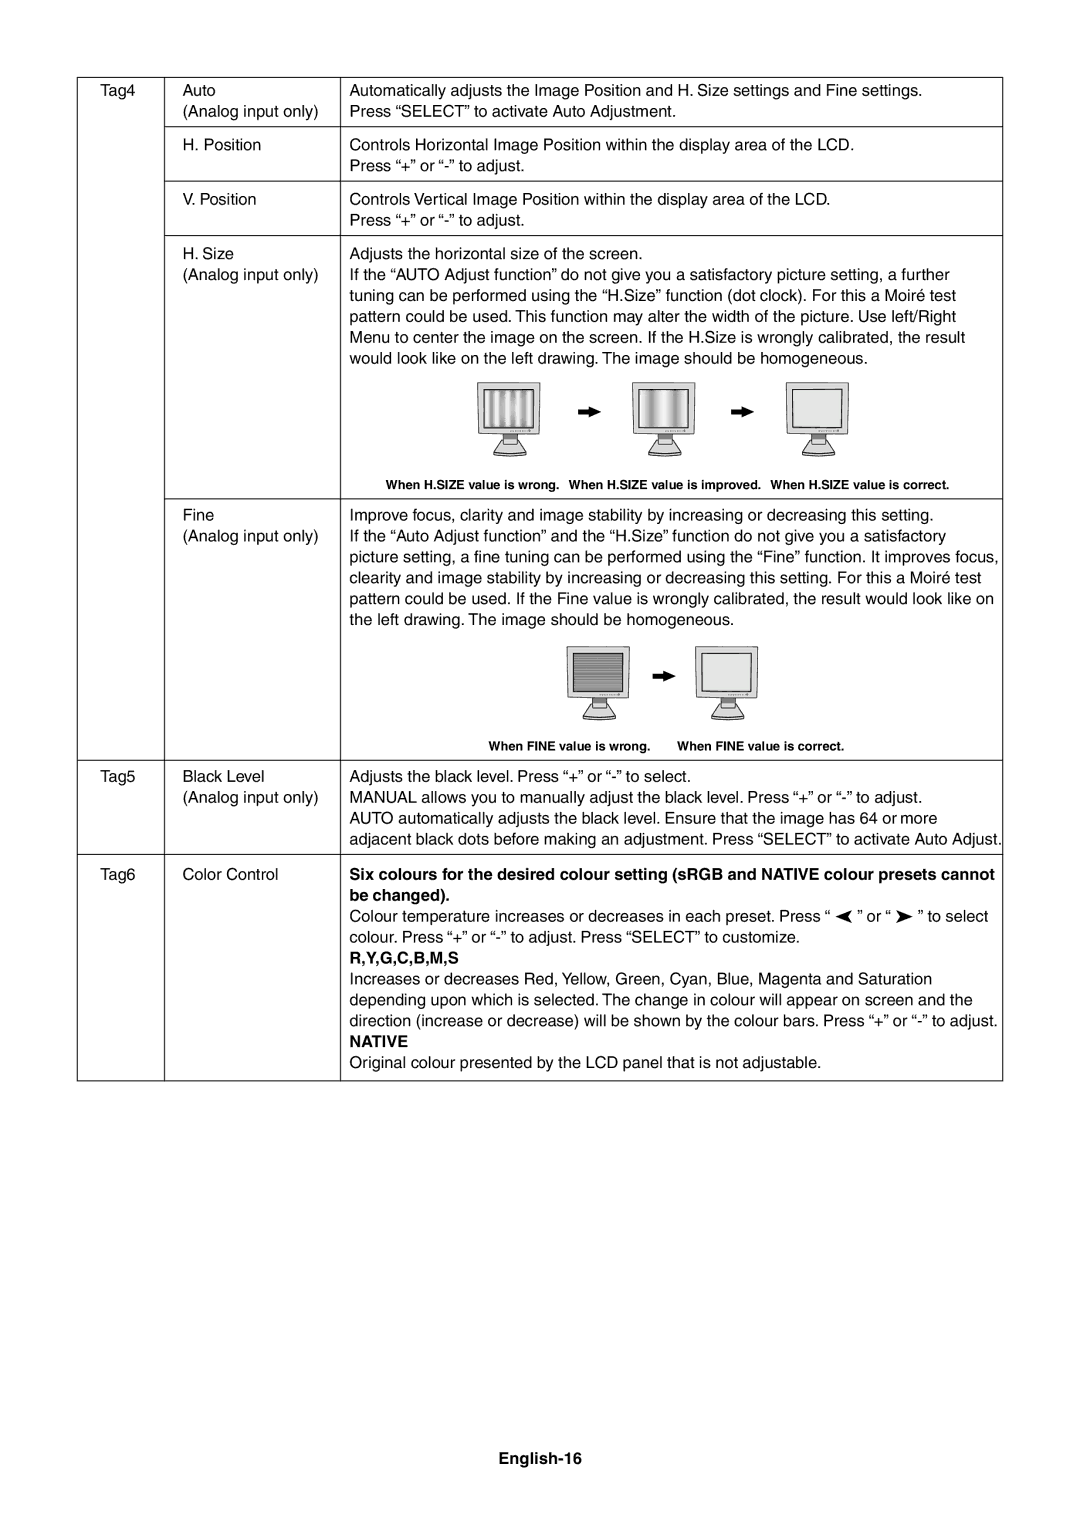
| H. Size | Adjusts the horizontal size of the screen. | ||||||||
| (Analog input only) | If the “AUTO Adjust function” do not give you a satisfactory picture setting, a further | ||||||||
|
| tuning can be performed using the “H.Size” function (dot clock). For this a Moiré test | ||||||||
|
| pattern could be used. This function may alter the width of the picture. Use left/Right | ||||||||
|
| Menu to center the image on the screen. If the H.Size is wrongly calibrated, the result | ||||||||
|
| would look like on the left drawing. The image should be homogeneous. | ||||||||
|
|
|
|
|
|
|
|
|
|
|
|
|
|
|
|
|
|
|
|
|
|
|
|
|
|
|
|
|
|
|
|
|
| When H.SIZE value is wrong. When H.SIZE value is improved. When H.SIZE value is correct. | ||||
|
|
|
|
|
|
Fine | Improve focus, clarity and image stability by increasing or decreasing this setting. | ||||
(Analog input only) | If the “Auto Adjust function” and the “H.Size” function do not give you a satisfactory | ||||
| picture setting, a fine tuning can be performed using the “Fine” function. It improves focus, | ||||
| clearity and image stability by increasing or decreasing this setting. For this a Moiré test | ||||
| pattern could be used. If the Fine value is wrongly calibrated, the result would look like on | ||||
| the left drawing. The image should be homogeneous. | ||||
|
|
|
|
|
|
|
|
|
|
|
|
|
|
|
|
|
|
|
| When FINE value is wrong. When FINE value is correct. |
|
|
|
Tag5 | Black Level | Adjusts the black level. Press “+” or |
| (Analog input only) | MANUAL allows you to manually adjust the black level. Press “+” or |
|
| AUTO automatically adjusts the black level. Ensure that the image has 64 or more |
|
| adjacent black dots before making an adjustment. Press “SELECT” to activate Auto Adjust. |
|
|
|
Tag6 | Color Control | Six colours for the desired colour setting (sRGB and NATIVE colour presets cannot |
|
| be changed). |
|
| Colour temperature increases or decreases in each preset. Press “ ” or “ ” to select |
|
| colour. Press “+” or |
|
| R,Y,G,C,B,M,S |
|
| Increases or decreases Red, Yellow, Green, Cyan, Blue, Magenta and Saturation |
|
| depending upon which is selected. The change in colour will appear on screen and the |
|
| direction (increase or decrease) will be shown by the colour bars. Press “+” or |
|
| NATIVE |
|
| Original colour presented by the LCD panel that is not adjustable. |
