Before Operation (Continued)

Clock Set

Press SETUP.

1 The Setup menu appears.

2Use v / V to select the GENERAL menu.

3 While the GENERAL option is selected, press B to move to the second level.

4Use v / V to select the Clock Set option.

Auto Programming


Program Edit


Clock Set

Date


/


- -

- -

TV Aspect


VCR Play System

Year

- - - -


Time


:


Progressive Scan

- -

- -


Factory Set

5Press B to move to the third level.

6time.

b / B (left/right): Moves the cursor to the previous or next column.

v / V (up/down): Changes the setting at the current cursor position.Enter the necessary information for date and

Press ENTER to confirm your setting, then

7 press SETUP to exit the Setup menu.

TV Aspect

You can choose:

4:3 Letter Box: Select when a standard 4:3 TV is con- nected. Displays theatrical images with masking bars above and below the picture.

4:3 Pan Scan: Select when a standard 4:3 TV is con- nected. The video material formatted in the Pan & Scan style is played back in that style (Both sides of the pic- ture are cut off).

16:9 Wide: Select when a 16:9 wide TV is connected.

Auto Programming


Program Edit


Clock Set


TV Aspect


4:3 Letter Box

VCR Play System


4:3 Pan Scan


Progressive Scan


16:9 Wide

Factory Set


VCR Play System

Your video recorder uses dual colour standards, PAL


and MESECAM. During play your video recorder should


select the colour system automatically, however if you


experience problems you may need to do it manually.

HOOKUP


Auto Programming


Program Edit


Clock Set


TV Aspect


VCR Play System


Auto


Progressive Scan


PAL


Factory Set


MESECAM


Progressive Scan

Progressive Scan Video provides the highest quality pictures with less flickering.

If you are using the COMPONENT/PROGRESSIVE SCAN VIDEO OUT jacks, but are connecting the recorder to a standard (analog) television, set Progressive Scan to OFF.

If you are using the component video jacks for connec- tion to a TV or monitor that is compatible with a pro- gressive scan signal, set Progressive Scan to ON.

Auto Programming


Program Edit


Clock Set


TV Aspect


VCR Play System


Progressive Scan


OFF

Factory Set


ON


Caution

Once the setting for progressive scan output is entered, an image will only be visible on a progressive scan compatible TV or monitor. If you set Progressive Scan to On in error, you must reset the unit.

ote

You can reset the unit only in DVD mode.

1)Remove any disc from the unit and close the disc tray.

2)Press STOP and hold it for five seconds before releasing it. The video output will be restored to the standard setting and a picture will once again be visible on a conventional analog TV or monitor.

21

Page 21
Image 21
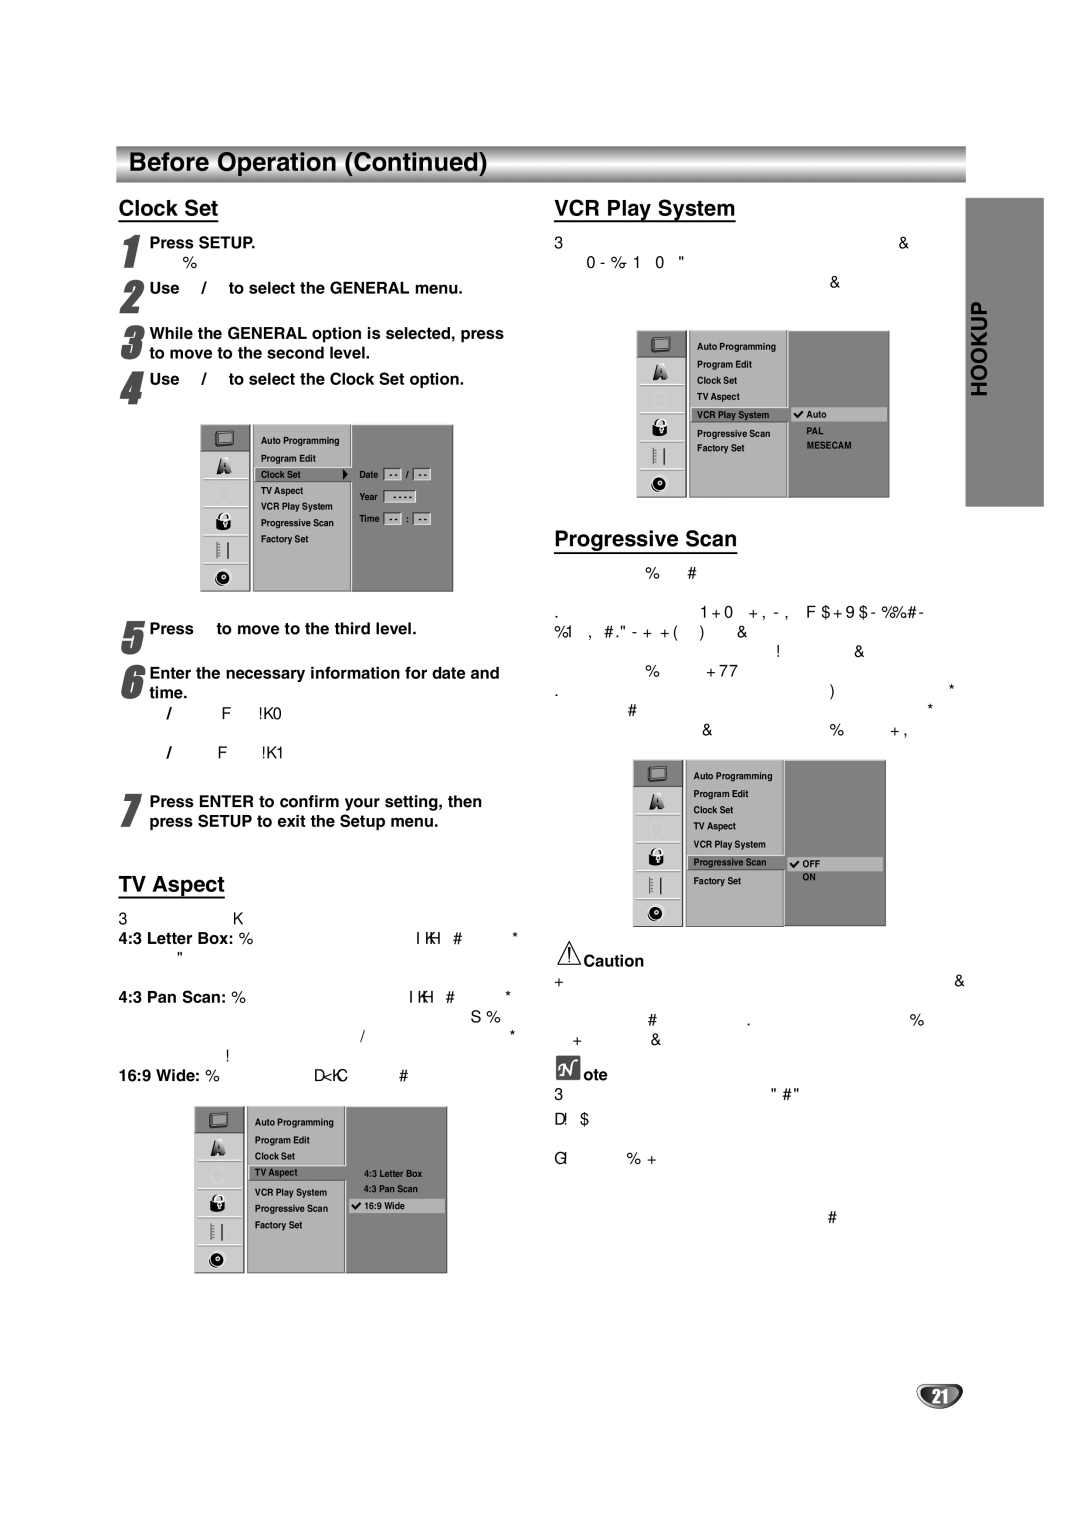
NEC NDRV-60 owner manual Clock Set, TV Aspect, VCR Play System, Progressive Scan, Press B to move to the third level Time

NDRV-60 specifications

The NEC NDRV-60 is a state-of-the-art network video recorder designed for modern surveillance needs. With a robust architecture, it offers reliability and performance suitable for both small and medium-sized installations. The NDRV-60 stands out in the crowded market of network video recorders due to its impressive features, cutting-edge technology, and user-friendly interface.

One of the main features of the NDRV-60 is its capability to support multiple camera connections. It can handle up to 60 IP camera channels, making it an ideal choice for businesses, educational institutions, and large facilities that require extensive surveillance coverage. This flexibility allows users to integrate cameras from various manufacturers, ensuring the system can adapt to different environments and requirements.

The NDRV-60 is built with advanced video encoding technologies that support high-definition video streams. It offers H.265, H.264, and MJPEG encoding formats, maximizing storage efficiency while maintaining high-quality images. This means that users can store longer video sequences without compromising on video clarity, an essential aspect of effective surveillance.

In terms of storage, the NDRV-60 provides ample options, supporting multiple hard drives with RAID configurations for redundancy and data protection. This ensures that footage is safe and can be retrieved even in the event of a drive failure. The system also features cloud storage integration, allowing users to have an additional backup of critical video data.

The NDRV-60 is equipped with a user-friendly graphical interface that simplifies navigation and setup. Users can easily configure camera settings, set up recording schedules, and access archived footage with just a few clicks. Remote access capabilities are also a noteworthy feature, enabling users to monitor their surveillance systems from anywhere through mobile devices or web browsers.

Additionally, the NDRV-60 incorporates advanced analytics features, such as motion detection and tamper alerts, enhancing situational awareness. These features help to minimize false alarms and ensure that users are notified of any suspicious activity in real-time.

Overall, the NEC NDRV-60 combines versatility, advanced technology, and ease of use, making it a reliable choice for those looking to enhance their security measures. Its comprehensive features ensure that users can tailor their surveillance to meet specific needs, providing peace of mind through effective monitoring solutions. Whether for commercial, educational, or public safety applications, the NDRV-60 sets a high standard in the field of network video recording.