Fig. 15 Releasing the heat sink screws
Note: When assembly the heat sink, tighten the heat sink screws according to the ascending order
(1 2 3 4). This is to ensure a well distributed pressure over the CPU and to prevent damaging the CPU
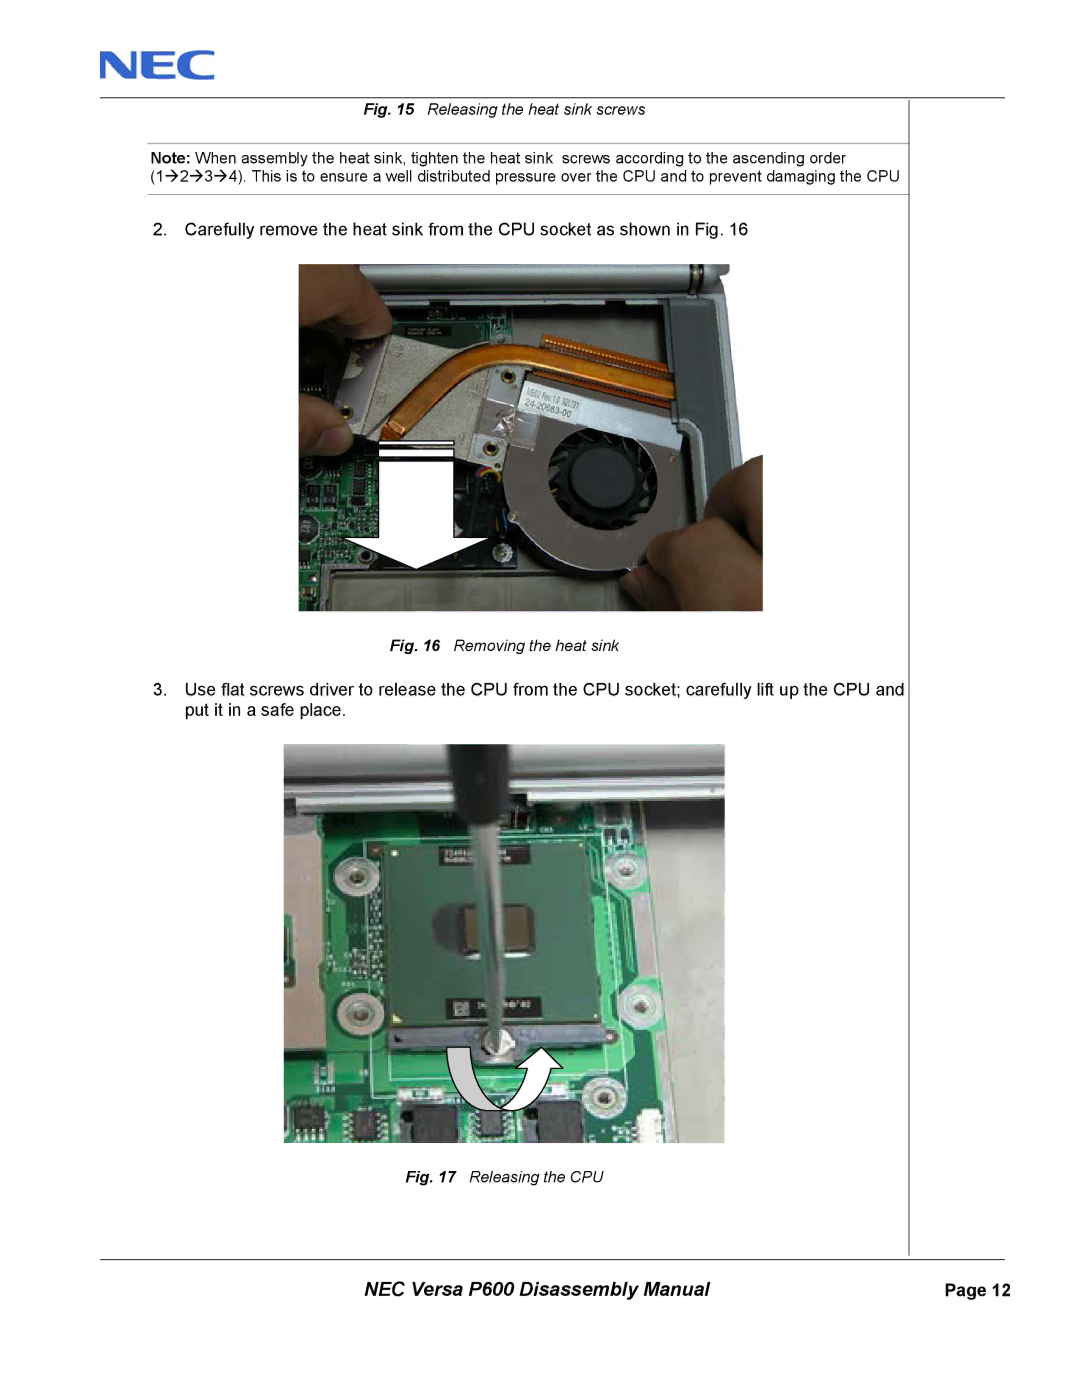
2. Carefully remove the heat sink from the CPU socket as shown in Fig. 16
Fig. 16 Removing the heat sink
3.Use flat screws driver to release the CPU from the CPU socket; carefully lift up the CPU and put it in a safe place.
Fig. 17 Releasing the CPU
NEC Versa P600 Disassembly Manual | Page 12 |
