3.Press the “DISPLAY” button on the remote control while aiming at the “PRIMARY” monitor. The Information OSD will be shown at top left side of the screen.
Monitor ID: Displays the ID number of the current monitor within the daisy chain.
Target ID: Displays the ID number of the monitor that to be controlled via daisy chain from the current monitor.
Press the Ò+Ó or
4.Use the wireless remote controller to control the “SECONDARY” monitor while aiming at the “PRIMARY” monitor. The ÒMENU OSDÓ will appear on the selected target monitor.
NOTE: If the ÒID No.Ó mode select OSD is showing, press the ÒDISPLAYÓ button on the remote control while pointing at the ÒPRIMARYÓ monitor to clear this OSD.
HINT: If you lost control due to the incorrect setting of ÒIR CONTROLÓ, pressing the ÒDISPLAYÓ button on the remote control for 5 or more seconds will reset the ÒIR CONTROLÓ menu to ÒNORMALÓ function.
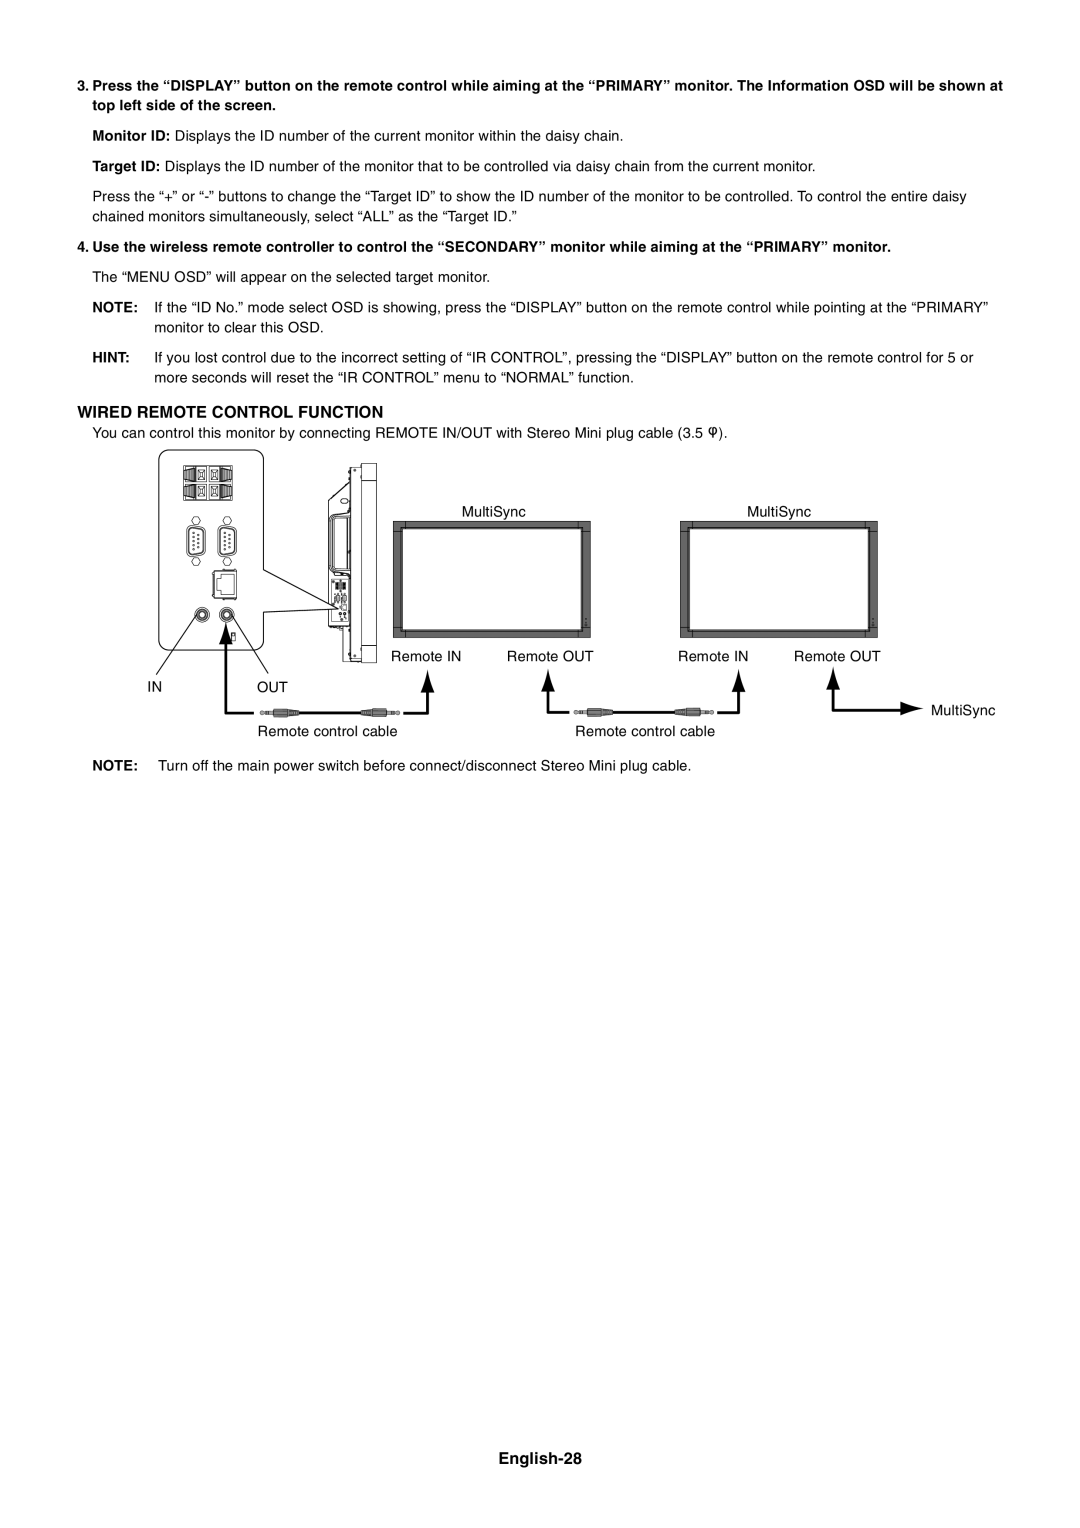
WIRED REMOTE CONTROL FUNCTION
You can control this monitor by connecting REMOTE IN/OUT with Stereo Mini plug cable (3.5 ![]() ).
).
| MultiSync |
| MultiSync | |||
|
|
|
|
|
|
|
|
|
|
|
|
|
|
|
|
|
|
|
|
|
Remote IN | Remote OUT | Remote IN | Remote OUT |
INOUT
MultiSync
Remote control cable | Remote control cable |
NOTE: Turn off the main power switch before connect/disconnect Stereo Mini plug cable.