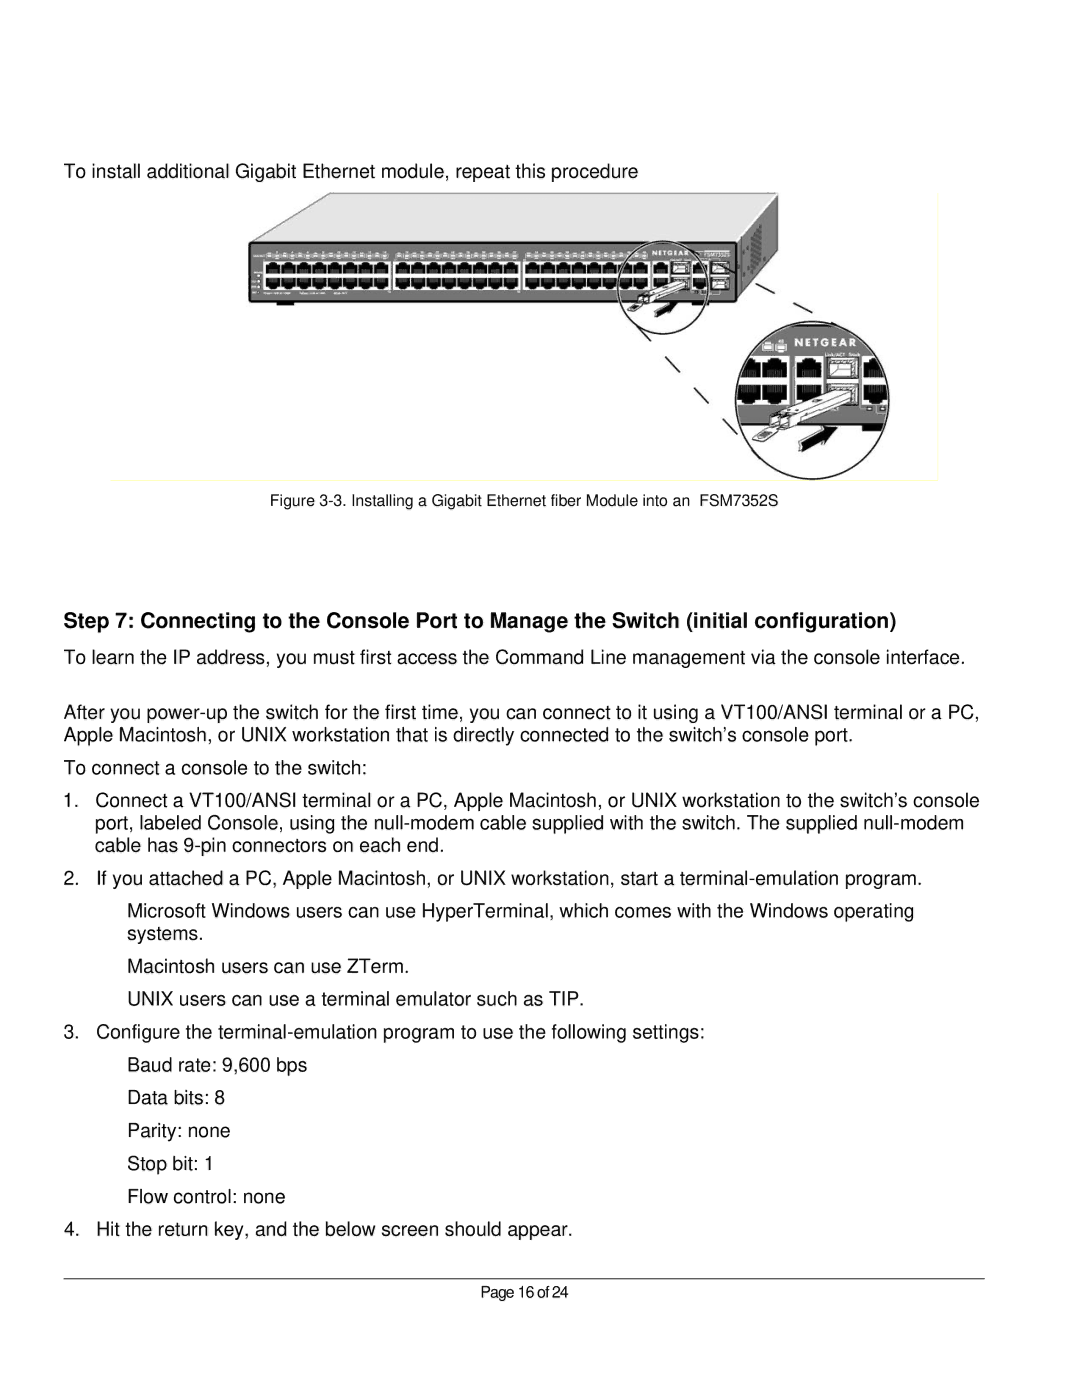
To install additional Gigabit Ethernet module, repeat this procedure
Figure 3-3. Installing a Gigabit Ethernet fiber Module into an FSM7352S
Step 7: Connecting to the Console Port to Manage the Switch (initial configuration)
To learn the IP address, you must first access the Command Line management via the console interface.
After you
To connect a console to the switch:
1.Connect a VT100/ANSI terminal or a PC, Apple Macintosh, or UNIX workstation to the switch’s console port, labeled Console, using the
2.If you attached a PC, Apple Macintosh, or UNIX workstation, start a
Microsoft Windows users can use HyperTerminal, which comes with the Windows operating systems.
Macintosh users can use ZTerm.
UNIX users can use a terminal emulator such as TIP.
3.Configure the
Data bits: 8
Parity: none
Stop bit: 1
Flow control: none
4.Hit the return key, and the below screen should appear.
Page 16 of 24