Rear Panel
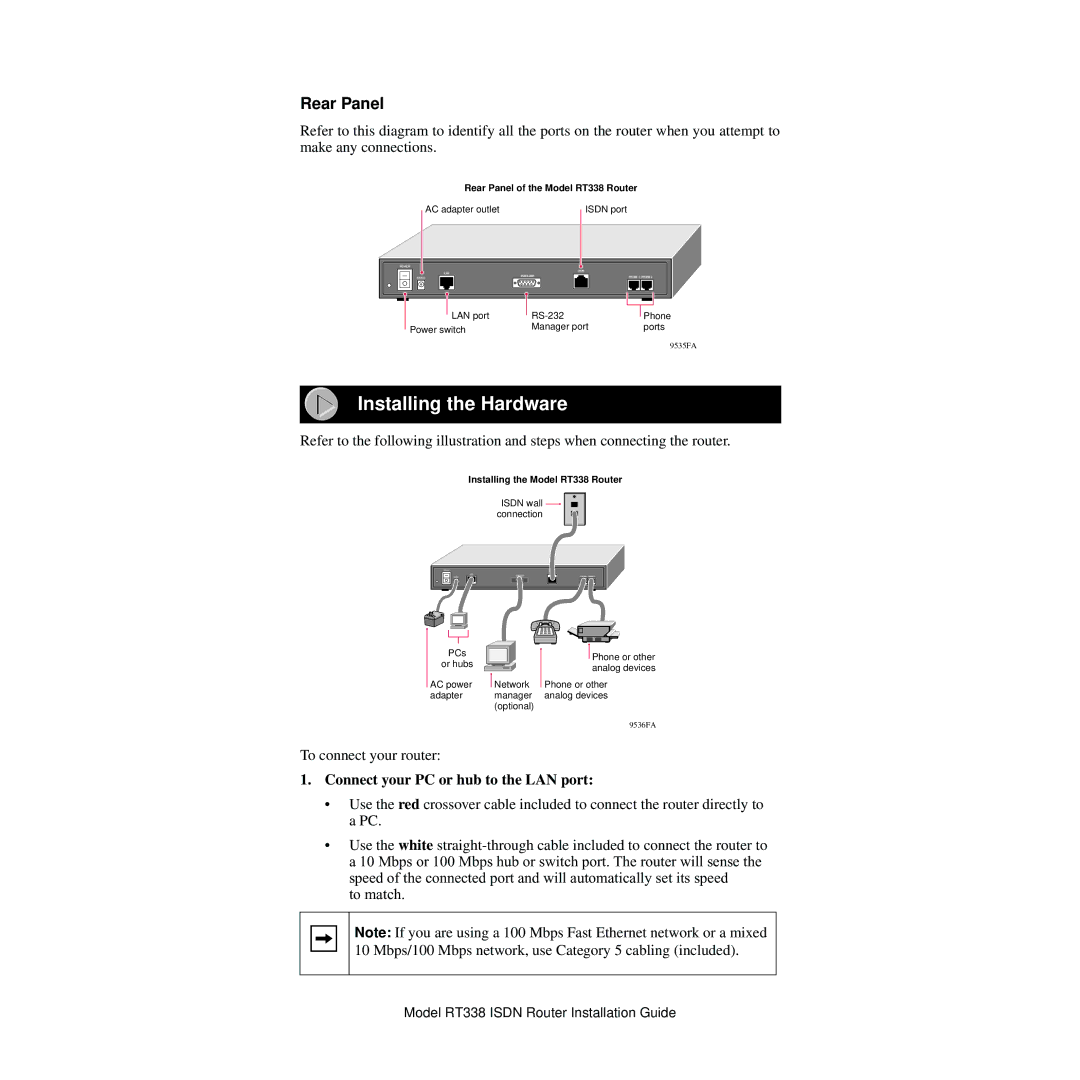
Refer to this diagram to identify all the ports on the router when you attempt to make any connections.
Rear Panel of the Model RT338 Router
AC adapter outlet
ISDN port
POWER
LAN
12VDC
ISDN
| MANAGER |
|
|
|
| PHONE 1 PHONE 2 | ||||||
|
|
|
|
|
|
|
|
|
|
|
|
|
LAN port
Power switch
Phone ports
9535FA
Installing the Hardware
Refer to the following illustration and steps when connecting the router.
Installing the Model RT338 Router
ISDN wall ![]() connection
connection
POWER
LAN
12VDC
ISDN
MANAGER |
|
|
| PHONE 1 PHONE 2 |
| ||||
|
|
|
|
|
|
|
|
|
|
PCs
or hubs
AC power adapter
| Phone or other |
| analog devices |
Network | Phone or other |
manager | analog devices |
(optional) |
|
9536FA
To connect your router:
1.Connect your PC or hub to the LAN port:
•Use the red crossover cable included to connect the router directly to a PC.
•Use the white
to match.
Note: If you are using a 100 Mbps Fast Ethernet network or a mixed 10 Mbps/100 Mbps network, use Category 5 cabling (included).
Model RT338 ISDN Router Installation Guide
