microscope set up is about
•Real field of view (in mm) represents the extent of the object that comes under observation. In higher magnification it becomes extremely small. Consequently, it is advisable to take aim at the object point to be exa- mined first under lower magnification and then revolve the nosepiece to higher magnification.
•When focus is on the center of the field, its circumference will usually be blurred, because a curvature of the image plane is unavoidable in the microscope, except when using a plan type objectives. In order to get sharp corner image, it is necessary to adjust the fine focusing knob and switch the focus from the center onto the corners.
•Depth of focus represents the thickness or height of the object in fi sharply seen when observation is made through the microscope. In photomicrogra- phy the depth of focus becomes smaller than the figure shown in the previous table. Therefore, careful attention must be made in focusing when taking microscope pictures.
By closing the condenser diaphragm, the depth of field can be made greater than the value shown in the table.
4.Condensers
ATTACHING THE LENSES
Before attaching the objective and the eyepiece to the microscope, first clean their outer lens surfaces. Even a slightly stained finger mark may often interfere with the image contrast.
1.Mounting the Objectives
Take special care in handling the objectives.
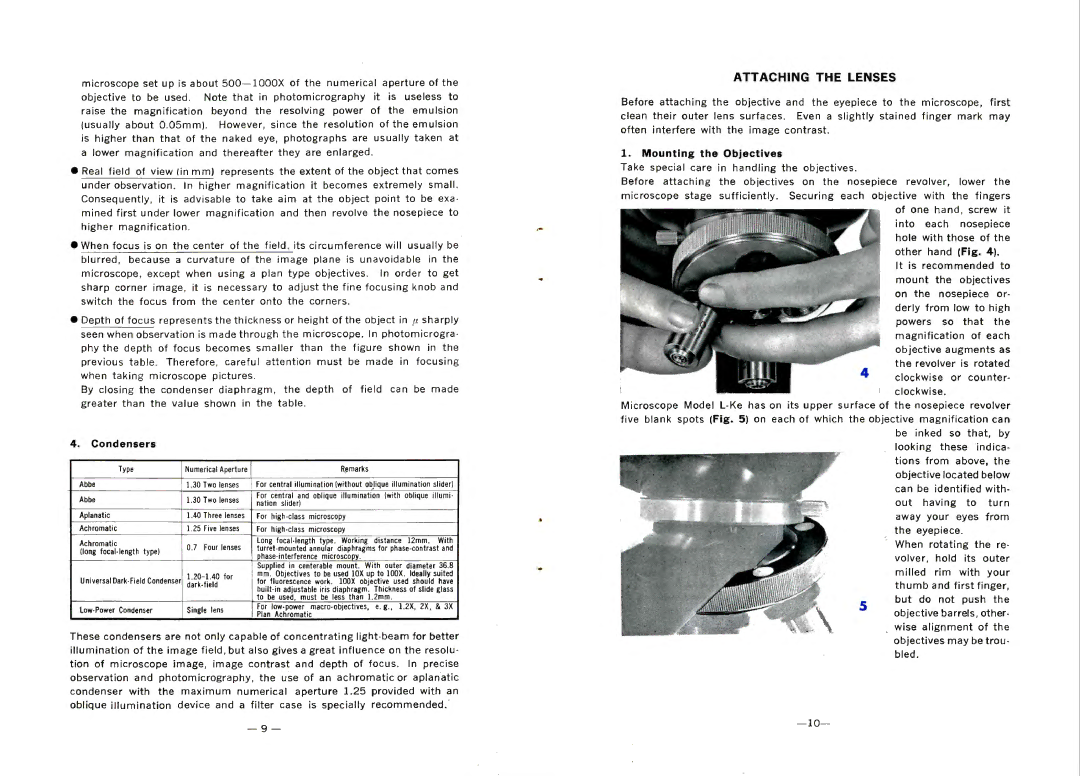
Before attaching the objectives on the nosepiece revolver, lower the microscope stage sufficiently. Securing each objective with the fingers of one hand, screw it into each nosepiece hole with those of the
other hand (Fig. 4). It is recommended to mount the objectives on the nosepiece or- derly from low to high powers so that the magnification of each objective augments as the revolver is rotated clockwise or counter- clockwise.
Microscope Model
Type | Numerical Aperture | |||
Abbe | 1.30 | Two | lenses | |
Abbe | 1.30 | Two | lenses | |
Aplanatic | 1.40 Three lenses | |||
Achromatic | 1.25 | Five | lenses | |
Achromatic | 0.7 | Four | lenses | |
(long | ||||
|
|
| ||
Universal | ||||
| ||||
Single lens | ||||
Remarks
For central illumination (without oblique illumination slider)
For central and oblique illumination (with oblique illumi- nation slider)
For
For
Long
Supplied in centerable mount. With outer diameter 36.8
mm.Objectives to be used lOX up to lOOX. Ideally suited for fluorescence work. lOOX objective used should have
For
objective located below can be identified with- out having to turn away your eyes from the eyepiece.
When rotating the re- volver, hold its outer milled rim with your thumb and first finger, but do not push the objective barrels, other- wise alignment of the
These condensers are not only capable of concentrating
— 9 —
objectives may be trou- bled.
- 1 0 -
