is not being used for storage. Keep the refrig- erator area clear and free from combustible materials, gasoline, and other flammable va- pors and liquids.
9.Periodically inspect the ventilation system. The air passage from the bottom intake vent to the refrigerator coils and from the refrigerator coils through the upper exhaust vent must be unob- structed.
10.Inspect combustion seals (visual check without removing the refrigerator). Combustion seals are attached the back surfaces of the refrigera- tor’s mounting flanges and must be continuous between the wall and the mounting flanges to assure a complete combustion seal.
11.Periodically inspect door seals. See "Checking Door Seals" below.
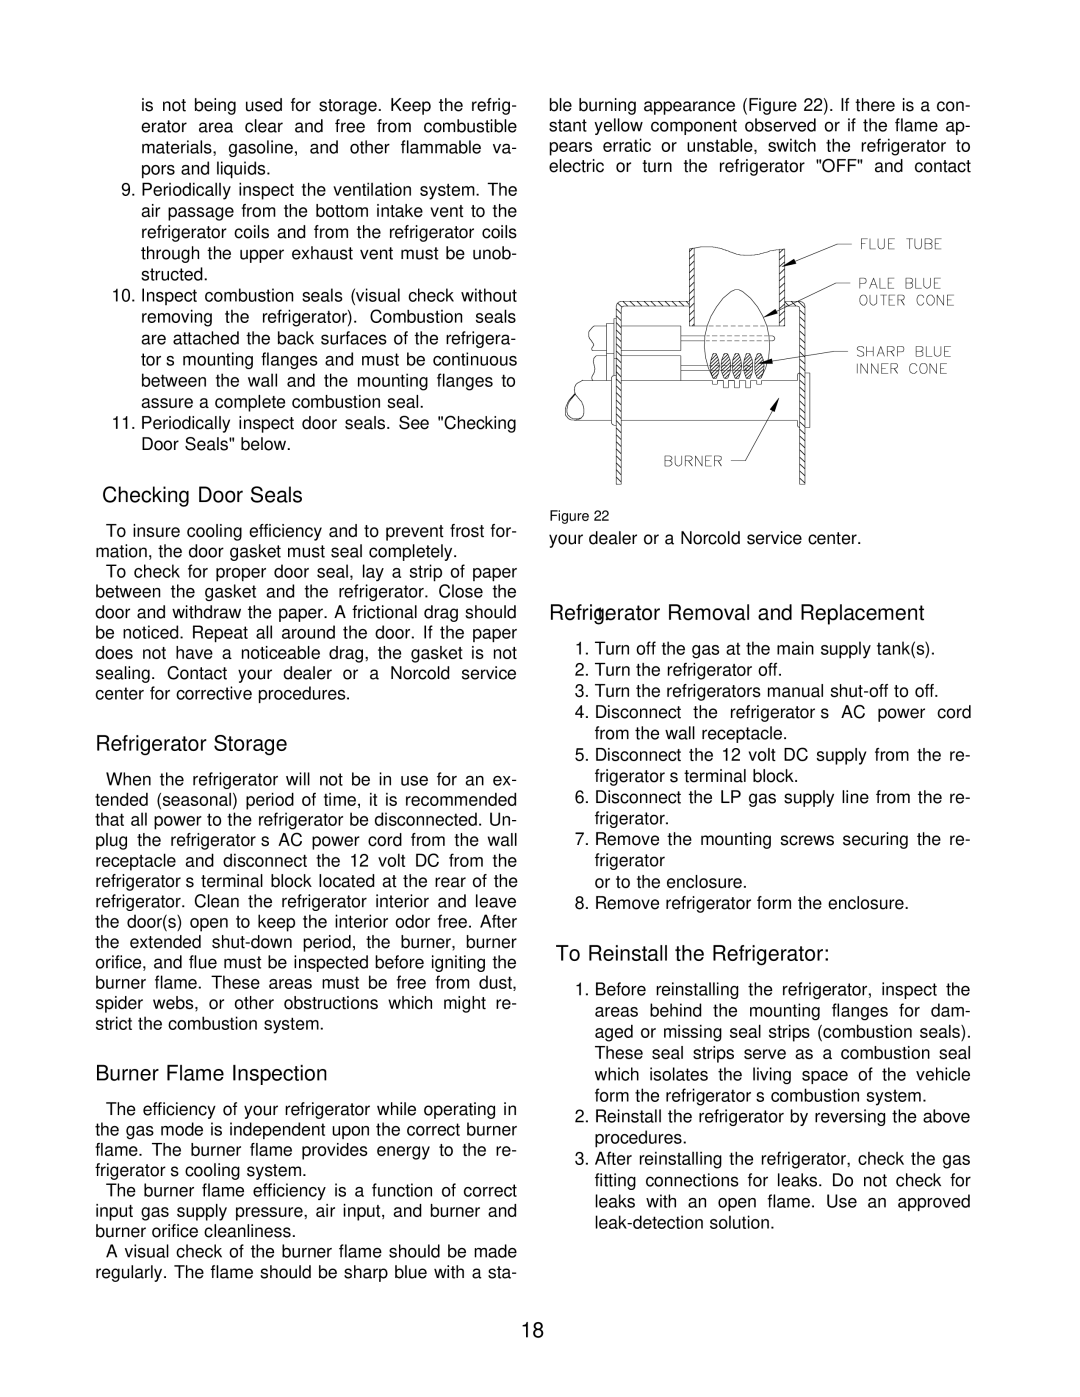
ble burning appearance (Figure 22). If there is a con- stant yellow component observed or if the flame ap- pears erratic or unstable, switch the refrigerator to electric or turn the refrigerator "OFF" and contact
Checking Door Seals
To insure cooling efficiency and to prevent frost for- mation, the door gasket must seal completely.
To check for proper door seal, lay a strip of paper between the gasket and the refrigerator. Close the door and withdraw the paper. A frictional drag should be noticed. Repeat all around the door. If the paper does not have a noticeable drag, the gasket is not sealing. Contact your dealer or a Norcold service center for corrective procedures.
Refrigerator Storage
When the refrigerator will not be in use for an ex- tended (seasonal) period of time, it is recommended that all power to the refrigerator be disconnected. Un- plug the refrigerator’s AC power cord from the wall receptacle and disconnect the 12 volt DC from the refrigerator’s terminal block located at the rear of the refrigerator. Clean the refrigerator interior and leave the door(s) open to keep the interior odor free. After the extended
Burner Flame Inspection
The efficiency of your refrigerator while operating in the gas mode is independent upon the correct burner flame. The burner flame provides energy to the re- frigerator’s cooling system.
The burner flame efficiency is a function of correct input gas supply pressure, air input, and burner and burner orifice cleanliness.
A visual check of the burner flame should be made regularly. The flame should be sharp blue with a sta-
Figure 22
your dealer or a Norcold service center.
Refrigerator1. Removal and Replacement
1.Turn off the gas at the main supply tank(s).
2.Turn the refrigerator off.
3.Turn the refrigerators manual
4.Disconnect the refrigerator’s AC power cord from the wall receptacle.
5.Disconnect the 12 volt DC supply from the re- frigerator’s terminal block.
6.Disconnect the LP gas supply line from the re- frigerator.
7.Remove the mounting screws securing the re- frigerator
or to the enclosure.
8.Remove refrigerator form the enclosure.
To Reinstall the Refrigerator:
1.Before reinstalling the refrigerator, inspect the areas behind the mounting flanges for dam- aged or missing seal strips (combustion seals). These seal strips serve as a combustion seal which isolates the living space of the vehicle form the refrigerator’s combustion system.
2.Reinstall the refrigerator by reversing the above procedures.
3.After reinstalling the refrigerator, check the gas fitting connections for leaks. Do not check for leaks with an open flame. Use an approved
18