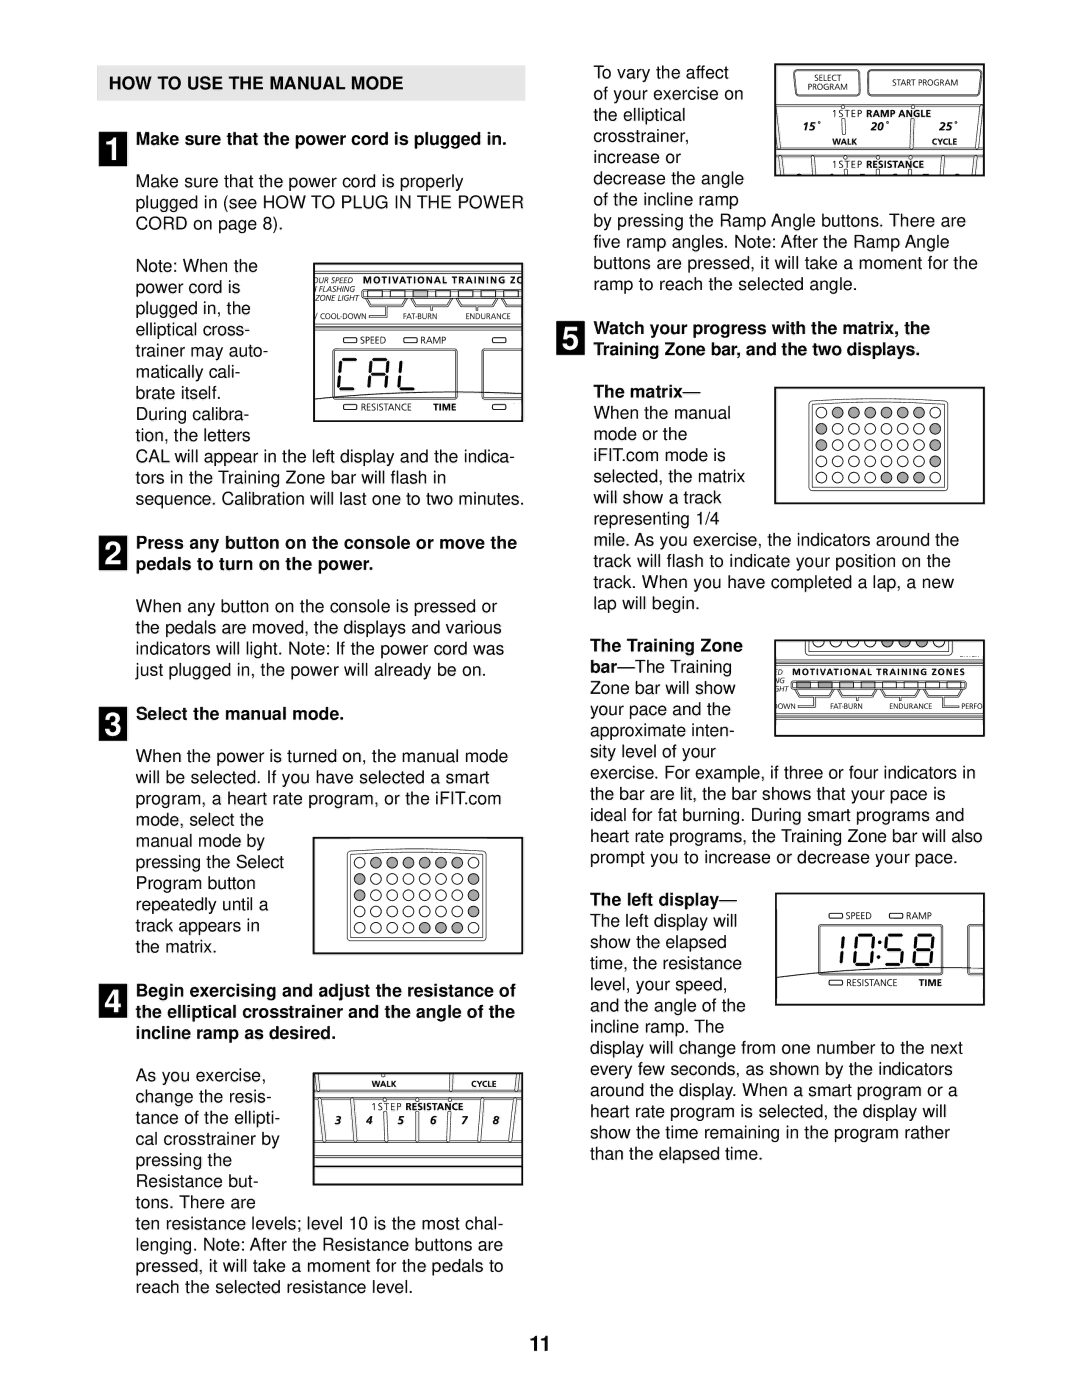
HOW TO USE THE MANUAL MODE
1 Make sure that the power cord is plugged in.
| Make sure that the power cord is properly | ||||||||||||||||||||||||||
| plugged in (see HOW TO PLUG IN THE POWER | ||||||||||||||||||||||||||
| CORD on page 8). | ||||||||||||||||||||||||||
| Note: When the |
|
|
|
|
|
|
|
|
|
|
| |||||||||||||||
|
|
|
|
|
|
|
|
|
|
|
|
|
|
|
|
|
|
|
|
|
|
|
|
|
| ||
| power cord is |
|
|
|
|
|
|
|
|
|
|
|
|
|
|
|
|
|
|
|
|
|
|
| |||
|
|
|
|
| |||||||||||||||||||||||
|
|
|
|
|
|
|
|
|
|
|
|
|
|
|
|
|
|
|
|
|
| ||||||
| plugged in, the |
|
|
|
|
|
|
|
|
|
|
| |||||||||||||||
| elliptical cross- |
|
|
|
|
|
|
|
|
|
|
| |||||||||||||||
| trainer may auto- |
|
|
|
|
|
|
|
|
|
|
|
|
|
|
|
|
|
|
|
|
|
|
|
|
| |
|
|
|
|
|
|
|
|
|
|
|
|
|
|
|
|
|
|
|
|
|
|
|
|
|
| ||
| matically cali- |
|
|
|
|
|
|
|
|
|
|
| |||||||||||||||
| brate itself. |
|
|
|
|
|
|
|
|
|
|
| |||||||||||||||
| During calibra- |
|
|
|
|
|
|
|
|
|
|
|
|
|
|
|
|
|
|
|
|
|
|
|
| ||
|
|
| |||||||||||||||||||||||||
|
|
|
|
|
|
|
|
|
|
|
|
|
|
|
|
|
|
|
|
|
|
|
|
|
| ||
| tion, the letters | ||||||||||||||||||||||||||
| CAL will appear in the left display and the indica- | ||||||||||||||||||||||||||
| tors in the Training Zone bar will flash in | ||||||||||||||||||||||||||
| sequence. Calibration will last one to two minutes. | ||||||||||||||||||||||||||
| Press any button on the console or move the | ||||||||||||||||||||||||||
2 | |||||||||||||||||||||||||||
pedals to turn on the power. | |||||||||||||||||||||||||||
When any button on the console is pressed or the pedals are moved, the displays and various indicators will light. Note: If the power cord was just plugged in, the power will already be on.
3 Select the manual mode.
When the power is turned on, the manual mode will be selected. If you have selected a smart program, a heart rate program, or the iFIT.com mode, select the
manual mode by pressing the Select Program button repeatedly until a
track appears in the matrix.
Begin exercising and adjust the resistance of
4the elliptical crosstrainer and the angle of the incline ramp as desired.
As you exercise, change the resis-
tance of the ellipti- cal crosstrainer by
pressing the Resistance but- tons. There are
ten resistance levels; level 10 is the most chal- lenging. Note: After the Resistance buttons are pressed, it will take a moment for the pedals to reach the selected resistance level.
To vary the affect of your exercise on
the elliptical crosstrainer,
increase or
decrease the angle of the incline ramp
by pressing the Ramp Angle buttons. There are five ramp angles. Note: After the Ramp Angle buttons are pressed, it will take a moment for the ramp to reach the selected angle.
5 | Watch your progress with the matrix, the | |
Training Zone bar, and the two displays. | ||
| The matrix | — |
| When the manual | |
| mode or the |
|
| iFIT.com mode is |
|
| selected, the matrix | |
| will show a track | |
| representing 1/4 | |
| mile. As you exercise, the indicators around the | |
| track will flash to indicate your position on the | |
| track. When you have completed a lap, a new | |
| lap will begin. |
|
| The Training Zone |
|
| bar | |
| Zone bar will show | |
| your pace and the | |
| approximate inten- | |
| sity level of your | |
| exercise. For example, if three or four indicators in | |
| the bar are lit, the bar shows that your pace is | |
| ideal for fat burning. During smart programs and | |
| heart rate programs, the Training Zone bar will also | |
| prompt you to increase or decrease your pace. | |
| The left display | — |
| The left display will | |
| show the elapsed | |
| time, the resistance | |
| level, your speed, | |
| and the angle of the | |
| incline ramp. The | |
| display will change from one number to the next | |
| every few seconds, as shown by the indicators | |
| around the display. When a smart program or a | |
| heart rate program is selected, the display will | |
| show the time remaining in the program rather | |
| than the elapsed time. | |
11
