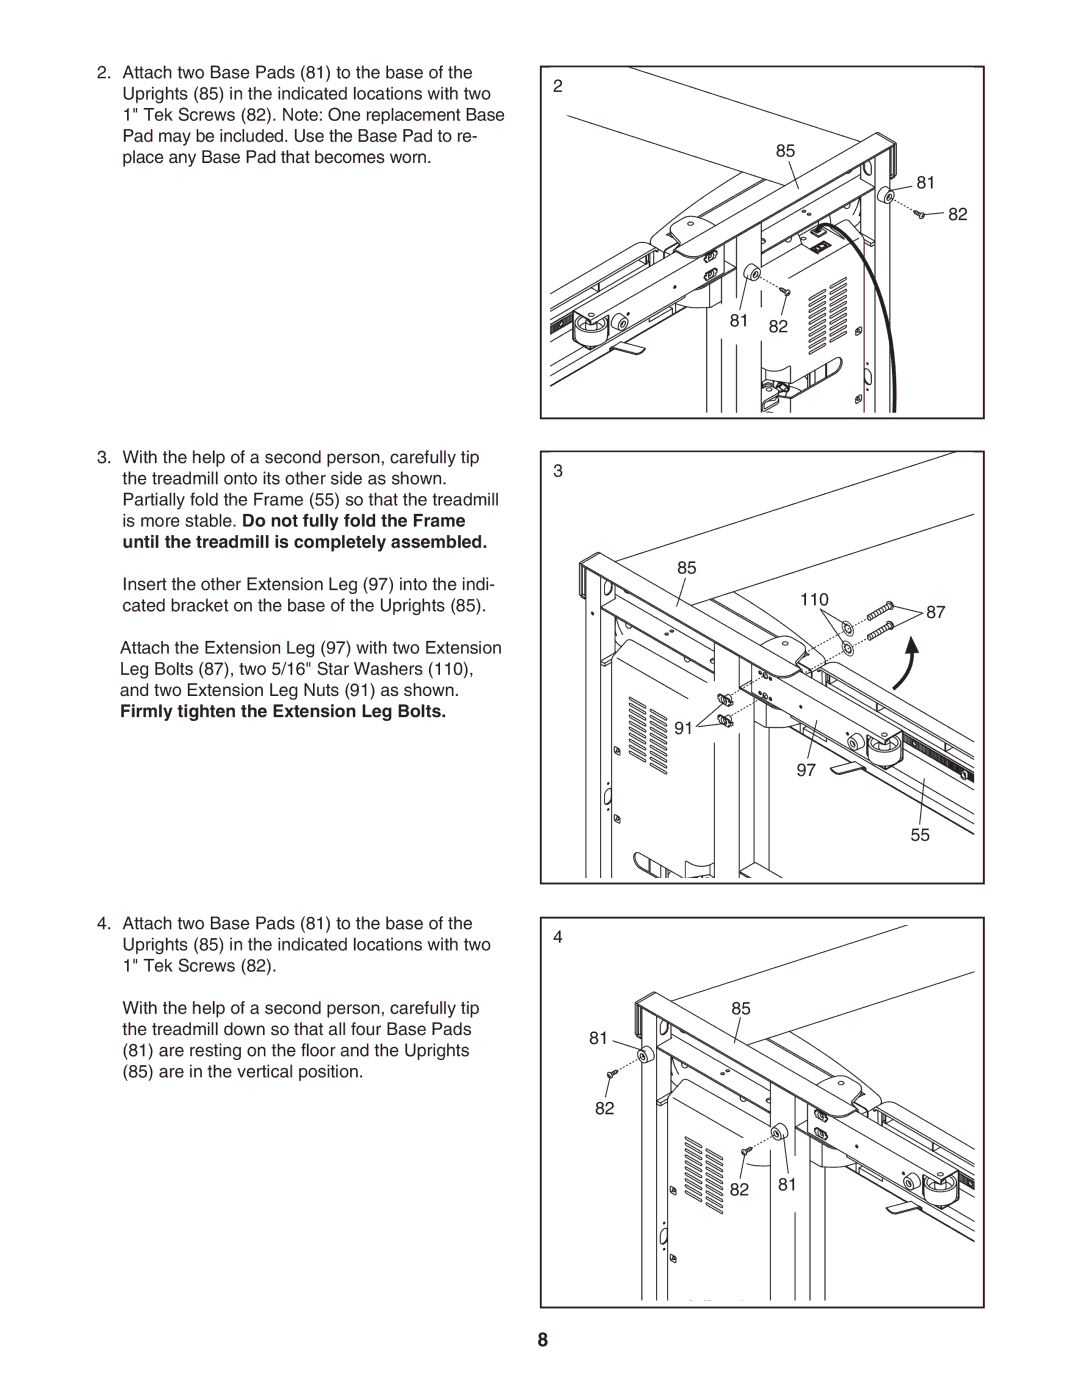
2. Attach two Base Pads (81) to the base of the | 2 |
|
Uprights (85) in the indicated locations with two |
| |
|
| |
1" Tek Screws (82). Note: One replacement Base |
|
|
Pad may be included. Use the Base Pad to re- |
| 85 |
place any Base Pad that becomes worn. |
| |
|
| |
|
| 81 |
|
| 82 |
| 81 | 82 |
|
| |
3. With the help of a second person, carefully tip | 3 |
|
the treadmill onto its other side as shown. |
| |
|
| |
Partially fold the Frame (55) so that the treadmill |
|
|
is more stable. Do not fully fold the Frame |
|
|
until the treadmill is completely assembled. |
|
|
Insert the other Extension Leg (97) into the indi- | 85 |
|
| 110 | |
cated bracket on the base of the Uprights (85). |
| |
| 87 | |
|
| |
Attach the Extension Leg (97) with two Extension |
|
|
Leg Bolts (87), two 5/16" Star Washers (110), |
|
|
and two Extension Leg Nuts (91) as shown. |
|
|
Firmly tighten the Extension Leg Bolts. | 91 |
|
|
| |
|
| 97 |
|
| 55 |
4. Attach two Base Pads (81) to the base of the | 4 |
|
Uprights (85) in the indicated locations with two |
| |
|
| |
1" Tek Screws (82). |
|
|
With the help of a second person, carefully tip | 85 |
|
the treadmill down so that all four Base Pads | 81 |
|
(81) are resting on the floor and the Uprights |
| |
|
| |
(85) are in the vertical position. |
|
|
| 82 |
|
| 82 | 81 |
|
| |
| 8 |
|