ASSEMBLY
Assembly requires two persons. Set the treadmill in a cleared area and remove all packing materials. Do not dispose of the packing materials until assembly is completed.
Note: The underside of the treadmill walking belt is coated with
Assembly requires the included allen wrench ![]() and your own Phillips screwdriver
and your own Phillips screwdriver ![]()
![]() . For help identifying the assembly hardware, see the hardware drawings below.
. For help identifying the assembly hardware, see the hardware drawings below.
|
|
| Handrail Bolt | 3/4” Tek Screw | Panel Screw | |
Console Bolt | ||||||
|
|
|
| |||
![]()
![]()
![]()
![]()
![]()
![]() Handrail
Handrail![]() Bracket
Bracket ![]() (31)–4
(31)–4![]()
![]()
![]()
![]()
![]()
![]()
![]()
![]()
![]()
![]()
![]()
![]()
![]()
![]()
![]()
![]()
![]()
![]()
![]()
![]()
![]()
![]() Upright
Upright![]() Bolt
Bolt ![]()
![]()
![]()
![]()
![]()
![]()
![]()
![]()
![]()
![]()
![]()
![]()
![]()
![]()
![]()
![]()
Washer | Star Washer |
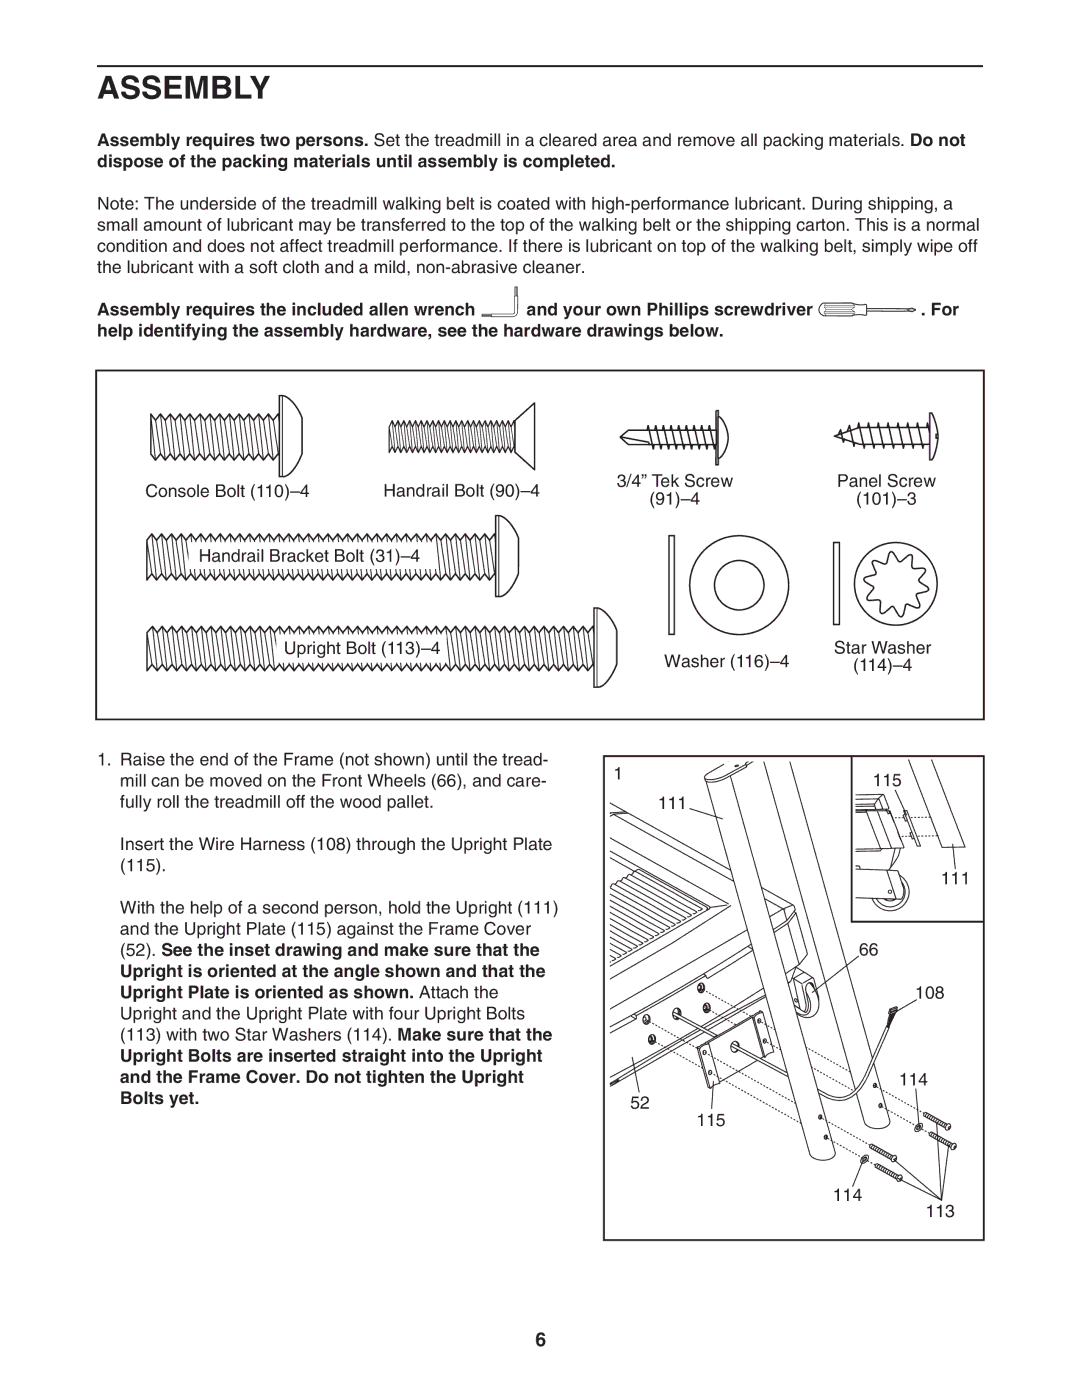
1.Raise the end of the Frame (not shown) until the tread- mill can be moved on the Front Wheels (66), and care- fully roll the treadmill off the wood pallet.
Insert the Wire Harness (108) through the Upright Plate
With the help of a second person, hold the Upright (111) and the Upright Plate (115) against the Frame Cover
(52).See the inset drawing and make sure that the Upright is oriented at the angle shown and that the Upright Plate is oriented as shown. Attach the Upright and the Upright Plate with four Upright Bolts
(113)with two Star Washers (114). Make sure that the
Upright Bolts are inserted straight into the Upright and the Frame Cover. Do not tighten the Upright Bolts yet.
1 | 115 |
| |
| 111 |
| 111 |
| 66 |
| 108 |
| 114 |
| 52 |
| 115 |
| 114 |
| 113 |
6