ASSEMBLY
Assembly requires two people. Set the treadmill in a cleared area and remove all packing materials. Do not dispose of the packing materials until assembly is completed. Assembly requires the included allen wrench
and your own ![]()
![]() , wire cutters
, wire cutters ![]() , and adjustable
, and adjustable
wrench ![]()
![]() .
.
Note: The underside of the treadmill walking belt is coated with
For help identifying the assembly hardware, see the PART IDENTIFICATION CHART on page 35.
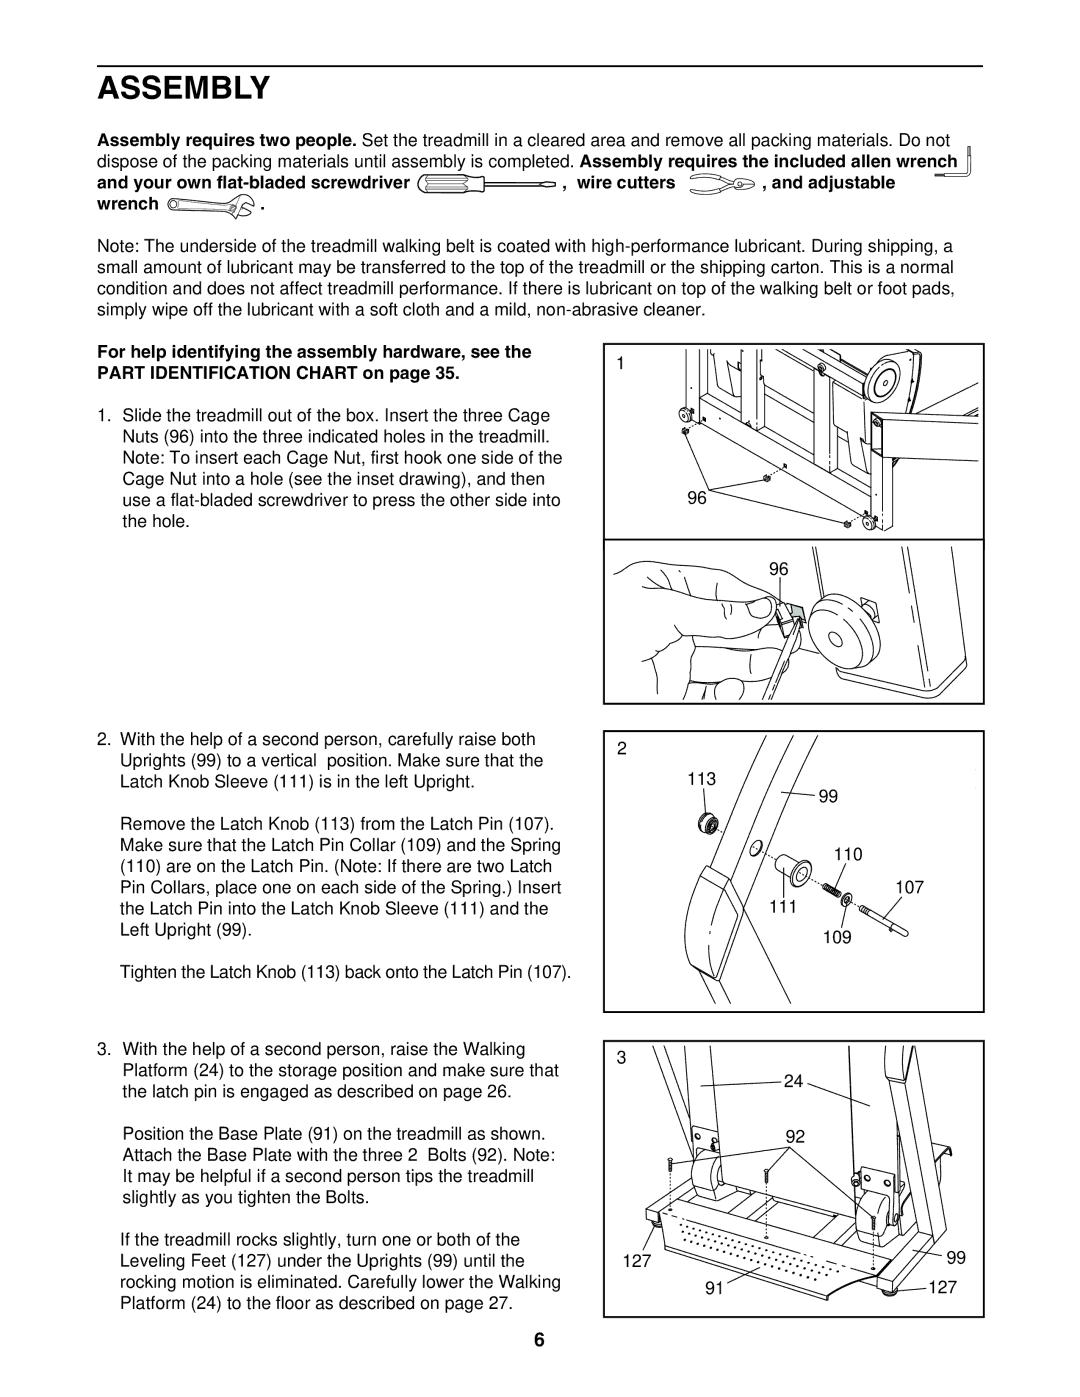
1.Slide the treadmill out of the box. Insert the three Cage Nuts (96) into the three indicated holes in the treadmill. Note: To insert each Cage Nut, first hook one side of the Cage Nut into a hole (see the inset drawing), and then use a
2.With the help of a second person, carefully raise both Uprights (99) to a vertical position. Make sure that the Latch Knob Sleeve (111) is in the left Upright.
Remove the Latch Knob (113) from the Latch Pin (107). Make sure that the Latch Pin Collar (109) and the Spring
(110)are on the Latch Pin. (Note: If there are two Latch Pin Collars, place one on each side of the Spring.) Insert the Latch Pin into the Latch Knob Sleeve (111) and the Left Upright (99).
Tighten the Latch Knob (113) back onto the Latch Pin (107).
3.With the help of a second person, raise the Walking Platform (24) to the storage position and make sure that the latch pin is engaged as described on page 26.
Position the Base Plate (91) on the treadmill as shown. Attach the Base Plate with the three 2” Bolts (92). Note: It may be helpful if a second person tips the treadmill slightly as you tighten the Bolts.
If the treadmill rocks slightly, turn one or both of the Leveling Feet (127) under the Uprights (99) until the rocking motion is eliminated. Carefully lower the Walking Platform (24) to the floor as described on page 27.
1 |
|
96 |
|
| 96 |
2 |
|
113 | 99 |
| |
| 110 |
| 107 |
| 111 |
| 109 |
3 |
|
| 24 |
| 92 |
127 | 99 |
91 | 127 |
6