Upgrade Instructions for the BayStack
2.Gently disengage the DCM connector from the NMM connector and lift the DCM off of the NMM.
Set the DCM aside. Be sure to keep the screws with the DCM so that you can use them again later.
Removing and Replacing the PROM
Caution: The NMM baseboard contains devices that are sensitive to electrostatic discharge (ESD). Be sure to discharge any accumulated static electricity and to follow ESD handling procedures (such as wearing a wrist strap) when you handle boards and EPROMs.
To replace the PROM on the NMM baseboard, follow these steps:
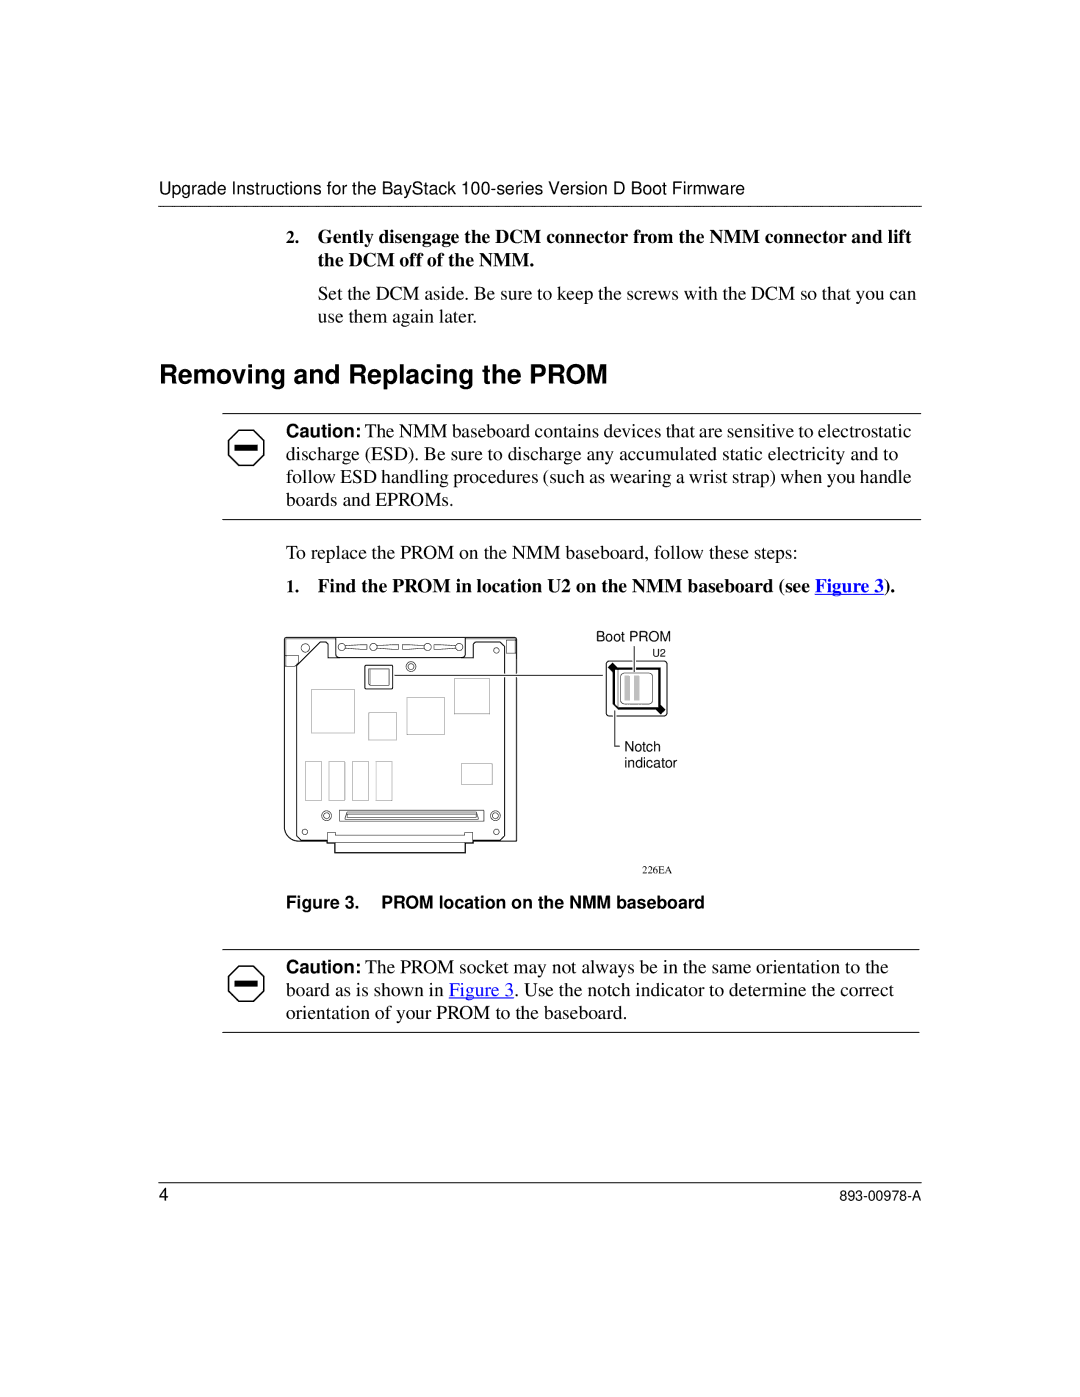
1.Find the PROM in location U2 on the NMM baseboard (see Figure 3).
Boot PROM
U2
![]() Notch indicator
Notch indicator
226EA
Figure 3. PROM location on the NMM baseboard
Caution: The PROM socket may not always be in the same orientation to the board as is shown in Figure 3. Use the notch indicator to determine the correct orientation of your PROM to the baseboard.
4 |