Quick Setup Guide
1.Make sure all items listed on the front of this guide are included in the box.
2.READ SAFETY INSTRUCTION BOOKLET BEFORE USING THE PRODUCT
3.Study this setup diagram.
4.Place the mixer in an appropriate position for operation.
5.Make sure all devices are turned off and all faders are at zero.
6.Connect all input sources as indicated in the diagram.
7.Connect the outputs to the power amplifier(s), monitors and/or projectors.
8.Plug your mixer and other devices into AC power.
9.Switch everything on in the following order:
•Audio input sources (i.e. CD players) and video input sources (i.e. DVD players, cameras, etc.)
•Your mixer
•Last, any amplifiers, televisions, monitors, projectors, etc.
10.When turning off, always reverse this operation by powering down in the following order:
•Any amplifiers, televisions, monitors, projectors, etc.
•Your mixer.
•Last, audio/video input sources.
11.Go to www.numark.com for product registration.
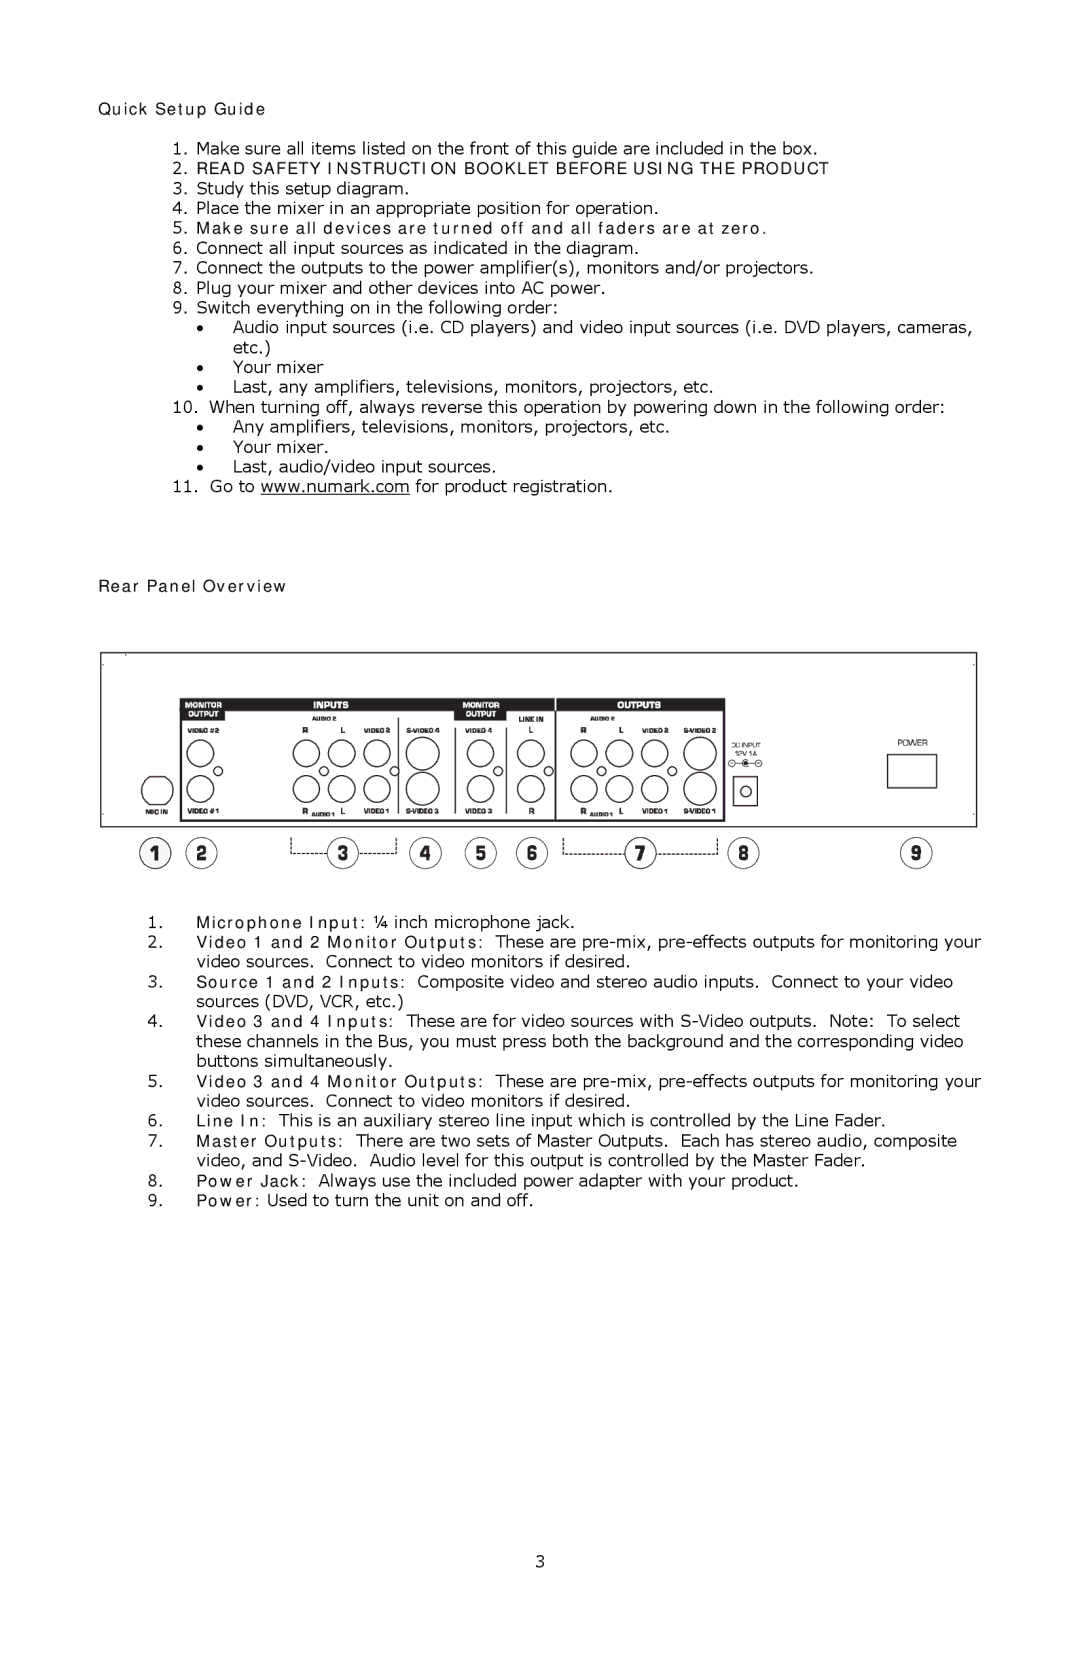
Rear Panel Overview
1.Microphone Input: ¼ inch microphone jack.
2.Video 1 and 2 Monitor Outputs: These are
3.Source 1 and 2 Inputs: Composite video and stereo audio inputs. Connect to your video sources (DVD, VCR, etc.)
4.Video 3 and 4 Inputs: These are for video sources with
5.Video 3 and 4 Monitor Outputs: These are
6.Line In: This is an auxiliary stereo line input which is controlled by the Line Fader.
7.Master Outputs: There are two sets of Master Outputs. Each has stereo audio, composite video, and
8.Power Jack: Always use the included power adapter with your product.
9.Power: Used to turn the unit on and off.
3