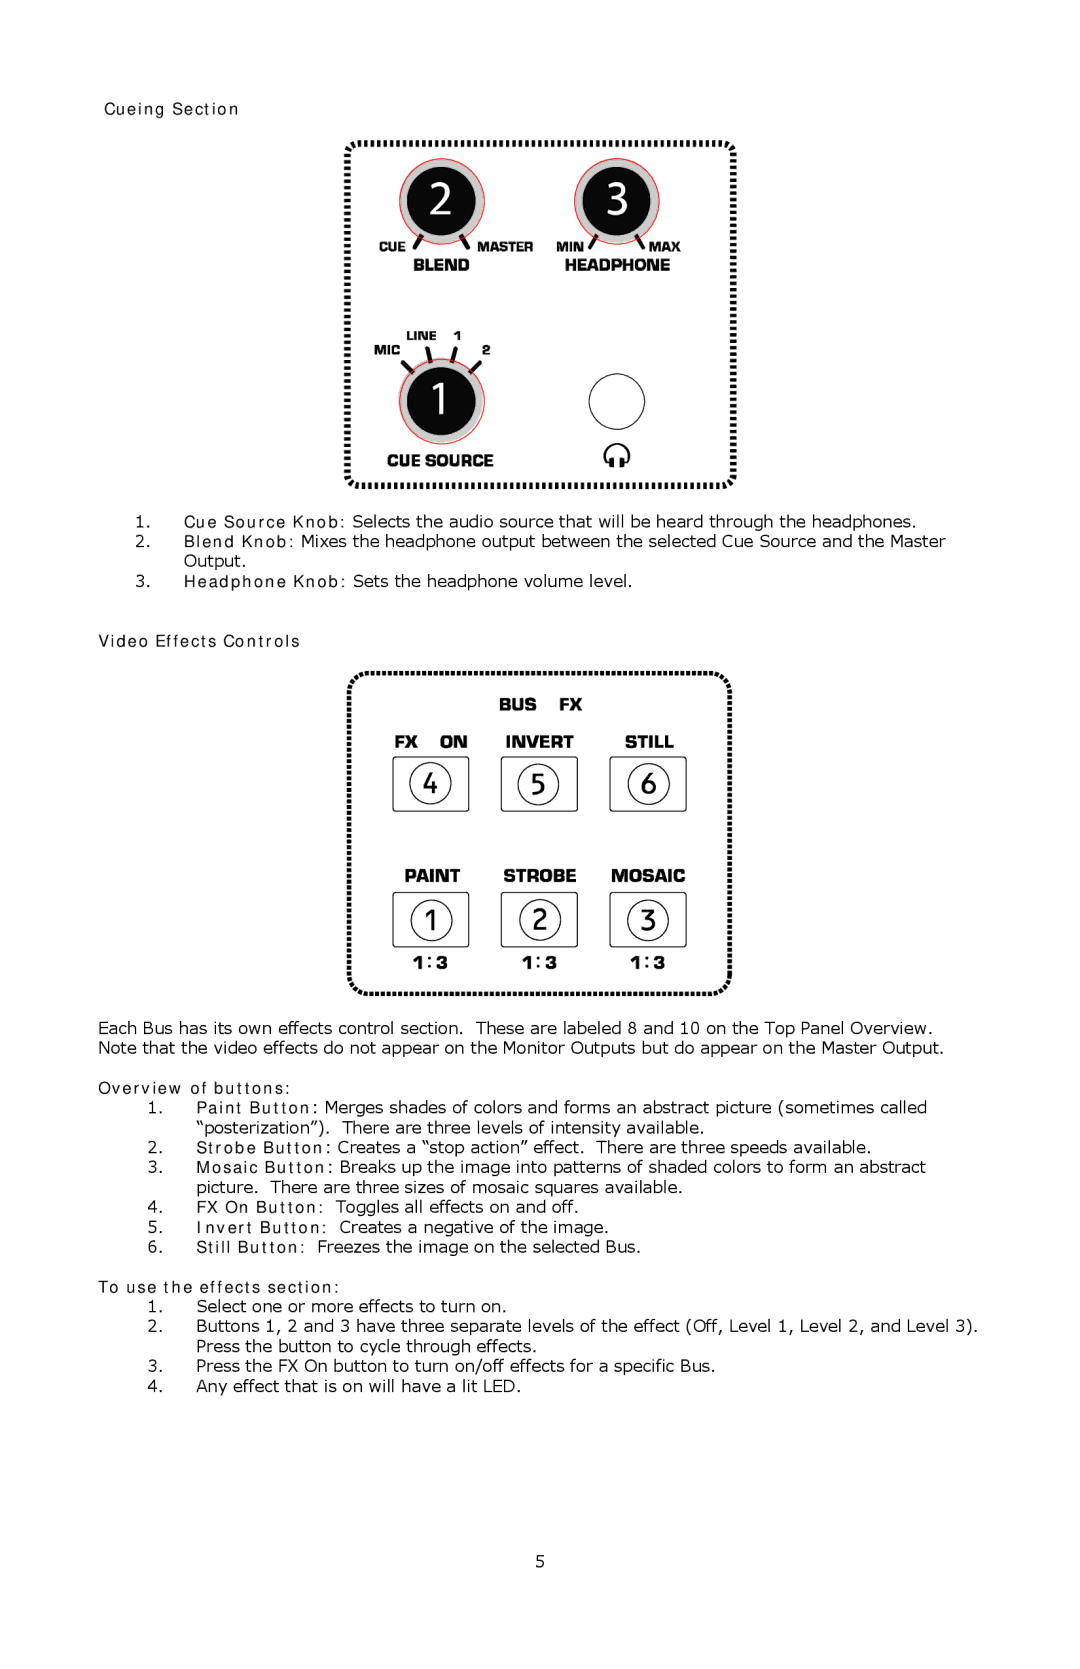
Cueing Section
1.Cue Source Knob: Selects the audio source that will be heard through the headphones.
2.Blend Knob: Mixes the headphone output between the selected Cue Source and the Master Output.
3.Headphone Knob: Sets the headphone volume level.
Video Effects Controls
Each Bus has its own effects control section. These are labeled 8 and 10 on the Top Panel Overview. Note that the video effects do not appear on the Monitor Outputs but do appear on the Master Output.
Overview of buttons:
1.Paint Button: Merges shades of colors and forms an abstract picture (sometimes called “posterization”). There are three levels of intensity available.
2.Strobe Button: Creates a “stop action” effect. There are three speeds available.
3.Mosaic Button: Breaks up the image into patterns of shaded colors to form an abstract picture. There are three sizes of mosaic squares available.
4.FX On Button: Toggles all effects on and off.
5.Invert Button: Creates a negative of the image.
6.Still Button: Freezes the image on the selected Bus.
To use the effects section:
1.Select one or more effects to turn on.
2.Buttons 1, 2 and 3 have three separate levels of the effect (Off, Level 1, Level 2, and Level 3). Press the button to cycle through effects.
3.Press the FX On button to turn on/off effects for a specific Bus.
4.Any effect that is on will have a lit LED.
5
